Grasshopper Archicad Extruded surface 01


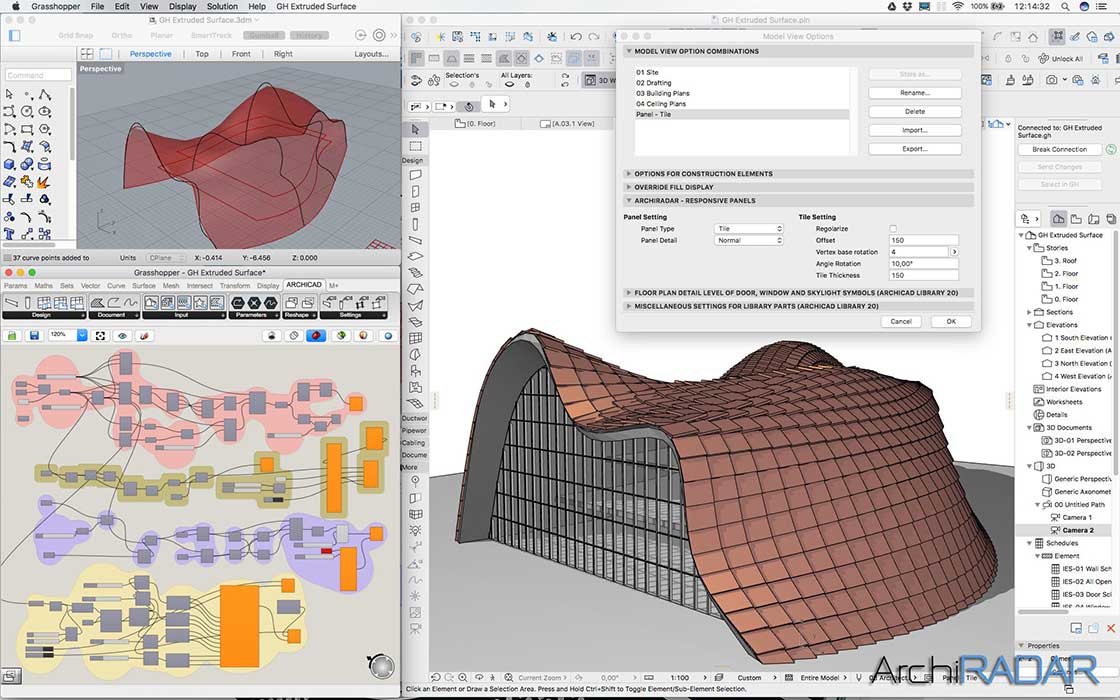
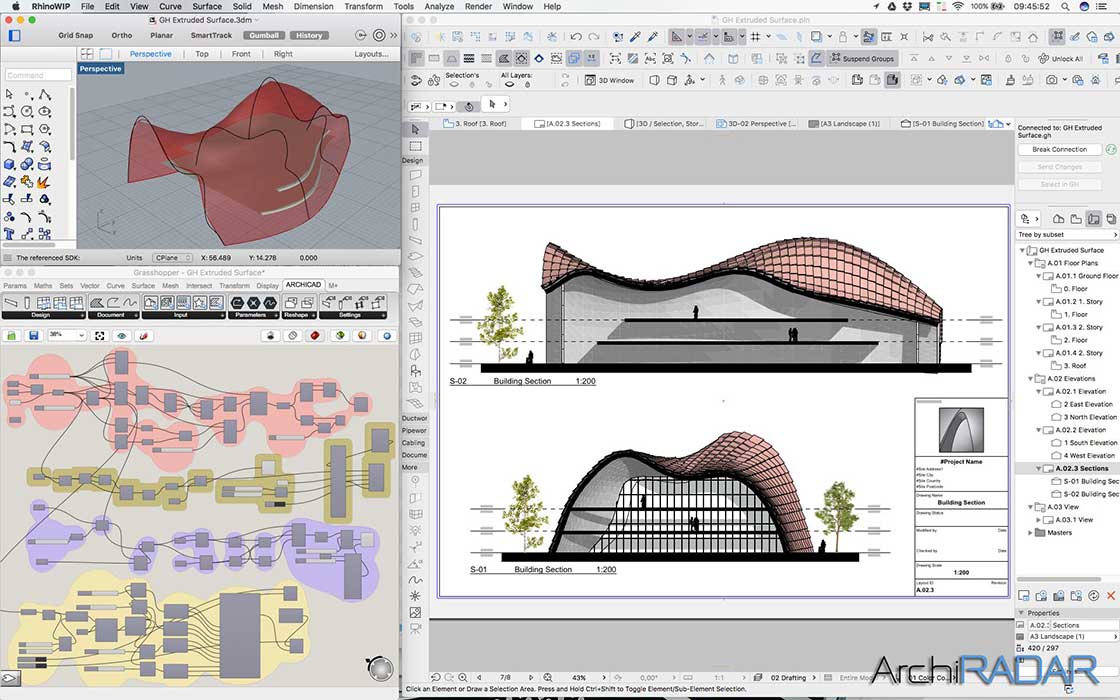
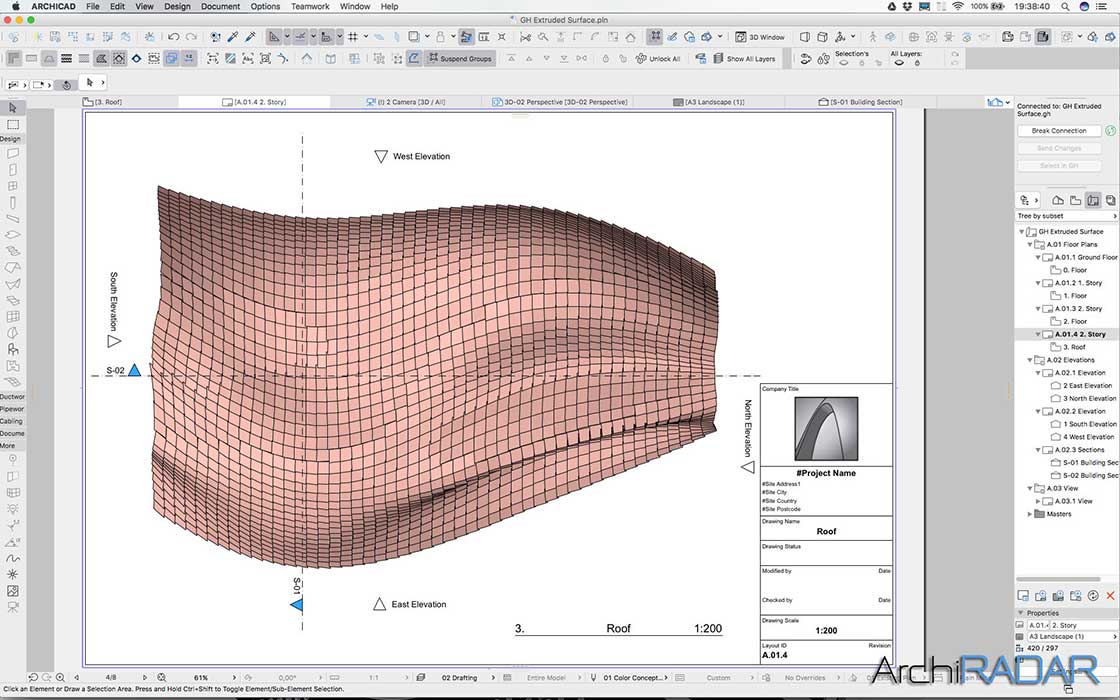
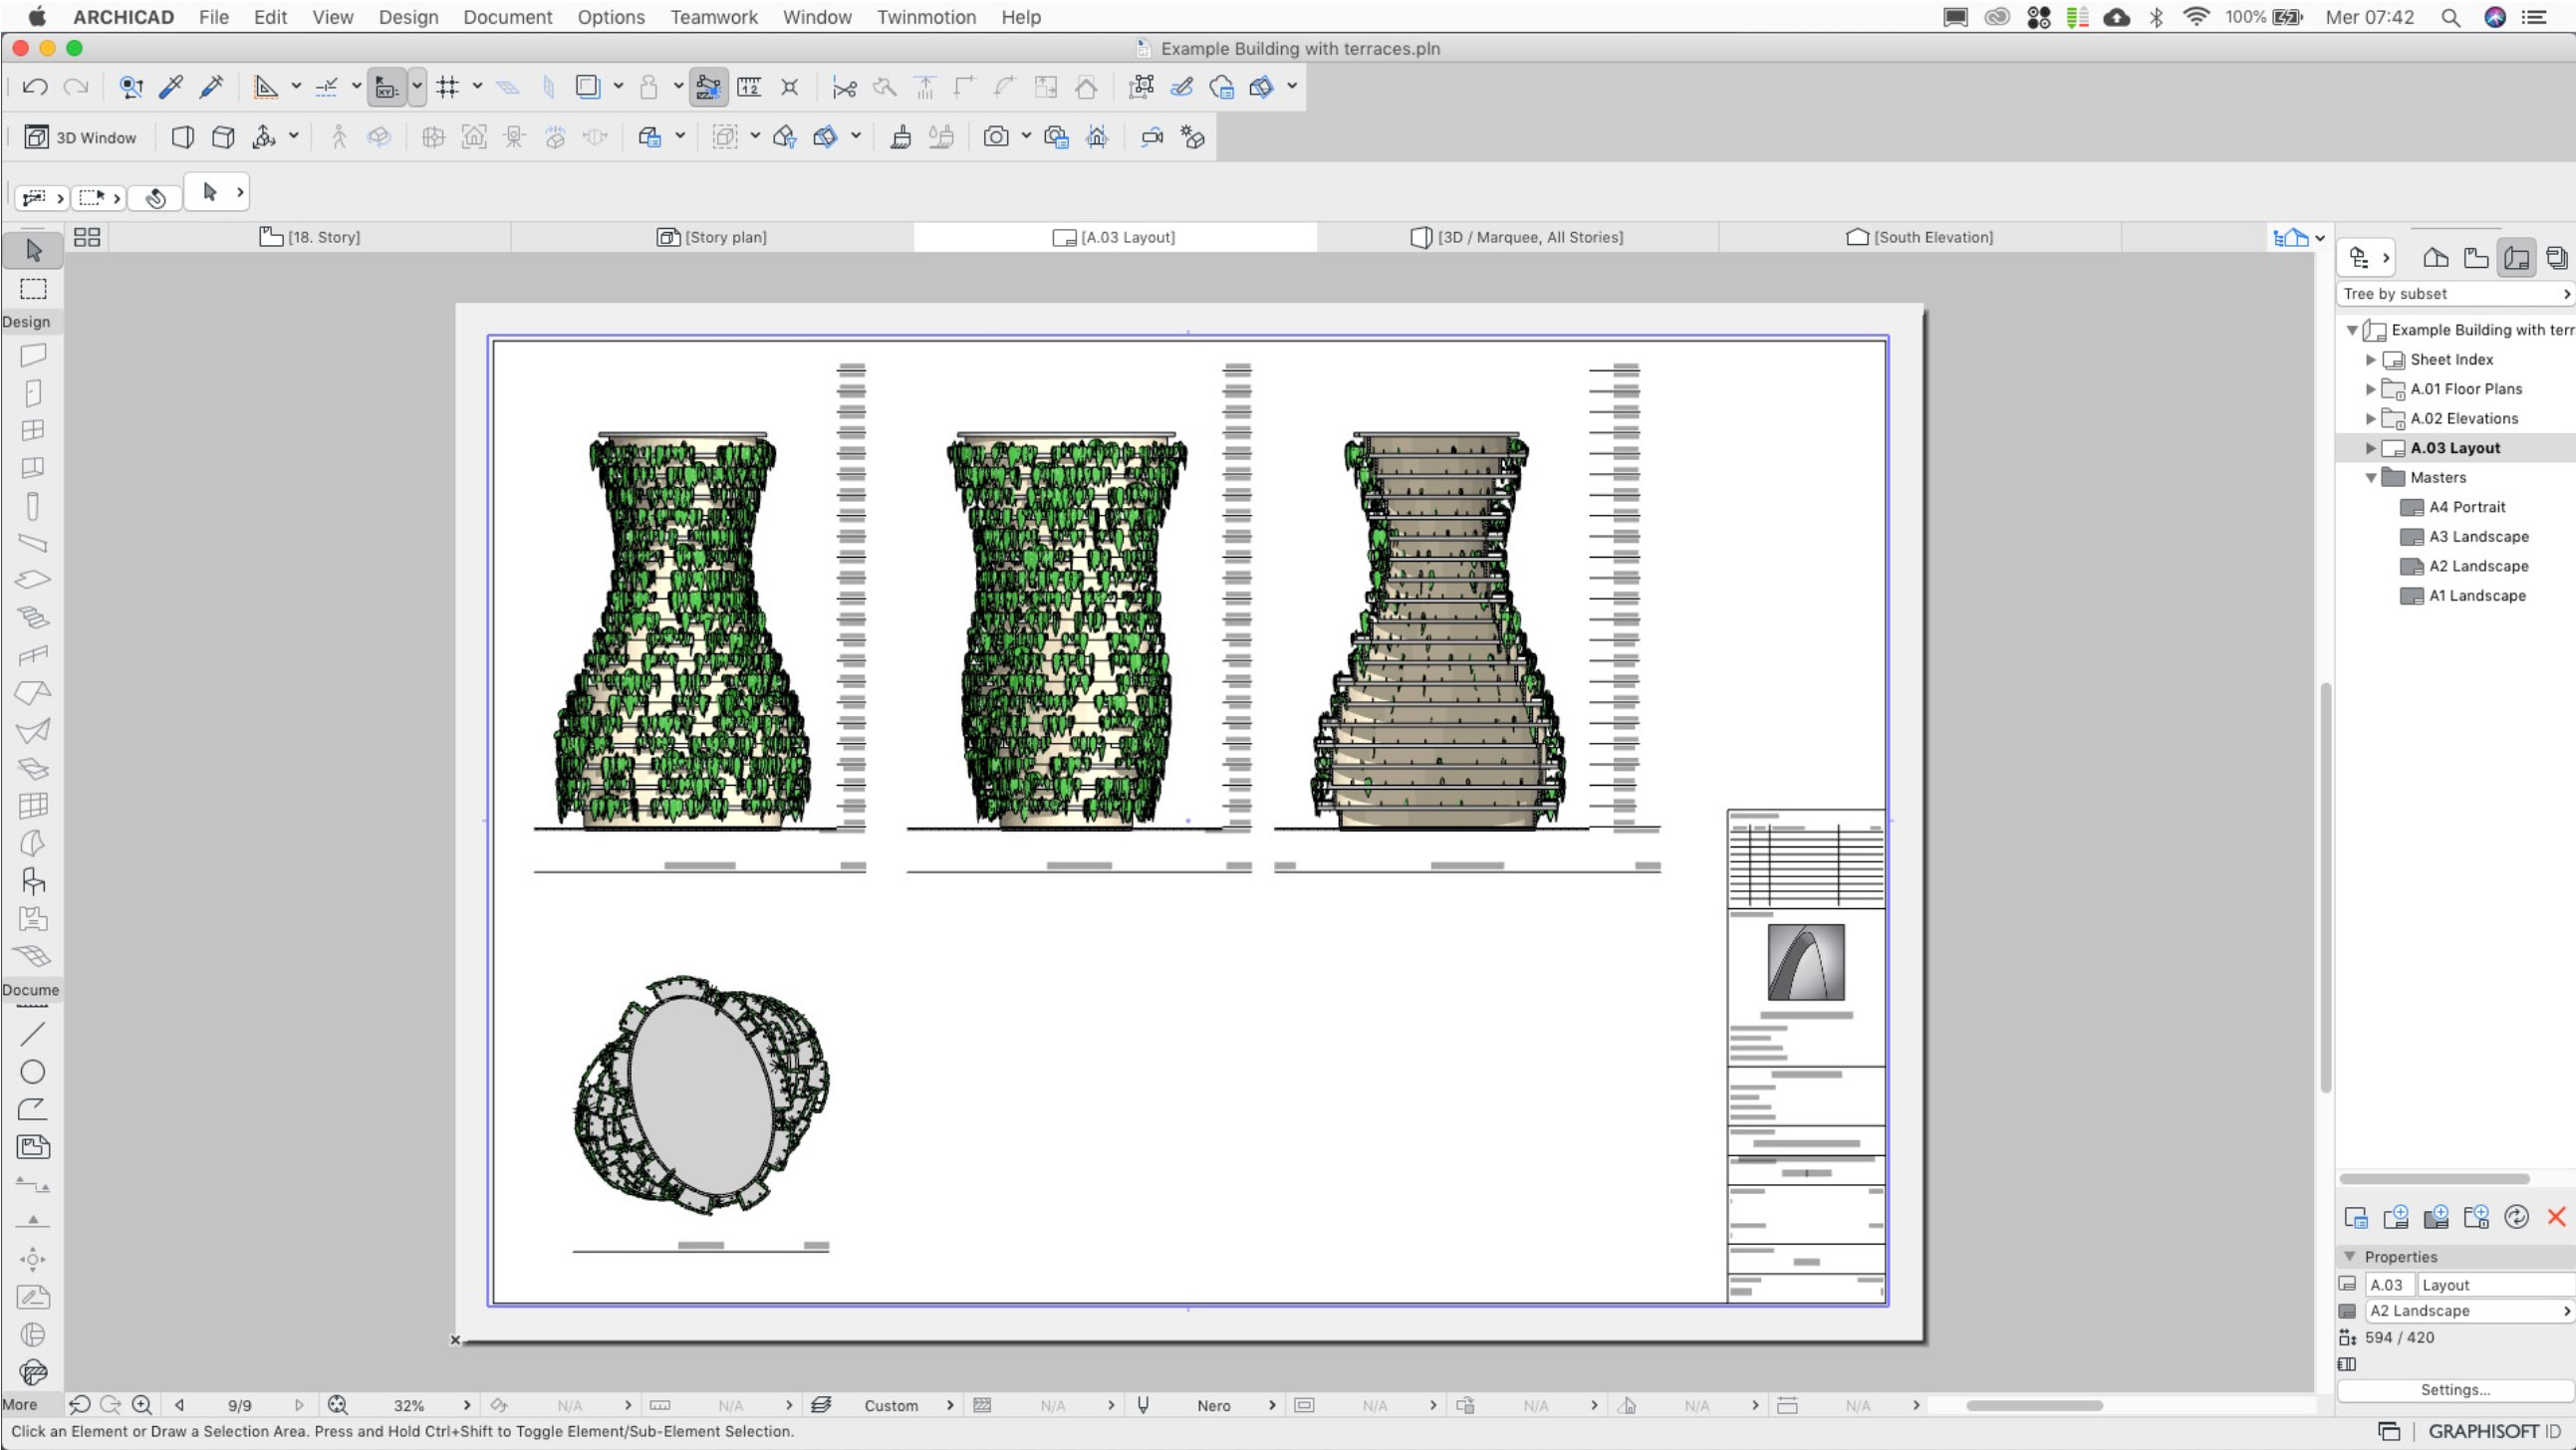
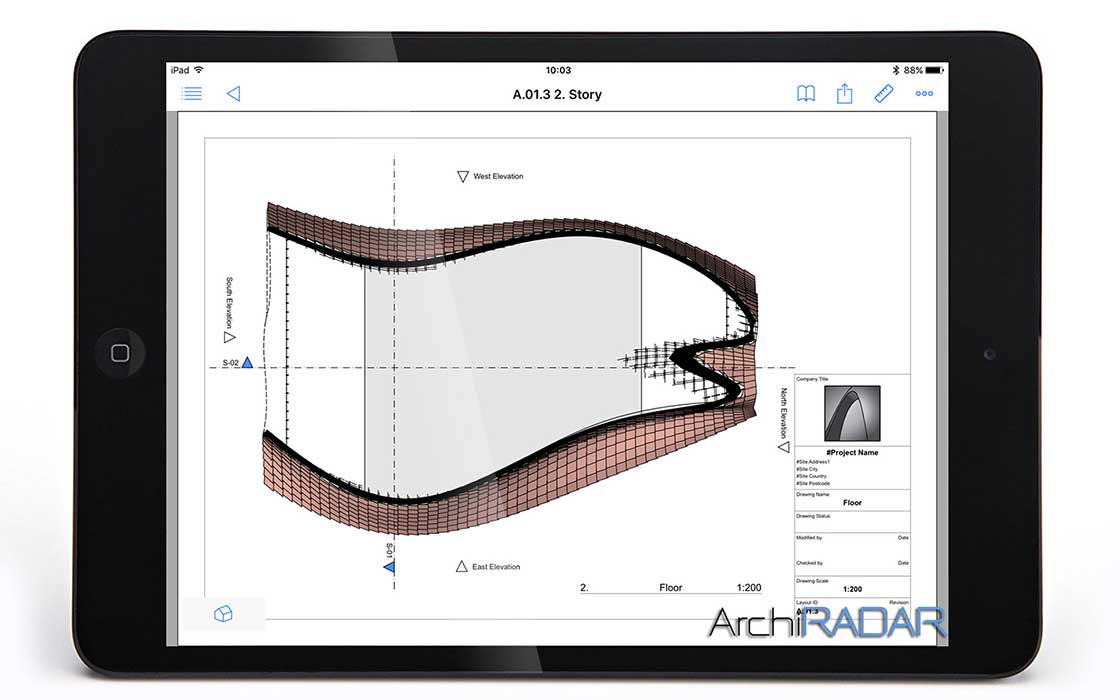
In this experimental model we tested the potentiality of the Grasshopper Archicad Connection to generate a free form with tiles applied. The test also evaluate the possibility to generate extruded free shapes, and the use of Model View Option to control the shape of tile objects. All the drawings in layouts update themselves according to the modifications in Rhino and Grasshopper.


RHINO GEOMETRY
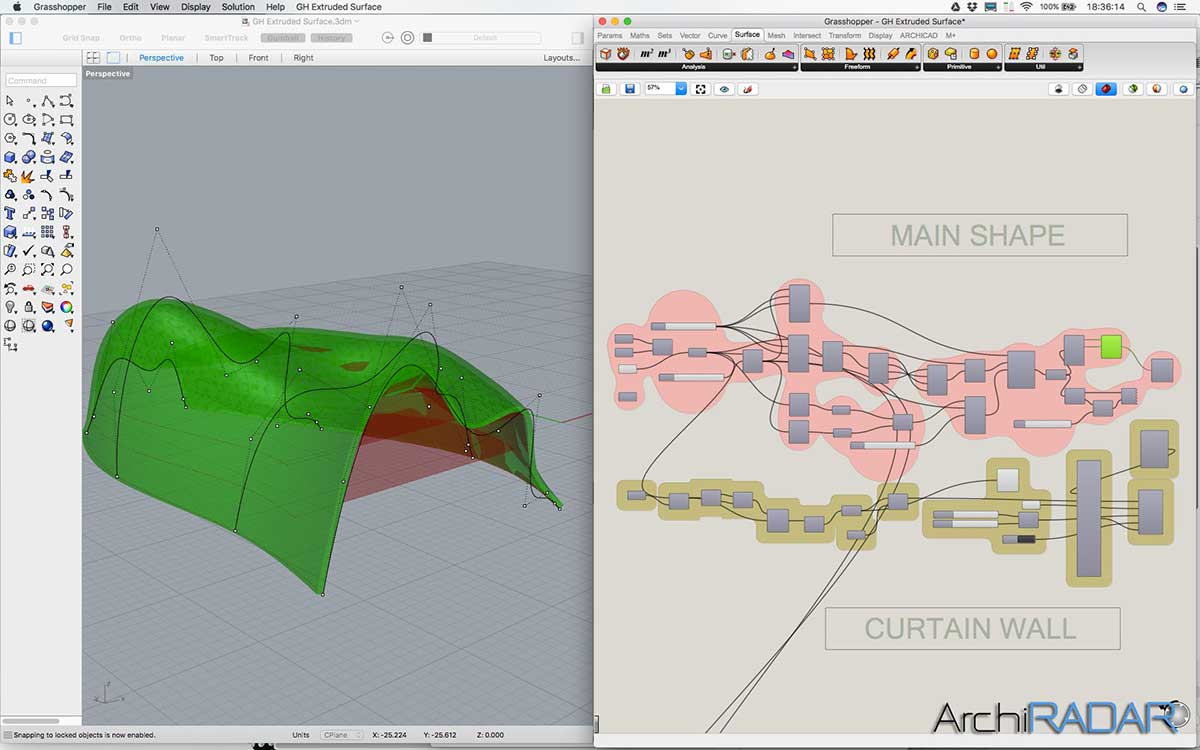
The shape is generated in Grasshopper using four free curves designed in Rhinoceros using the loft component.


THE MAIN SHELL
The generated surface in GH is used to create the mail shell creating an offset surface and connecting the two geometry. The new shape with thickness has been converted in Archicad Morph; using Morph we have the advantage to have a correct visualisation in 2d view.


Grasshopper Archicad Extruded surface 02


Grasshopper Archicad Extruded surface 03


THE TILES
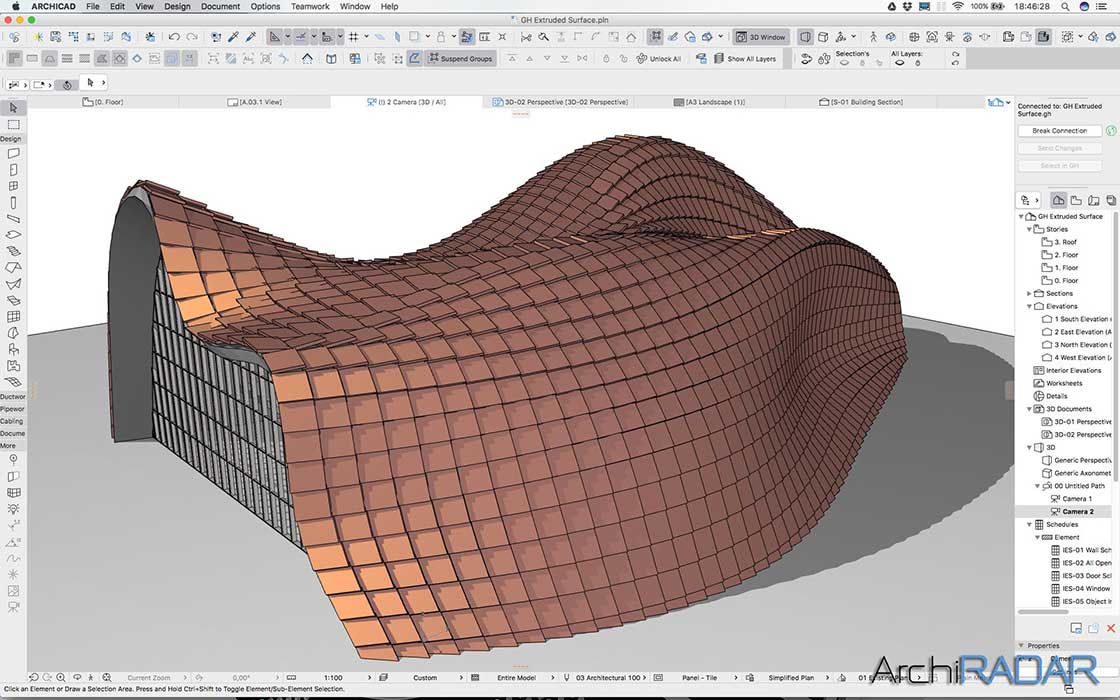
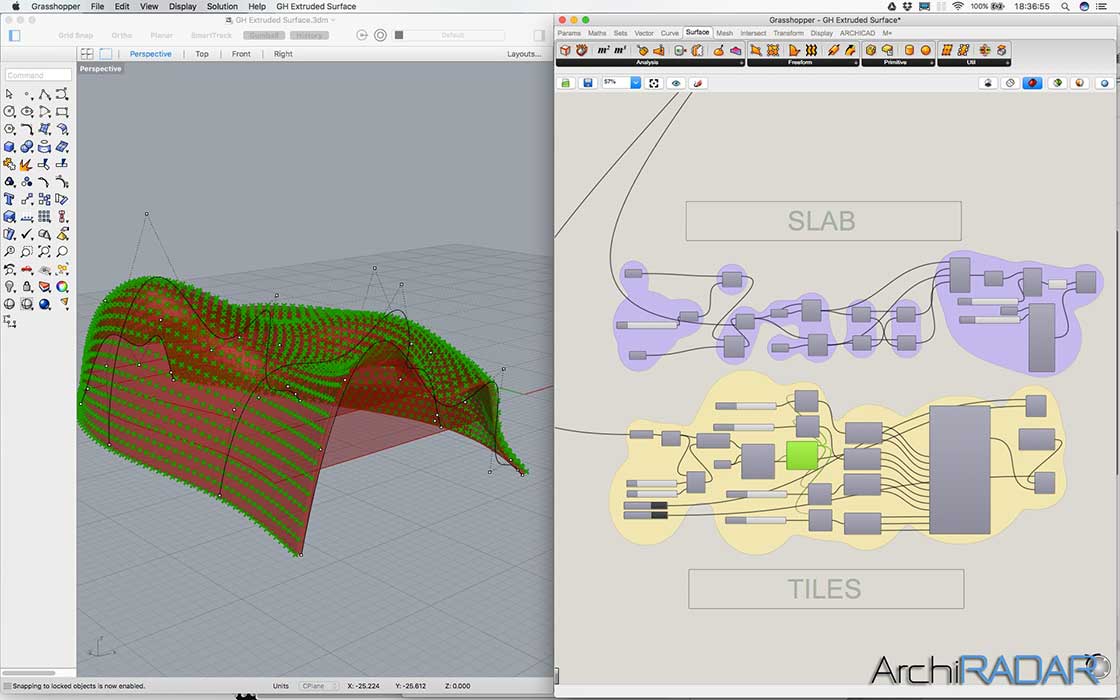
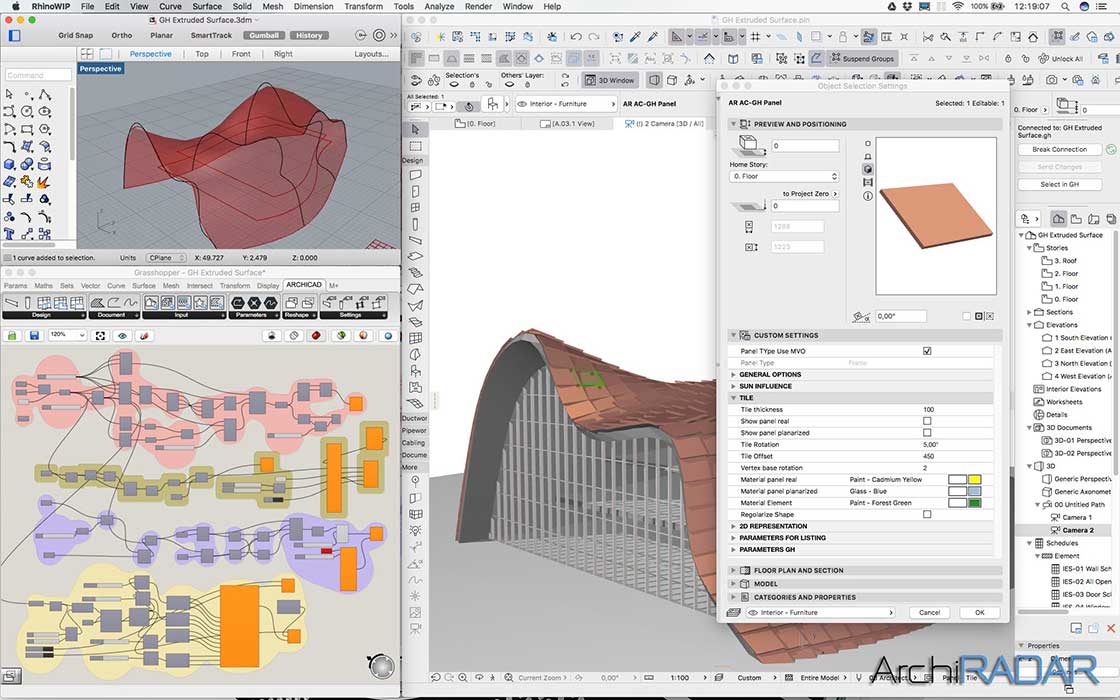
To create the tiles the main shape is converted in mesh; each single quadrangular face of the mesh has been used to create single Archicad Objects. Using object we have the possibility to manage a real projection in floor plan.
We have also the possibility to manage different visualisation of the tile object according to the view; automatic different visualisation is managed using a personal menu in Model View Option intentionally created for the tiles; for example in floor plan the tile is a simple plan without thickness; it means a faster elaboration of the 2d view. In MVO you can change the parameters of all the tile objects without open all single object; for example you can change the slope direction, the angle, the thickness, the overlapping.
The tiles objects have a particular option: the tile detect automatically the direction of the slope of the shape inverting the overlapping.
Without came back in Grasshopper we can add further details in the tiles modifying the GDL code in Archicad.


Grasshopper Archicad Extruded surface 04


THE CURTAIN WALL
The Curtain wall is also generated from the shape and it updates according to the geometry of the main curve in Rhinoceros.


Grasshopper Archicad Extruded surface 05


THE SLABS
The slabs are generated from intersect the main geometry with horizontal plans.


Grasshopper Archicad Extruded surface 06


Grasshopper Archicad Extruded surface 07


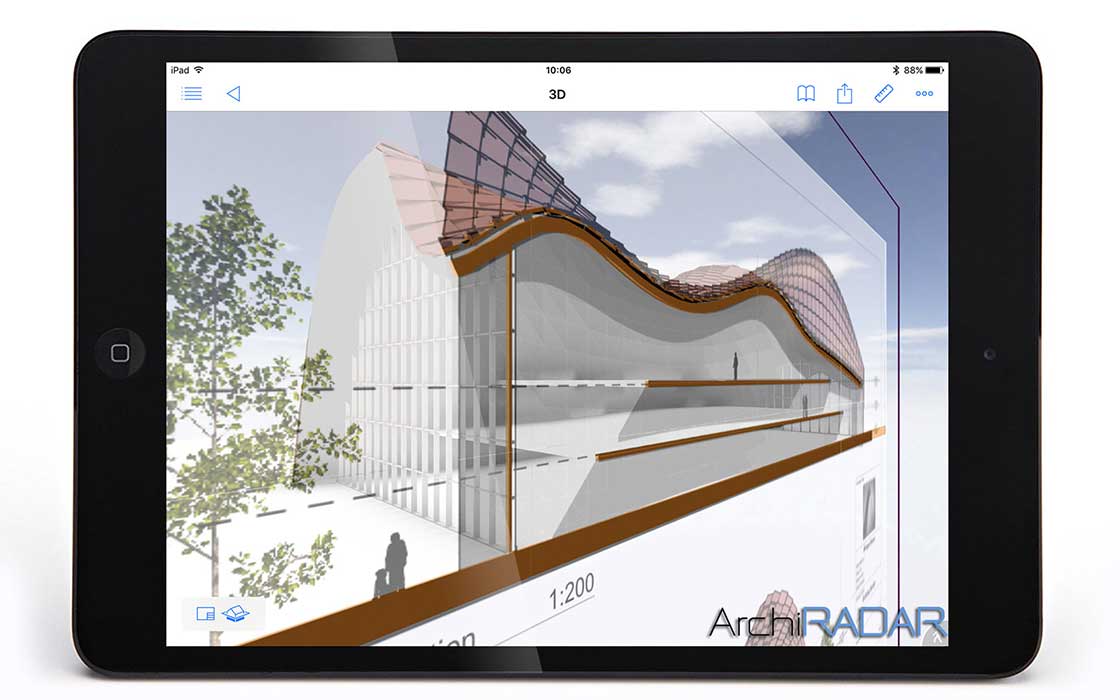
THE BIMX MODEL
From the model in Archicad we generated the BIM model you can download at this link:

http://www.archiradar.it/images/BIMX/GH-Extruded-Surface.bimx


Grasshopper Archicad Extruded surface 08


Grasshopper Archicad Extruded surface 09


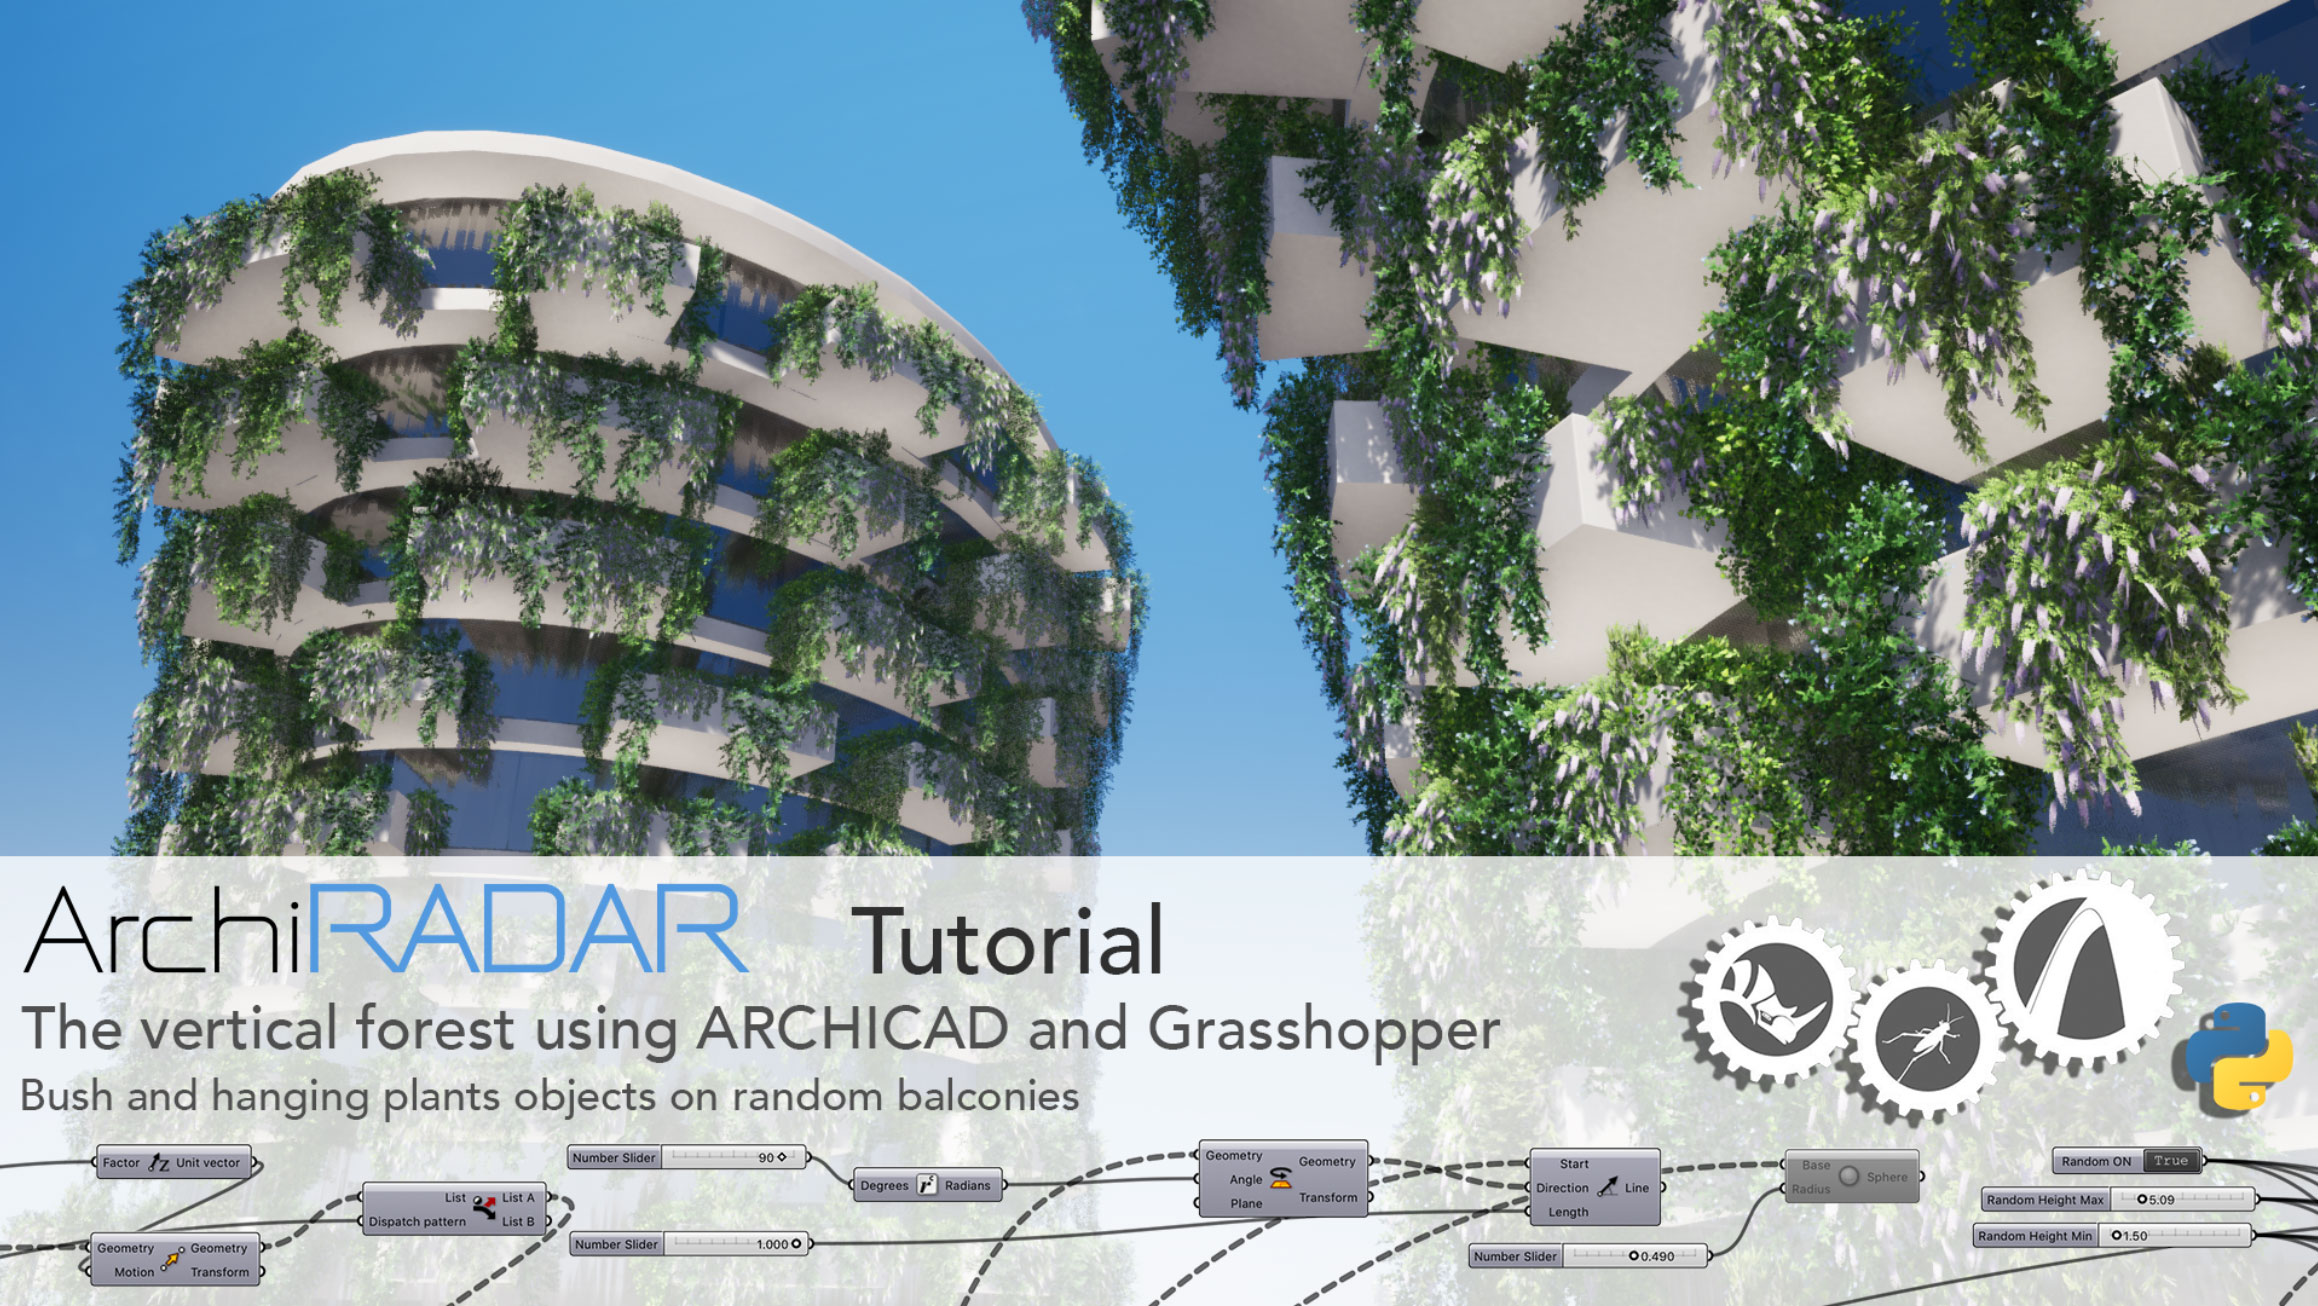
01 Vertical Forest archicad grasshopper


This tutorial is made using ARCHICAD 23, Rhinoceros 6 and ARCHICAD-Grasshopper Connection 3007. Use the GH-AC Connection manual for further information. The tutorial uses a definition in Grasshopper to define a skyscraper with random balconies and random plants.


• Open the files

Open ARCHICAD file, open Rhinoceros file, open Grasshopper file. Turn on Connection in ARCHICAD. In ARCHICAD is important to define enough stories with the same height set in the GH definition (4,20 m default); you will have the attribution of each ARCHICAD element to the right story. Add to your AC library the ArchiRADAR Plants for hangings and bushes.
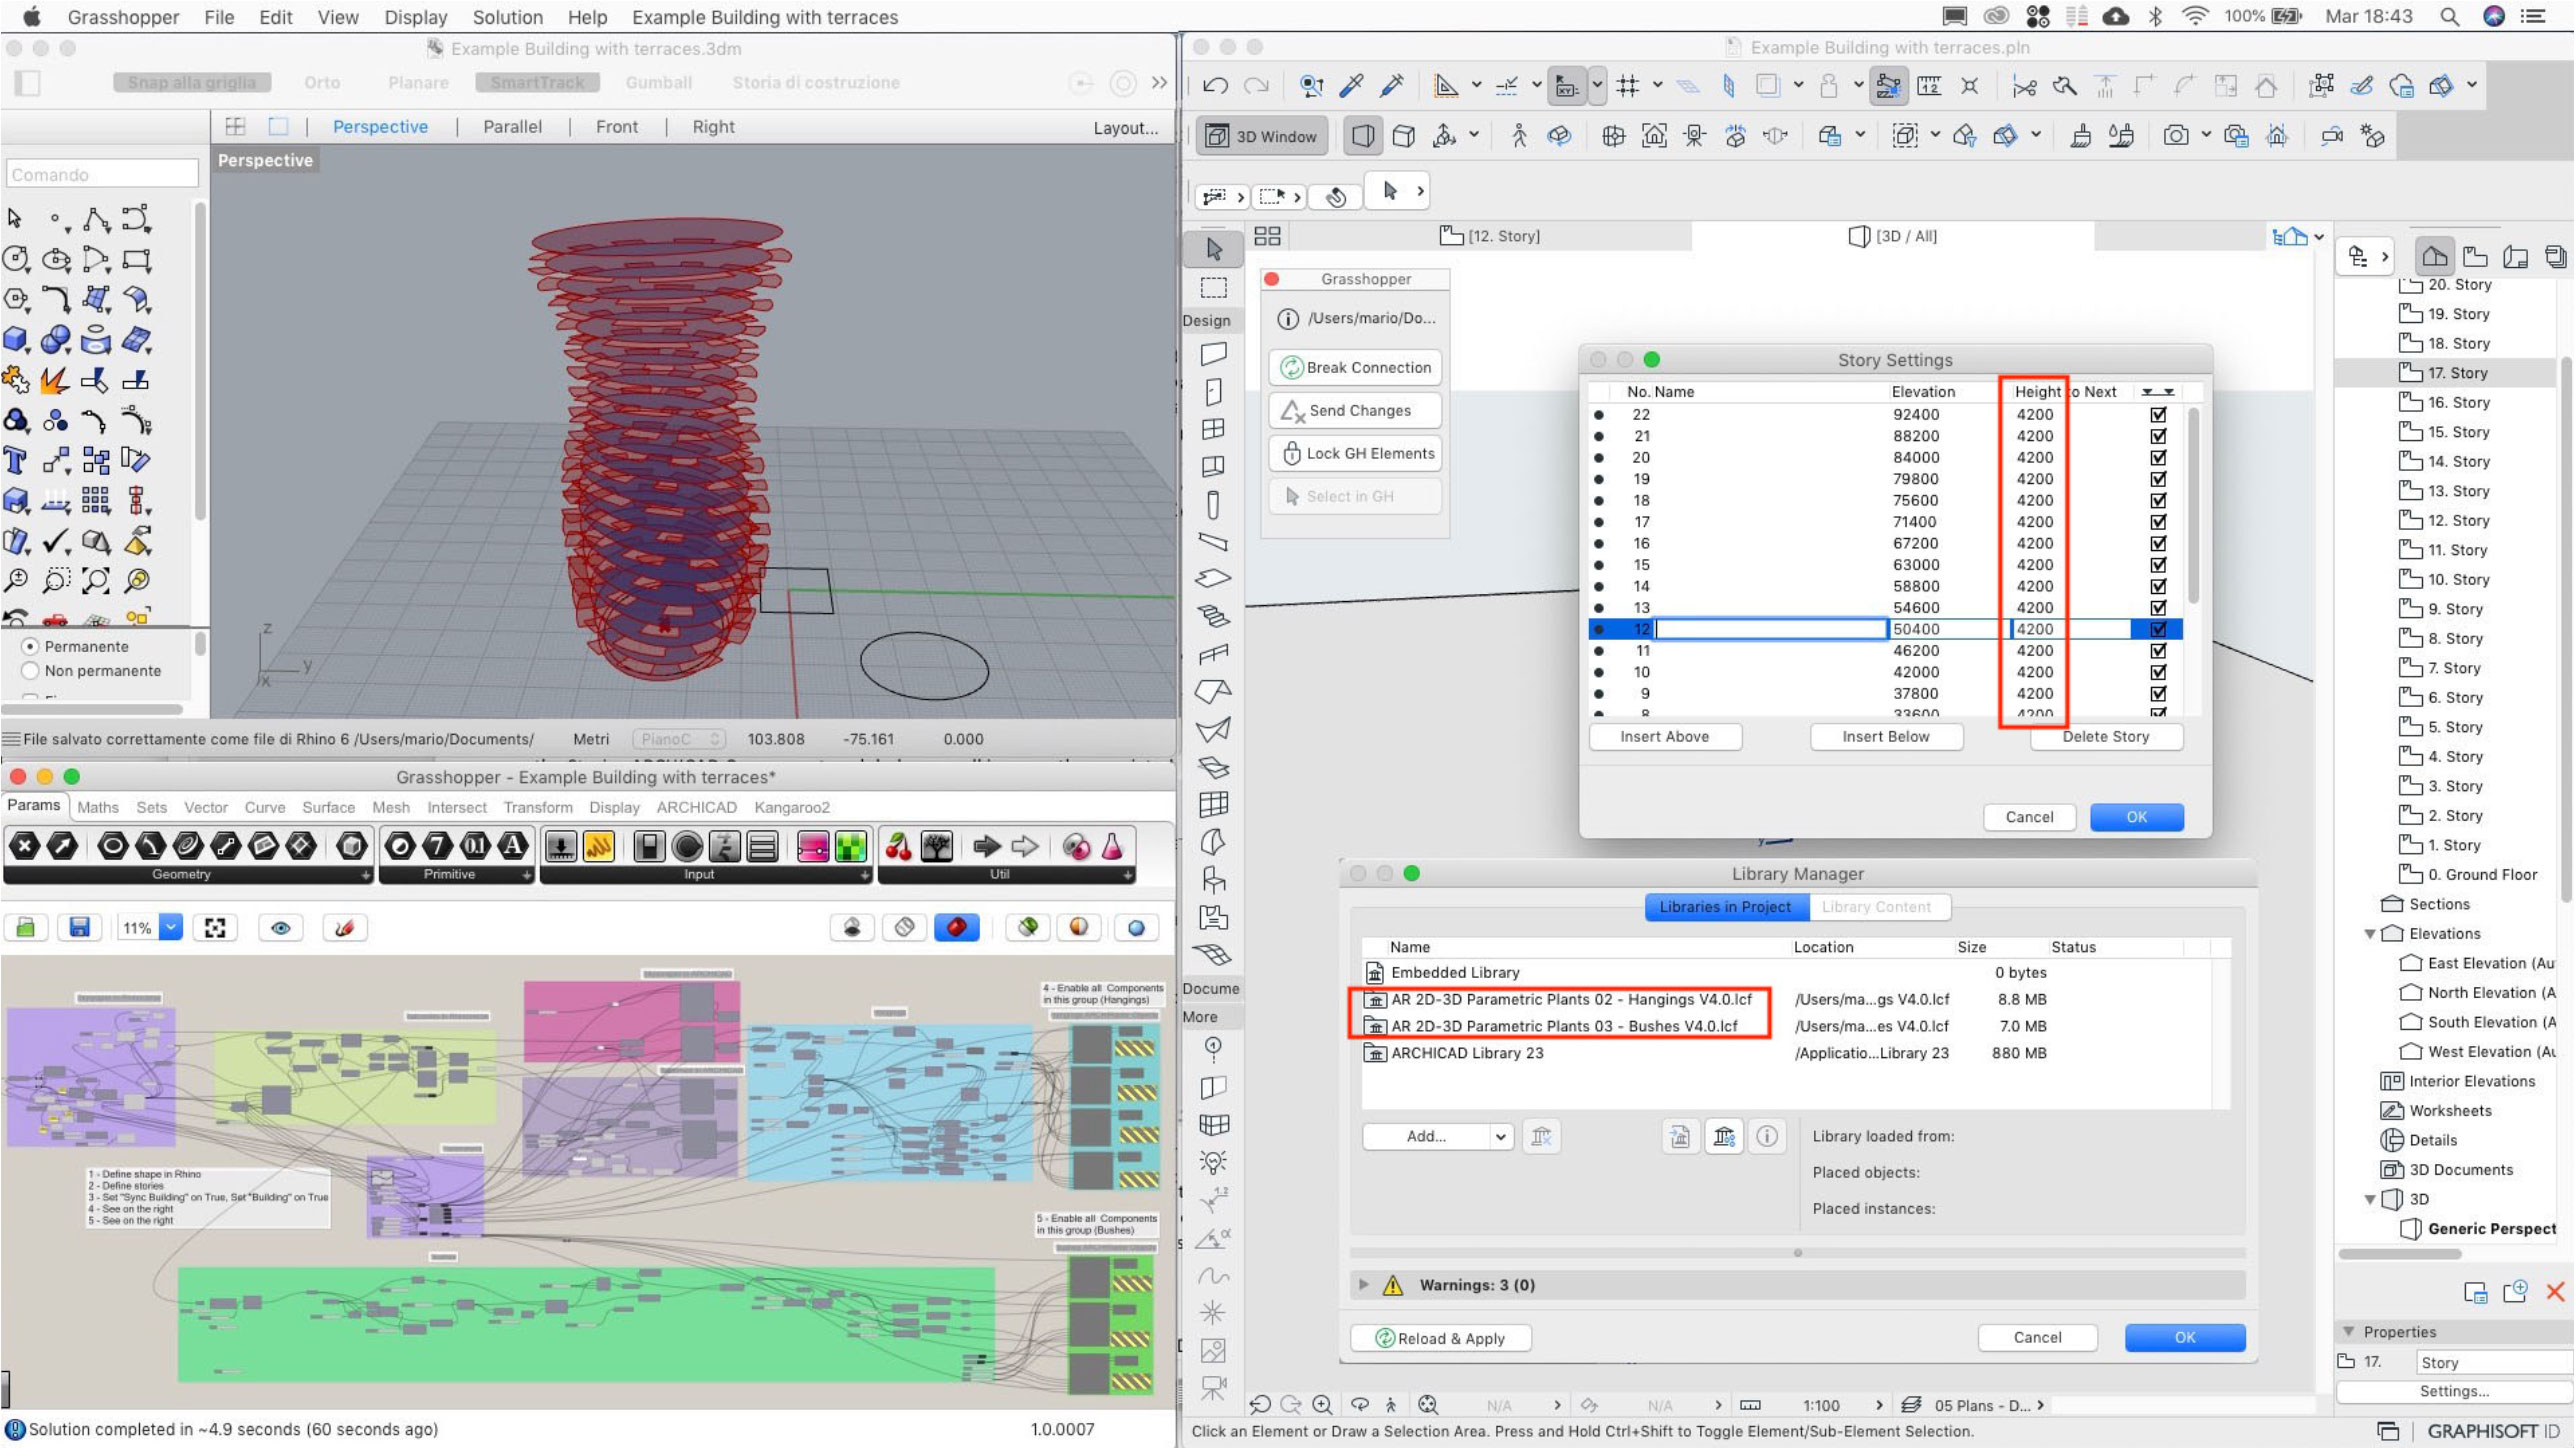
 

02 Foresta verticale archicad grasshopper


• The skyscraper in Rhinoceros
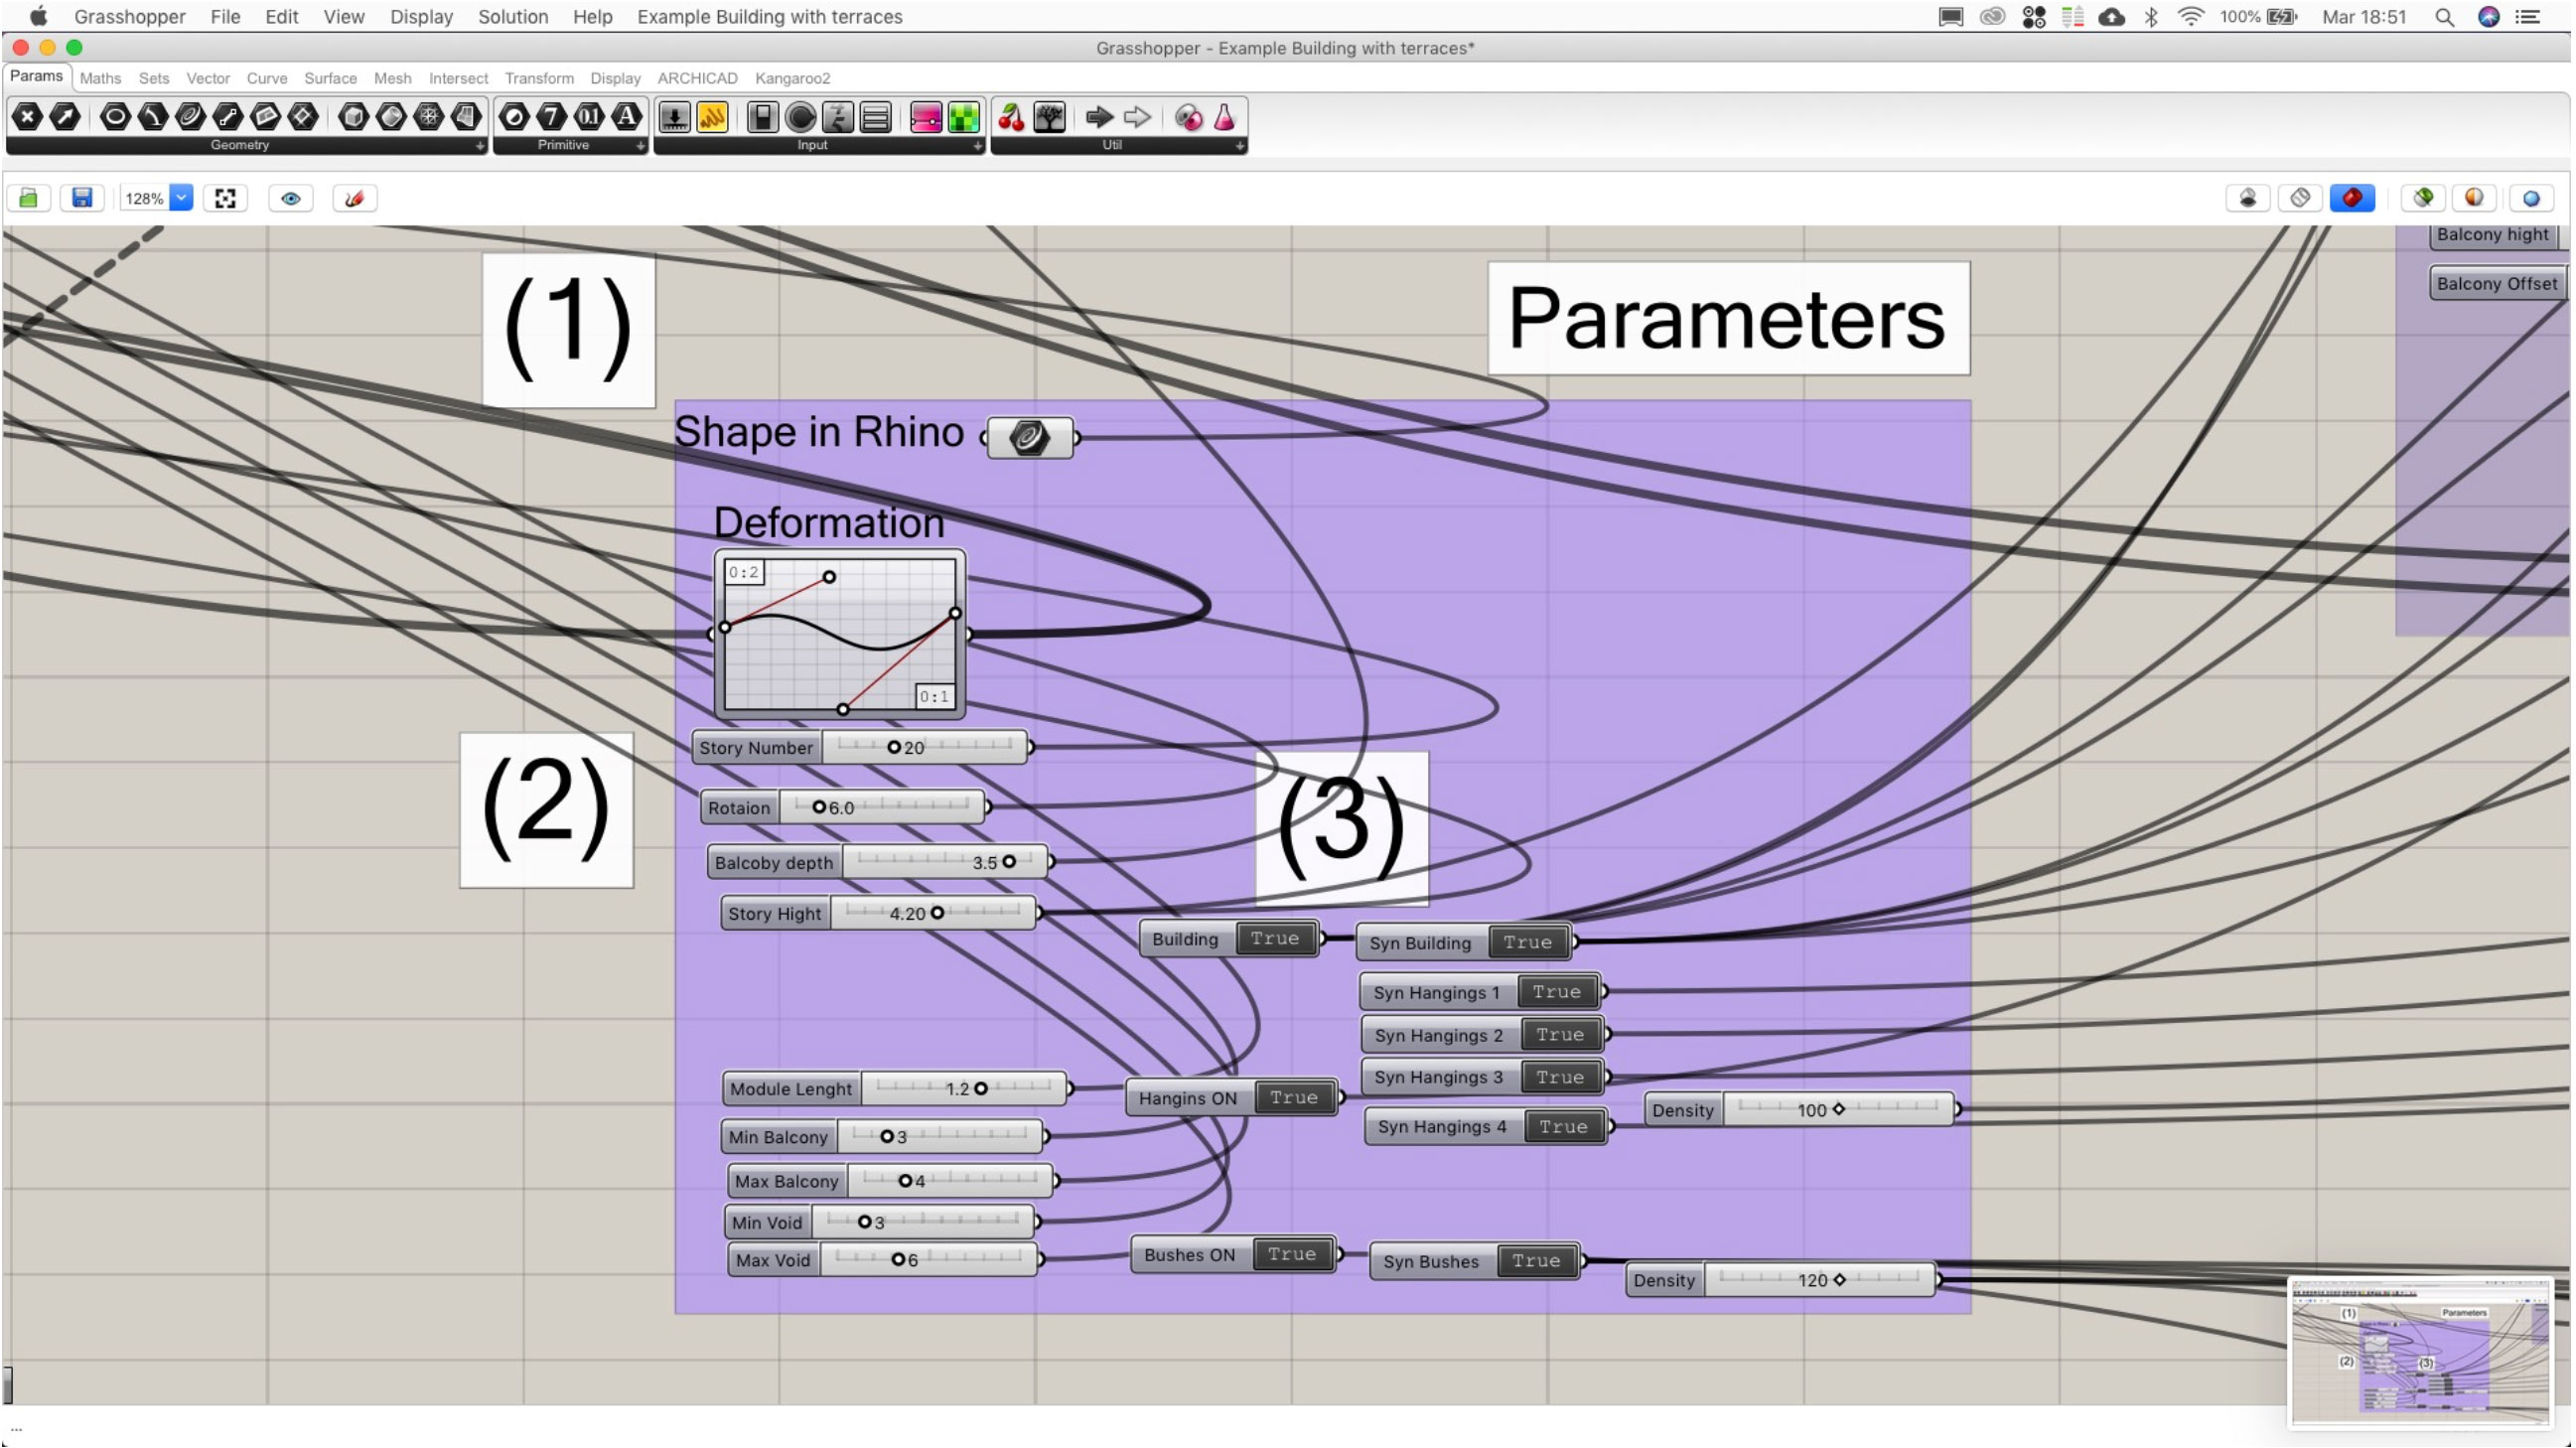
The first part of the definition in GH create a skyscraper from a shape selected in Rhinocers, with different parameters: story height, number of stories, progressive rotation of the stories, deformation of the stories. Define your own Skyscraper using parameters: shape in Rhinoceros (1), stories, rotation, deformation (2).
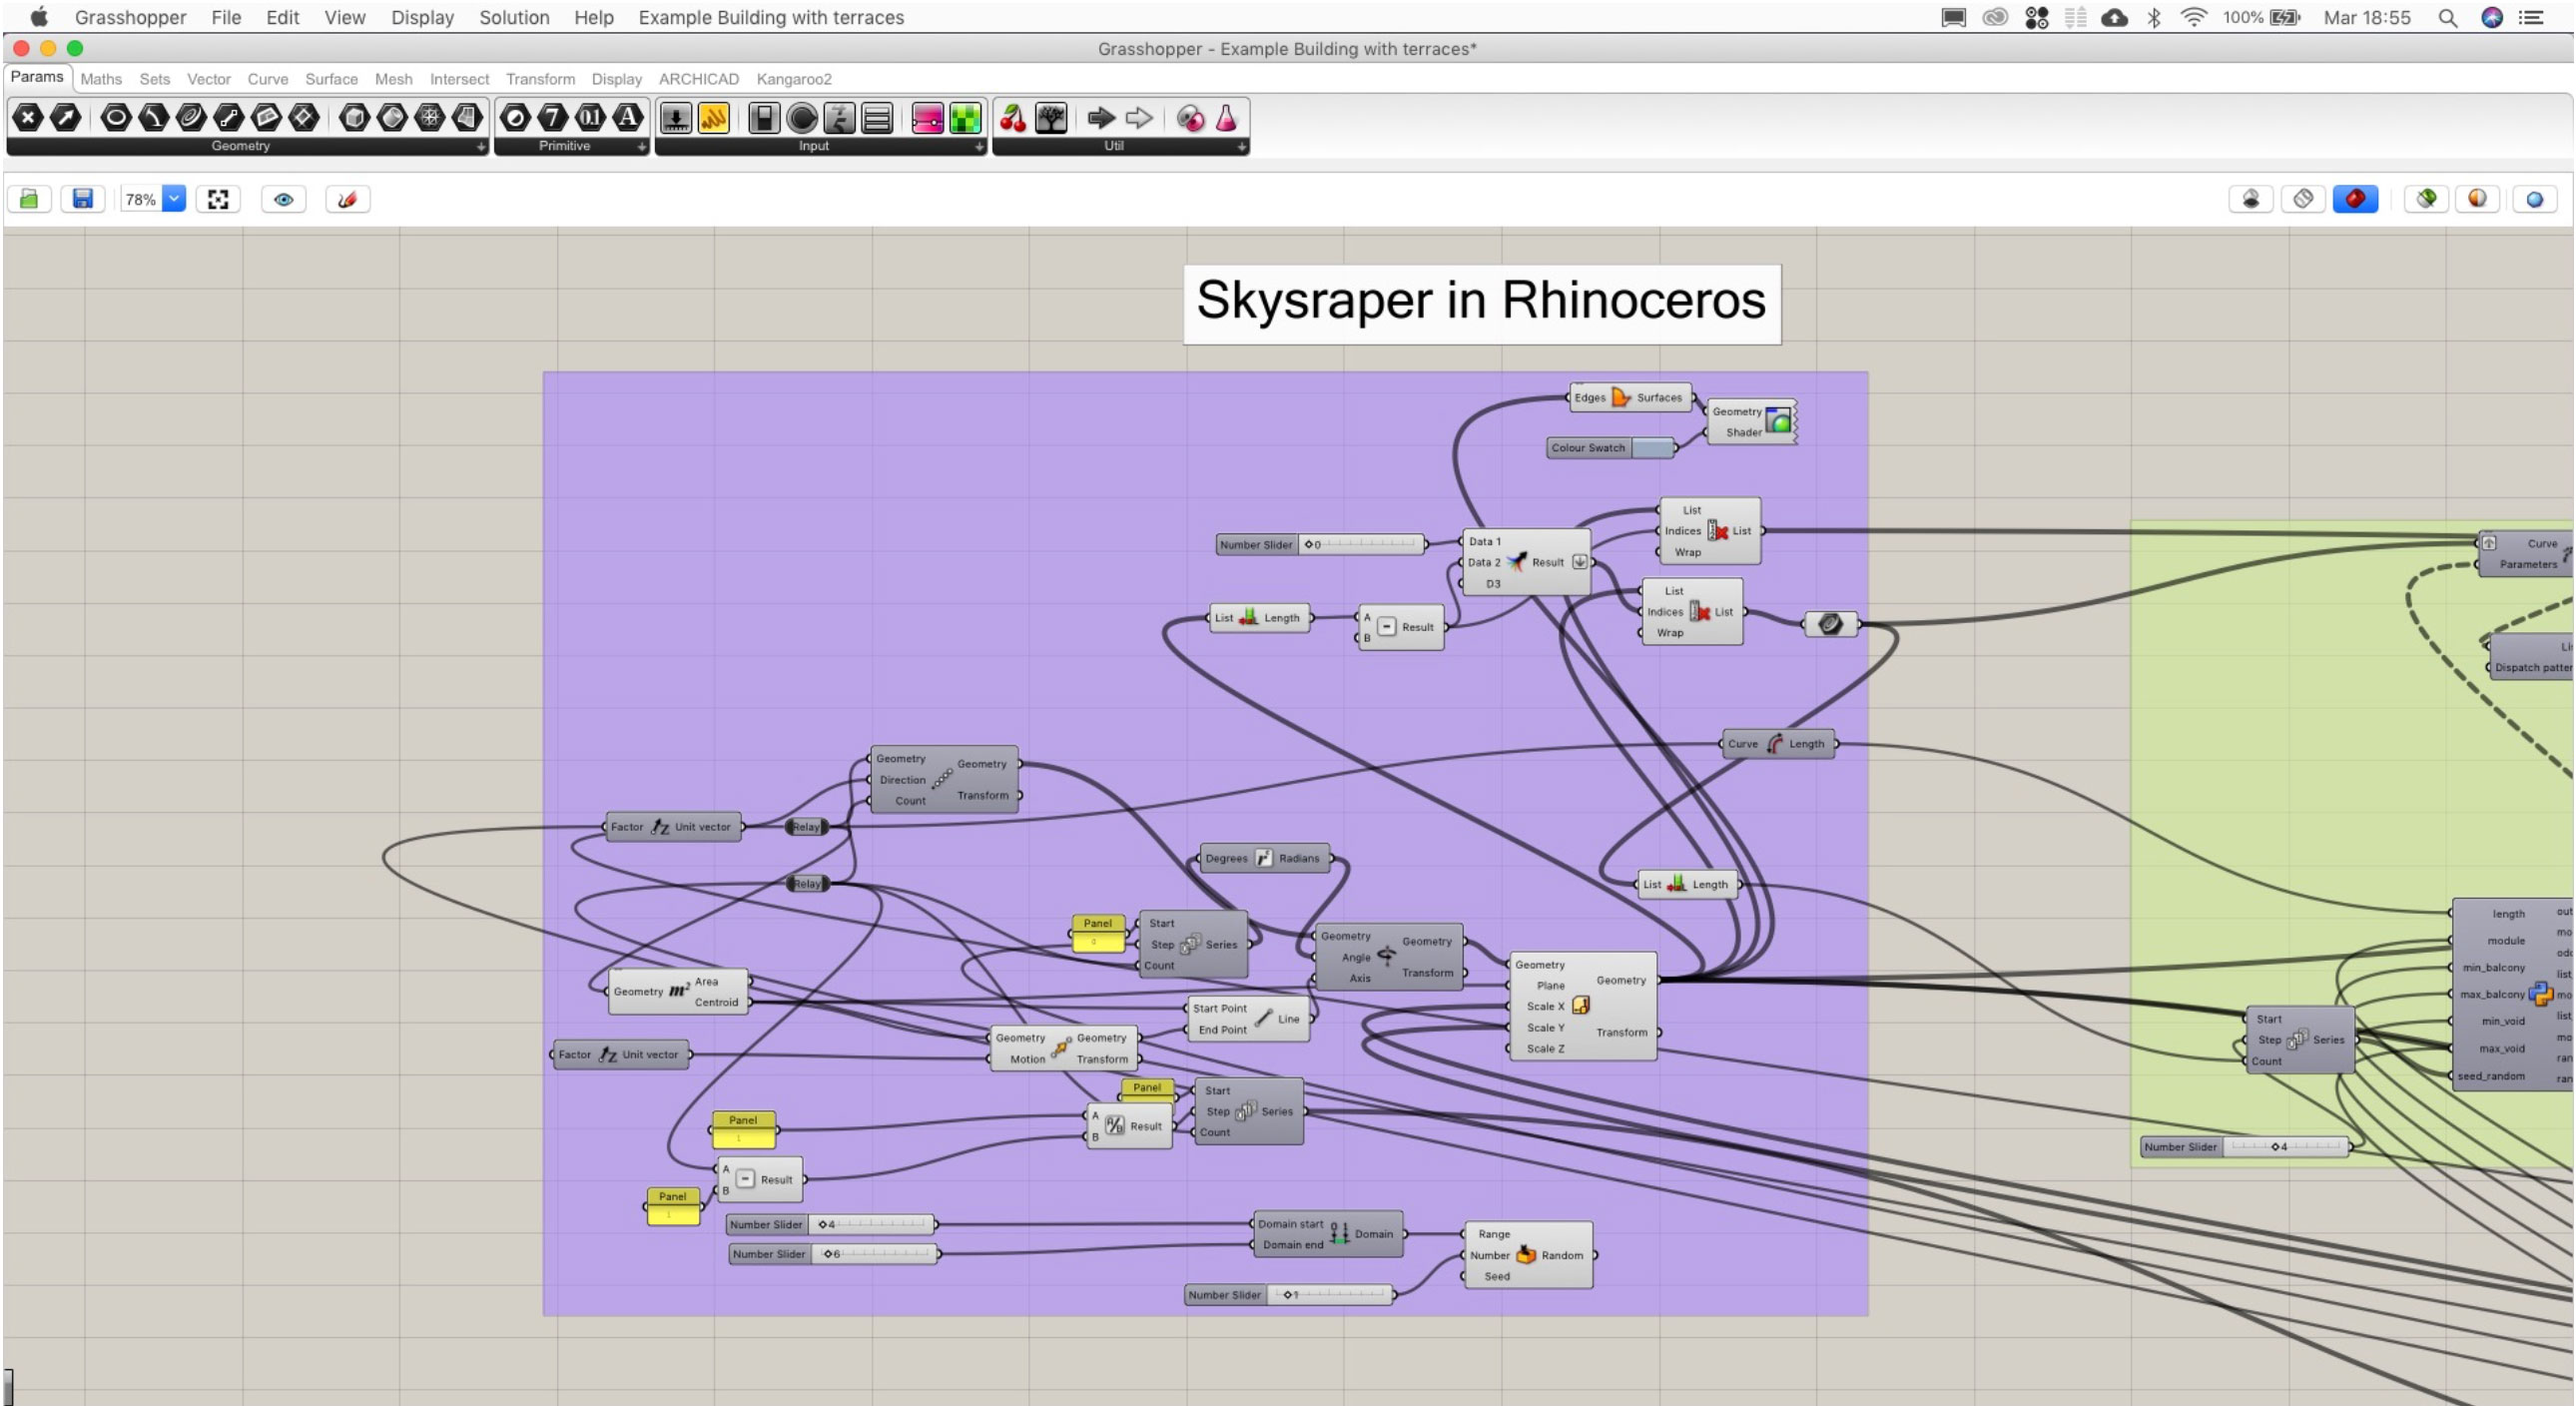
 

03 Foresta verticale archicad grasshopper


04 Foresta verticale archicad grasshopper


• The skyscraper in ARCHICAD
The skyscraper in ARCHICAD is generated using the Slab and Wall ARCHICAD component. Set "Sync Building" on True, Set "Building" on True (3).
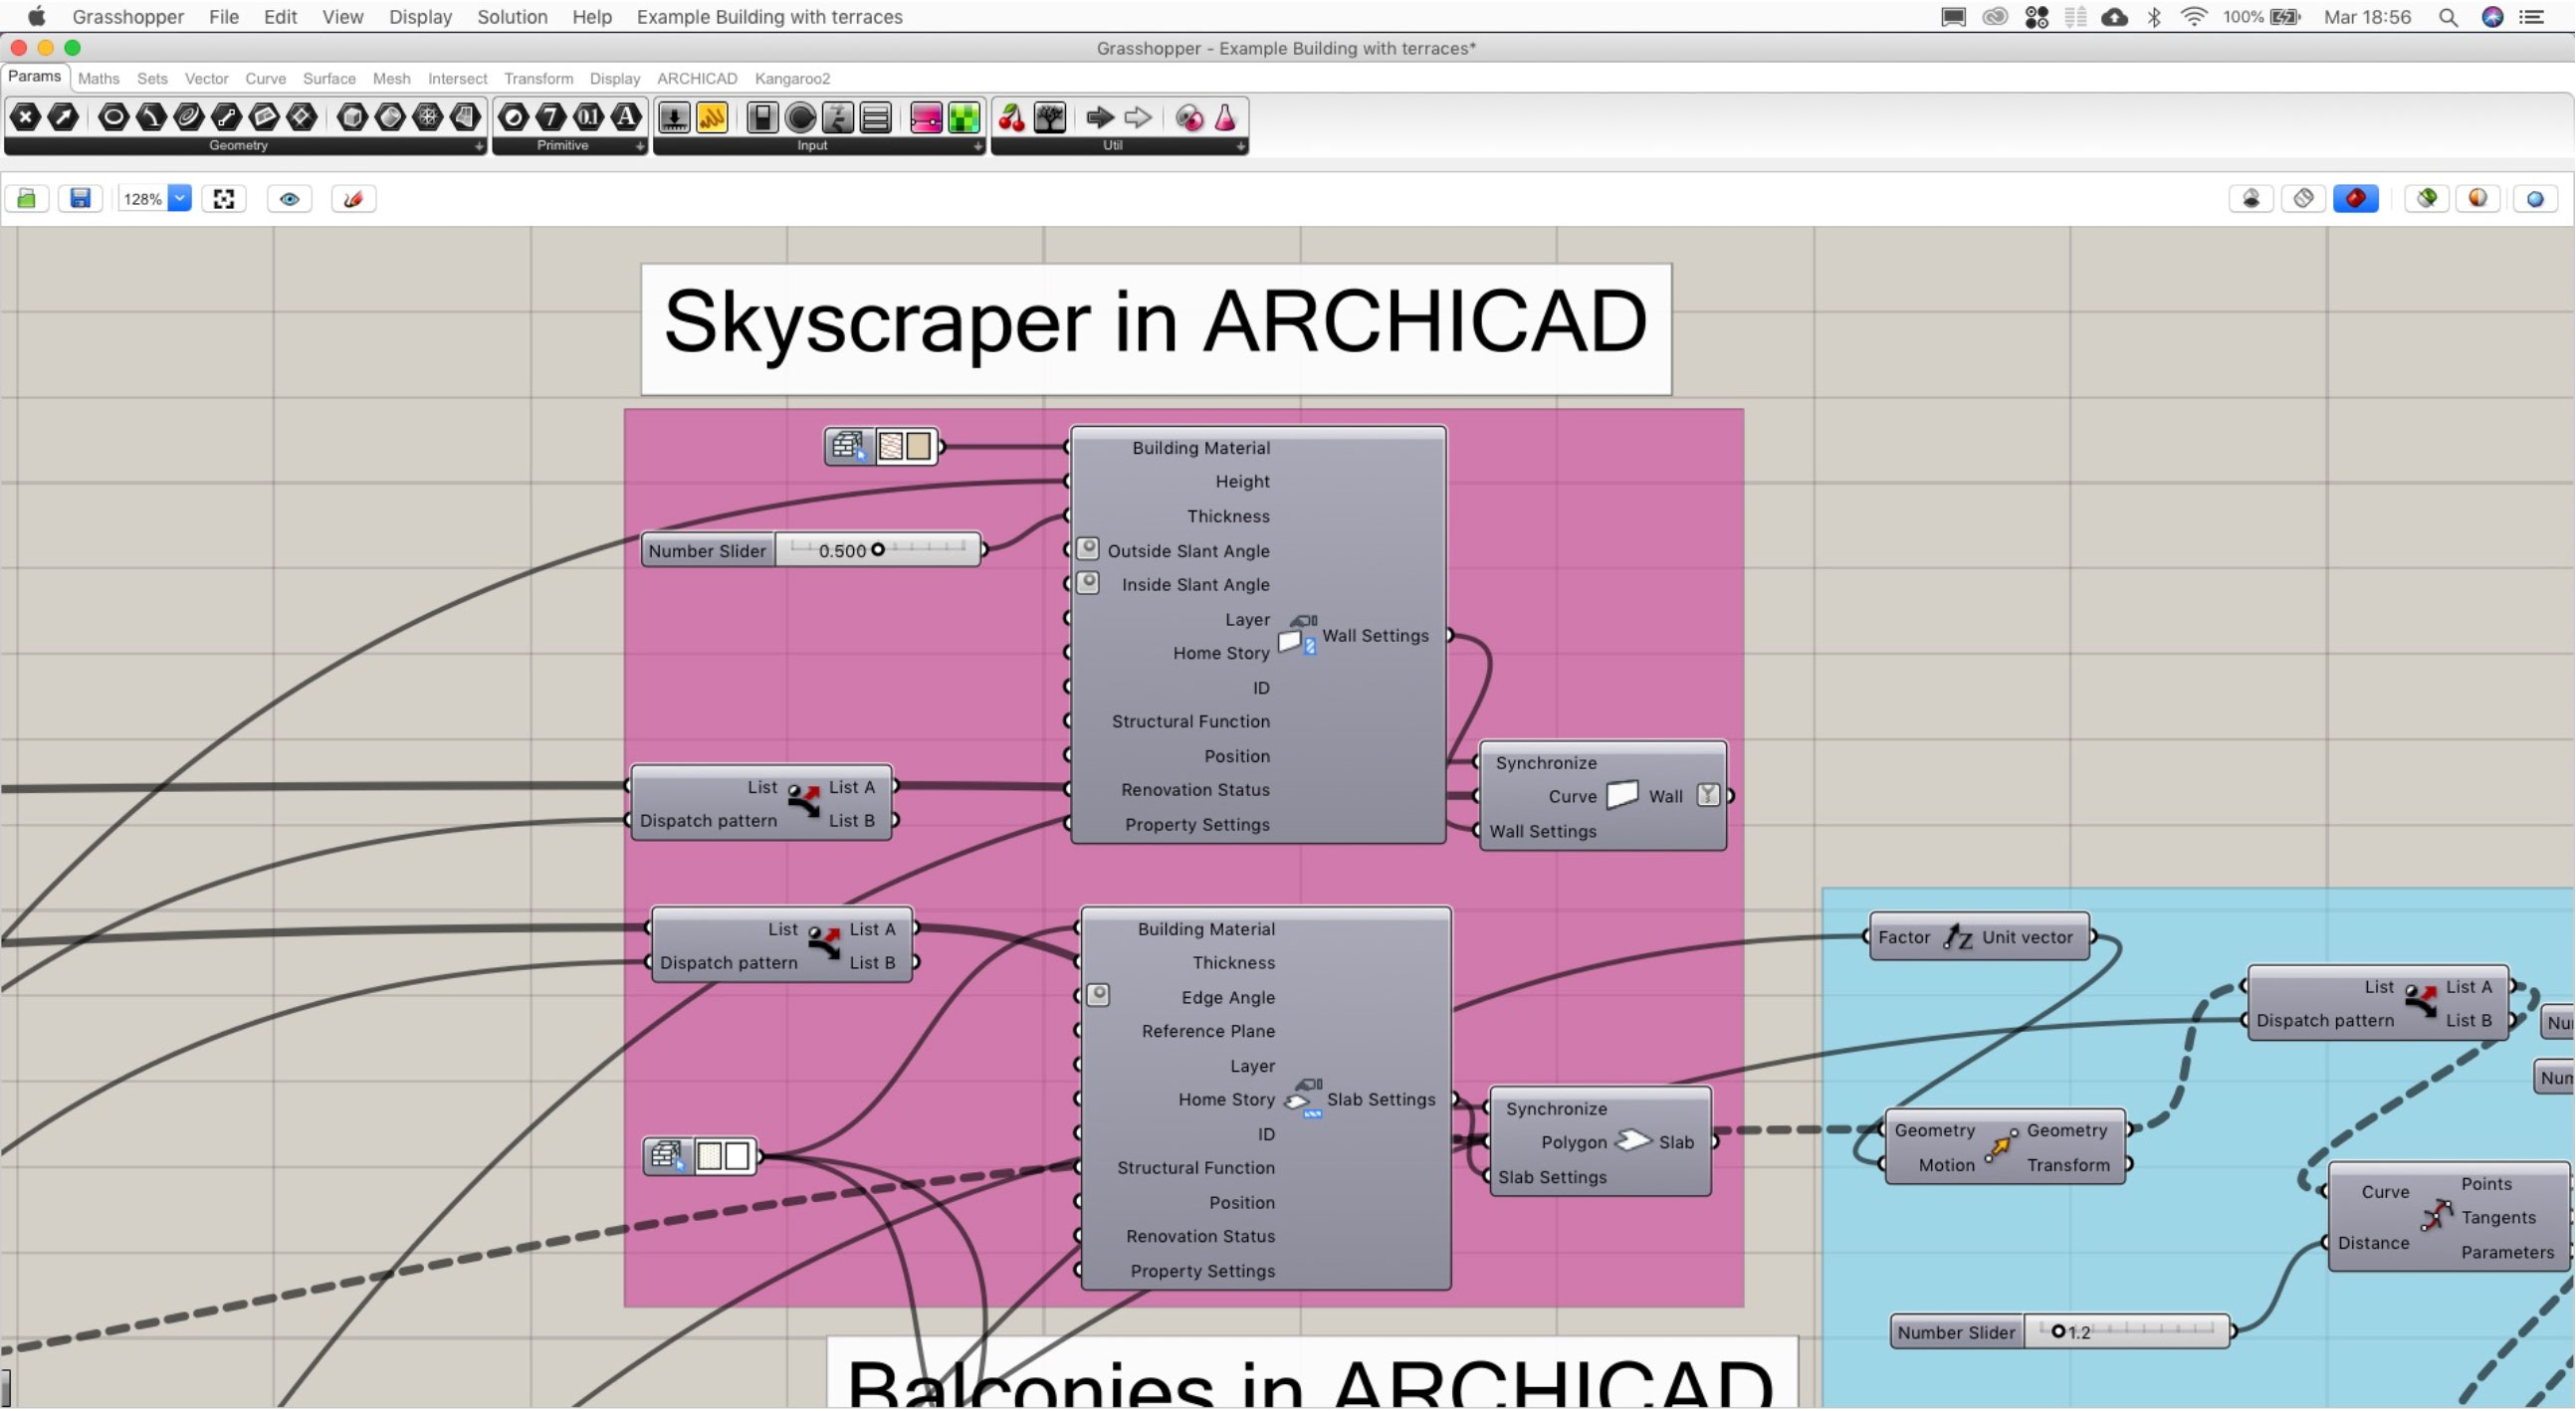
 

05 Foresta verticale archicad grasshopper


• The balconies in Rhinoceros
The balconies are generated from a Python Script; the script generate a random sequence of balconies; you can manage these parameters: balconies depth, balconies minimum and maximum width, voids minimum and width, balconies height.
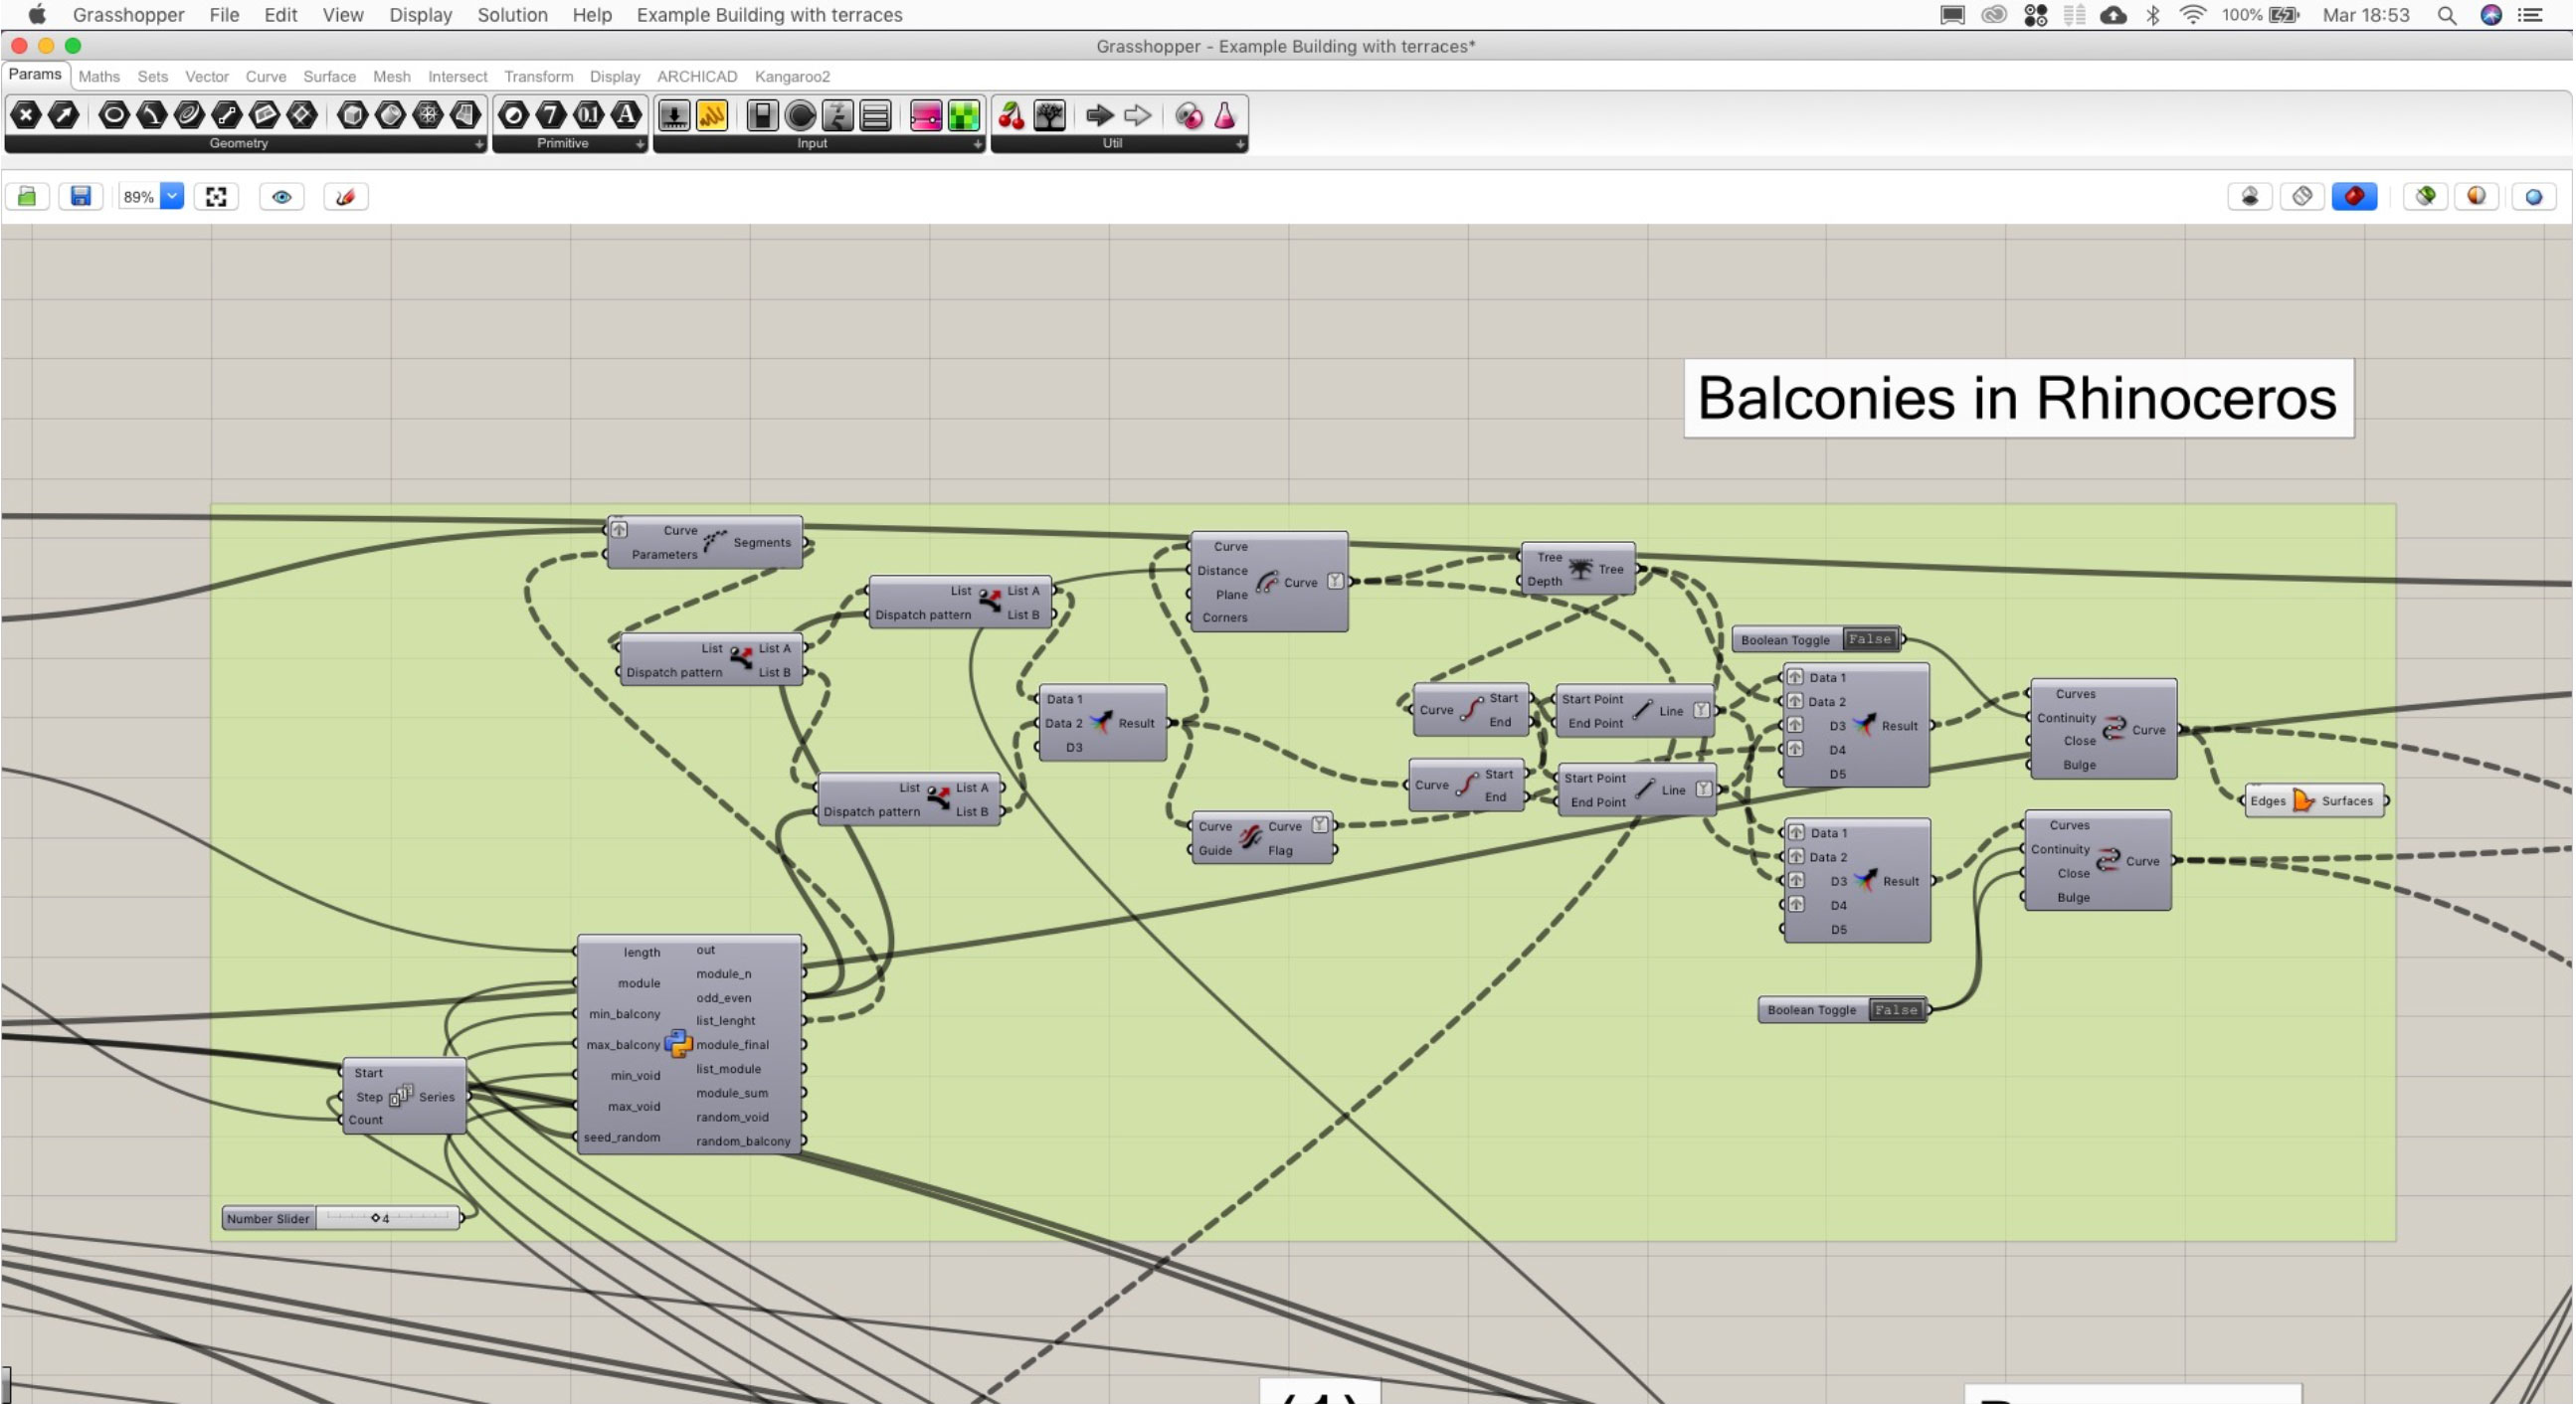
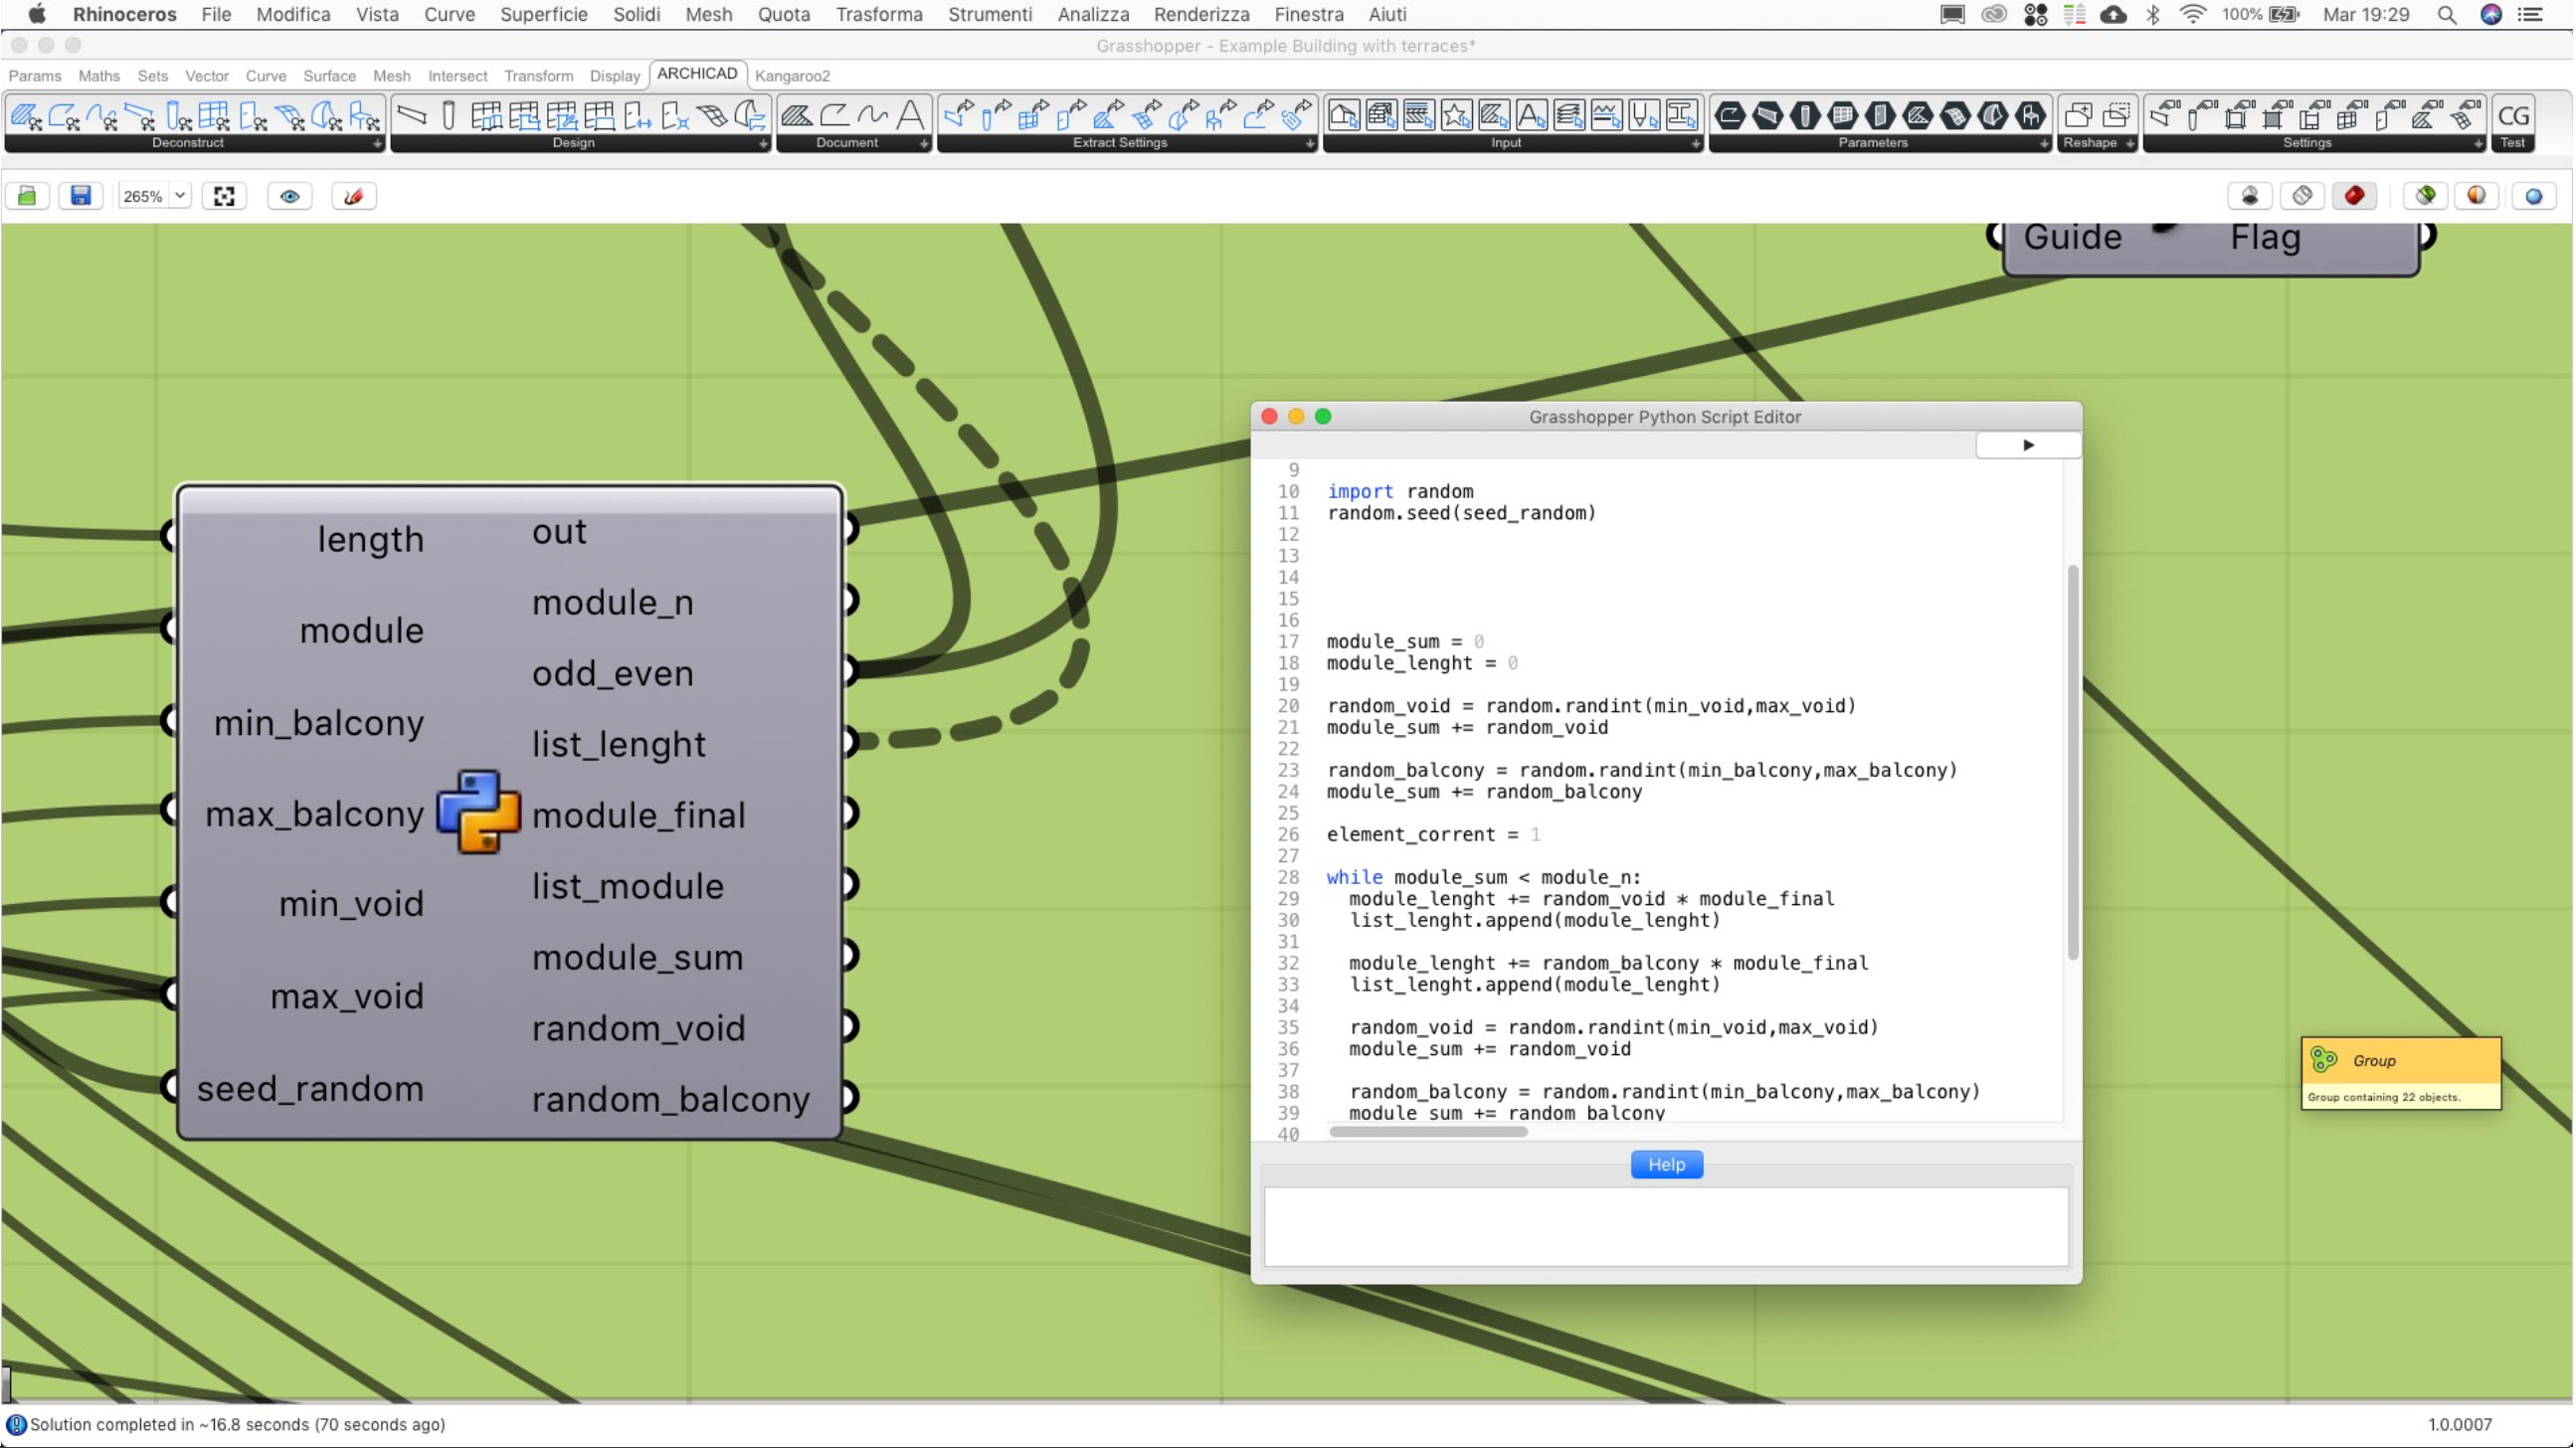
 

06 Foresta verticale archicad grasshopper


07 Foresta verticale archicad grasshopper


• The balconies in ARCHICAD
The balconies in ARCHICAD are generated using the Slab and Wall ARCHICAD component. Using the Stories ARCHICAD Component each balcony wall is correctly associated to the correct story.
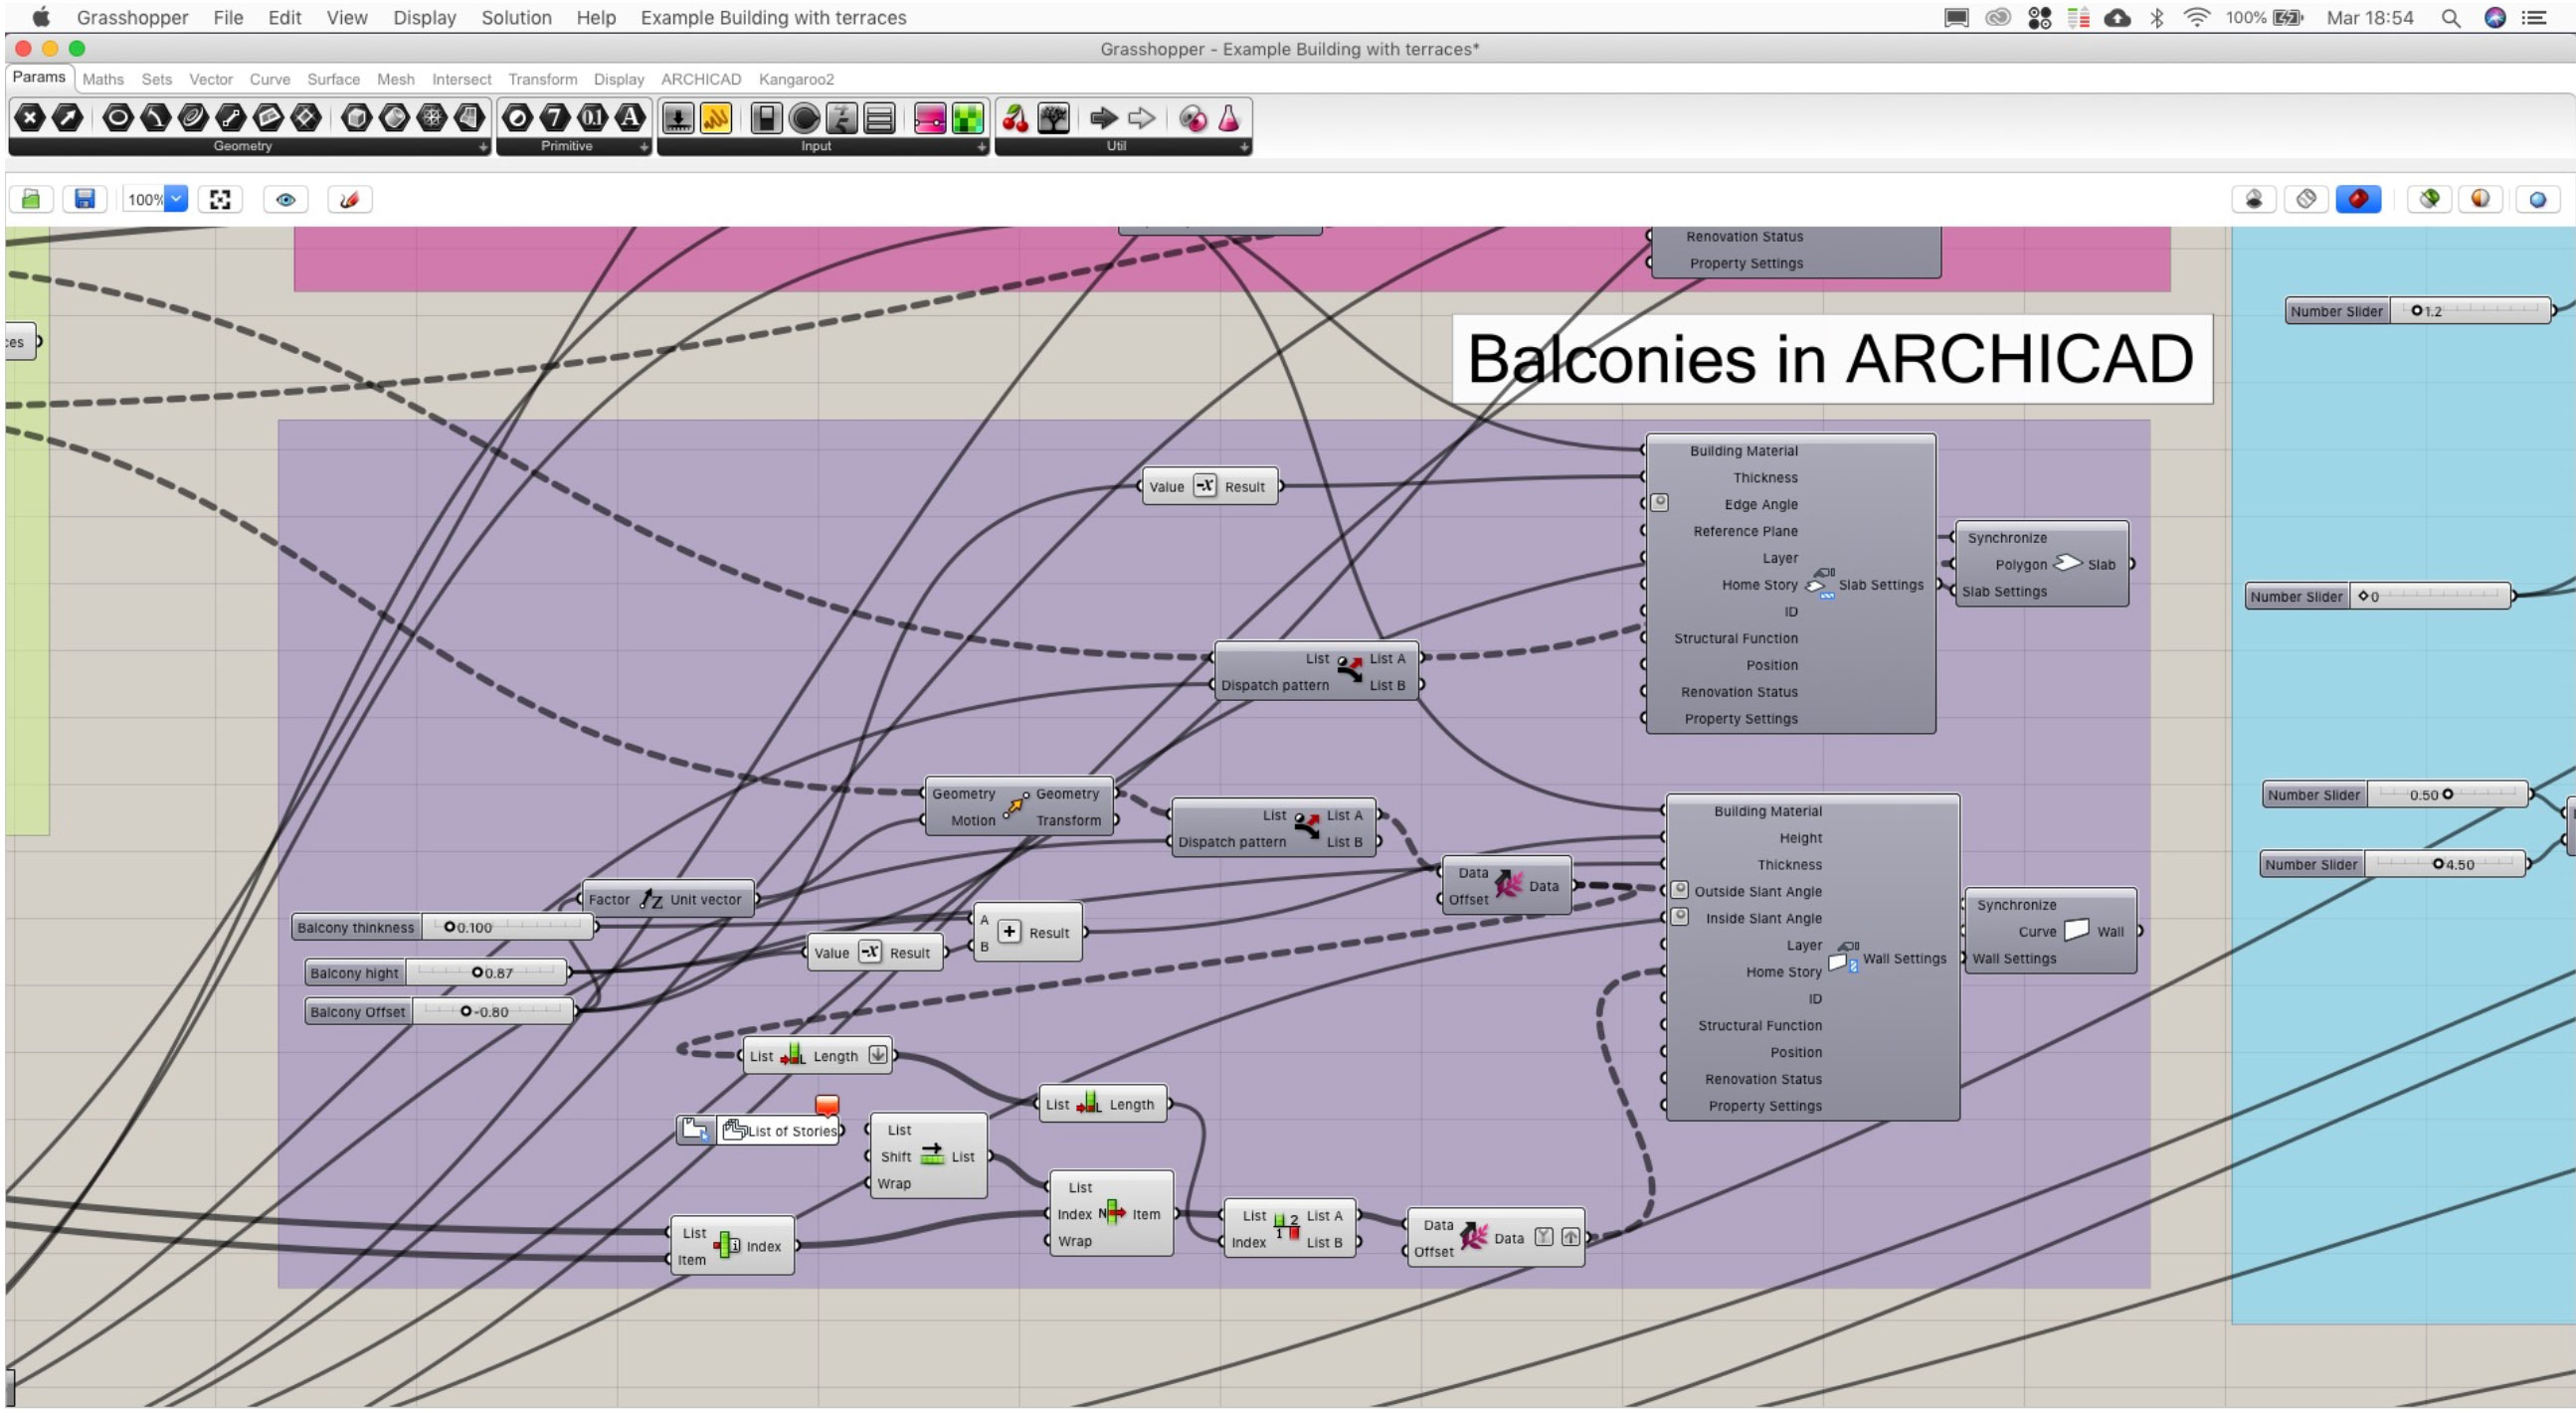
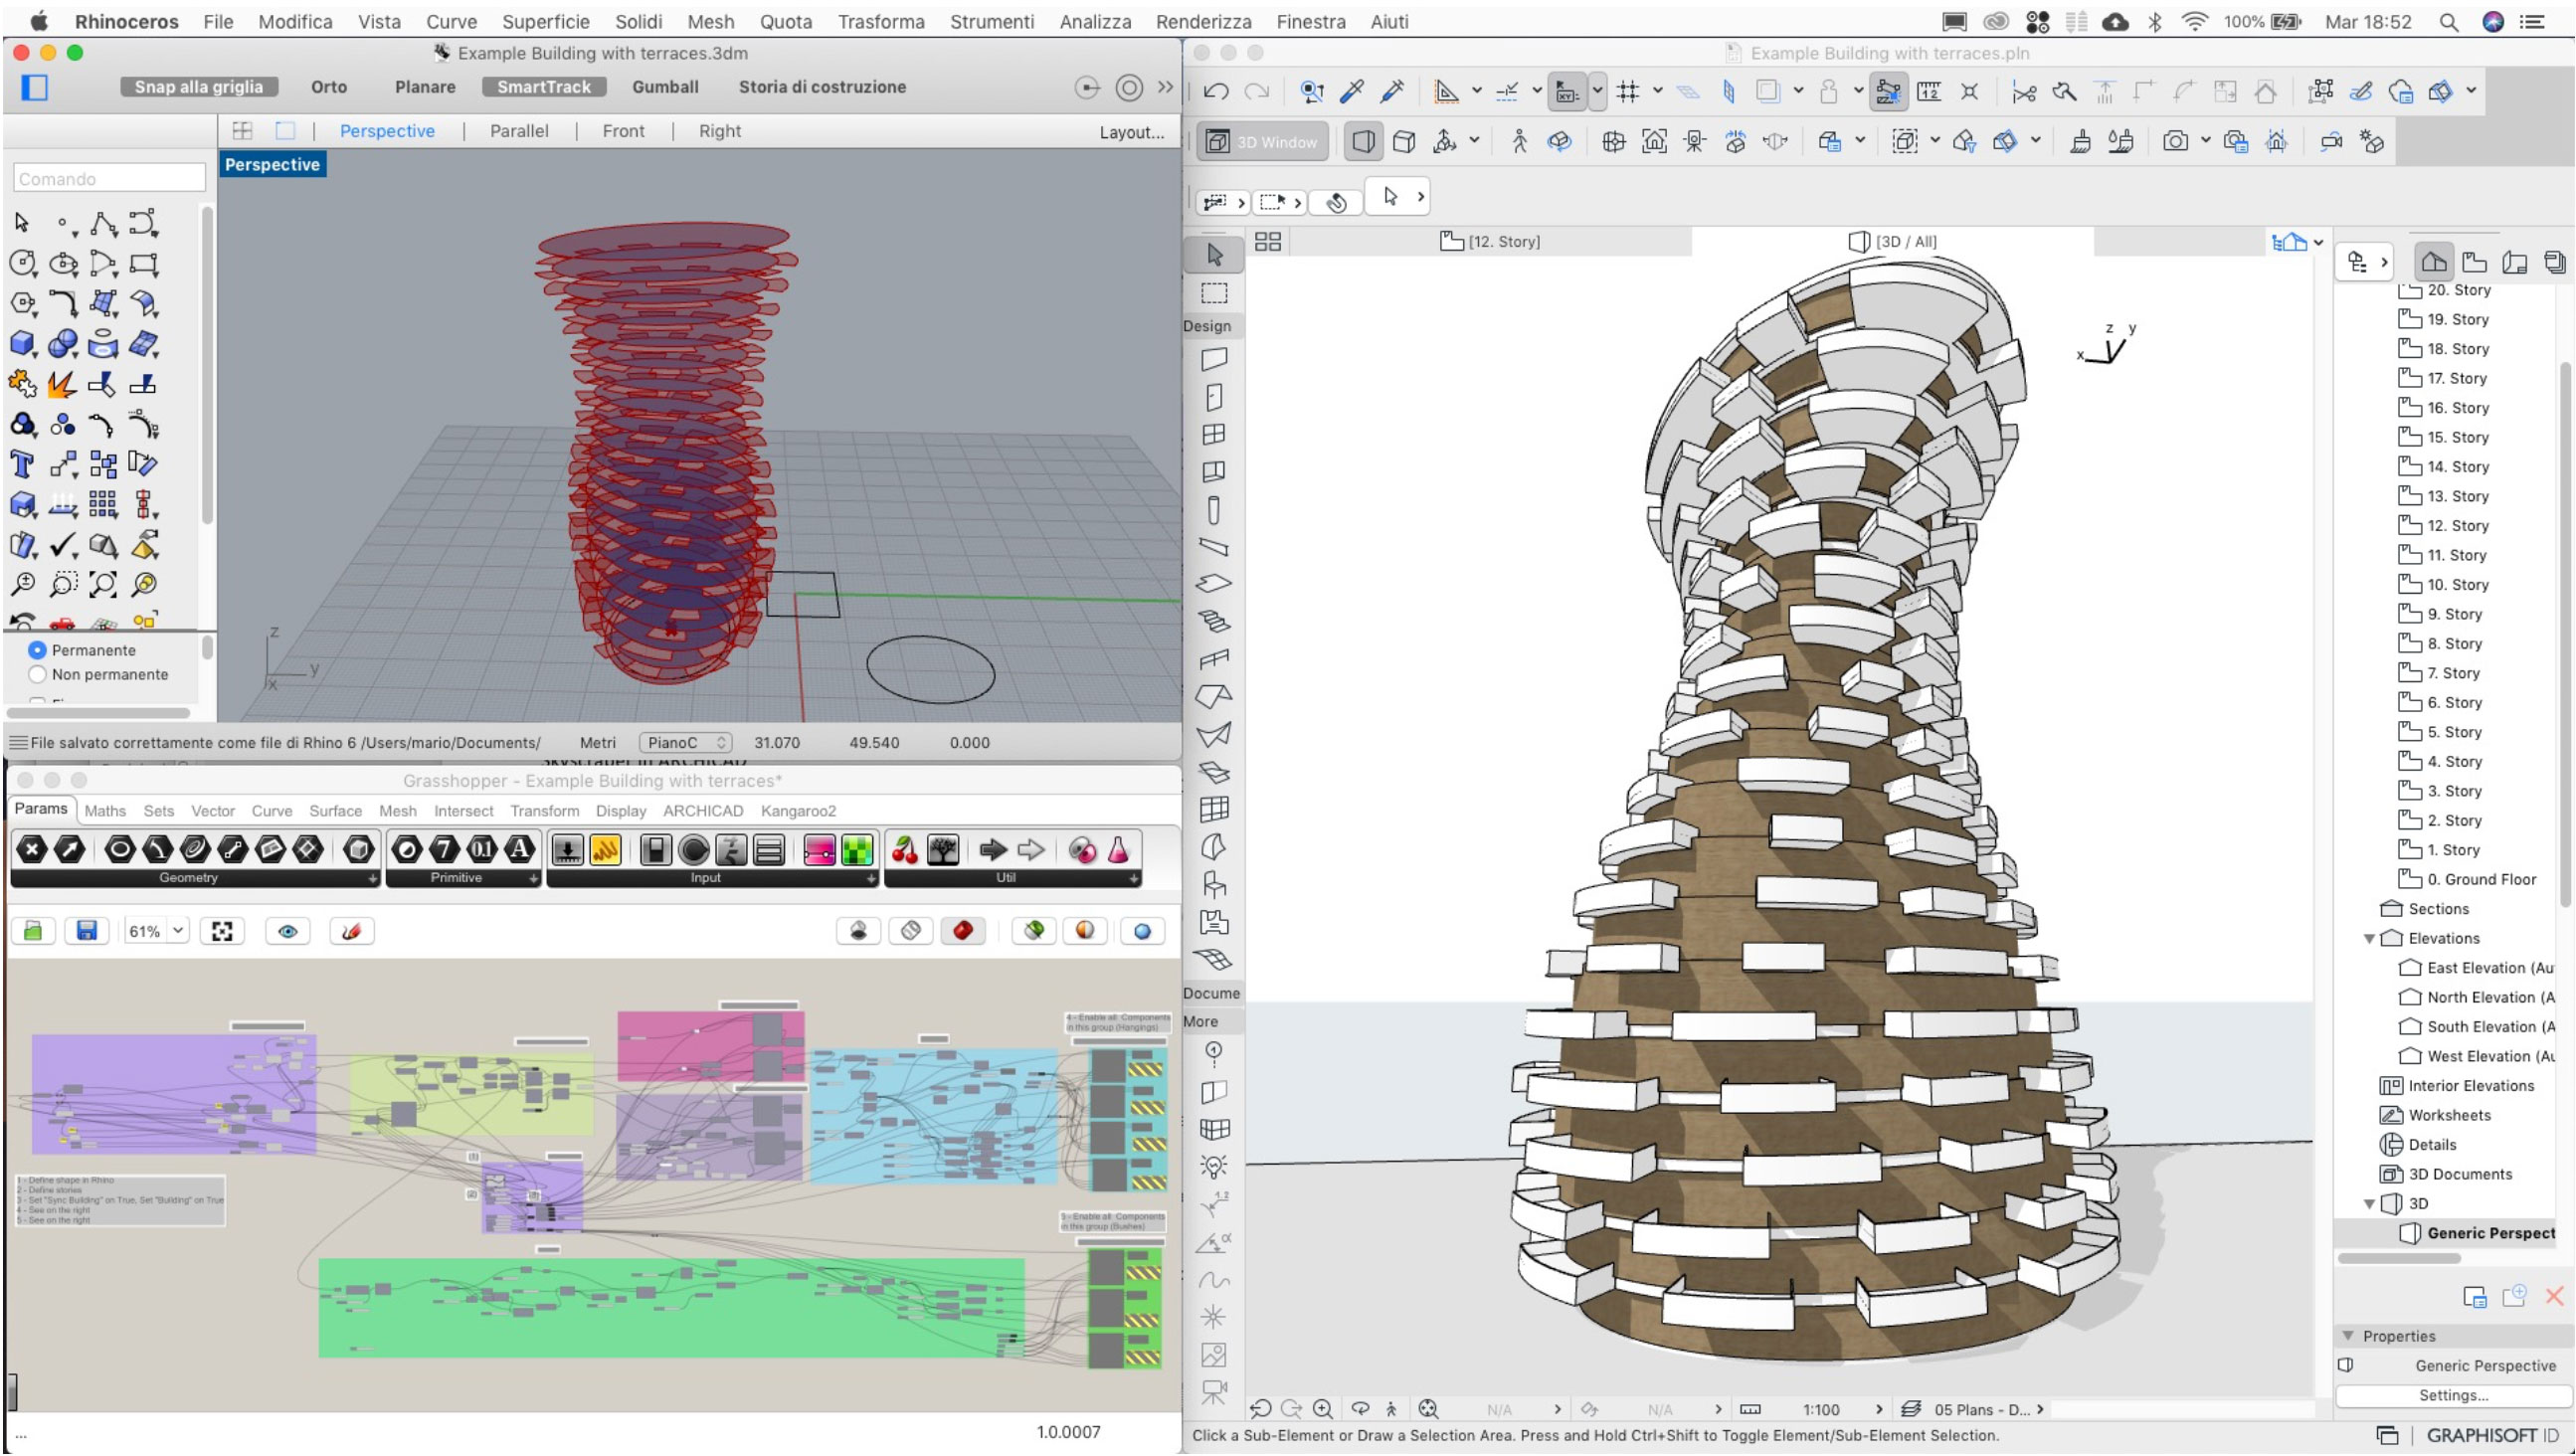
 

08 Foresta verticale archicad grasshopper


09 Foresta verticale archicad grasshopper


• Define hangings and bushes
The definition in GH create a random location on the outside of the balconies where will be placed the ARCHICAD objects plants
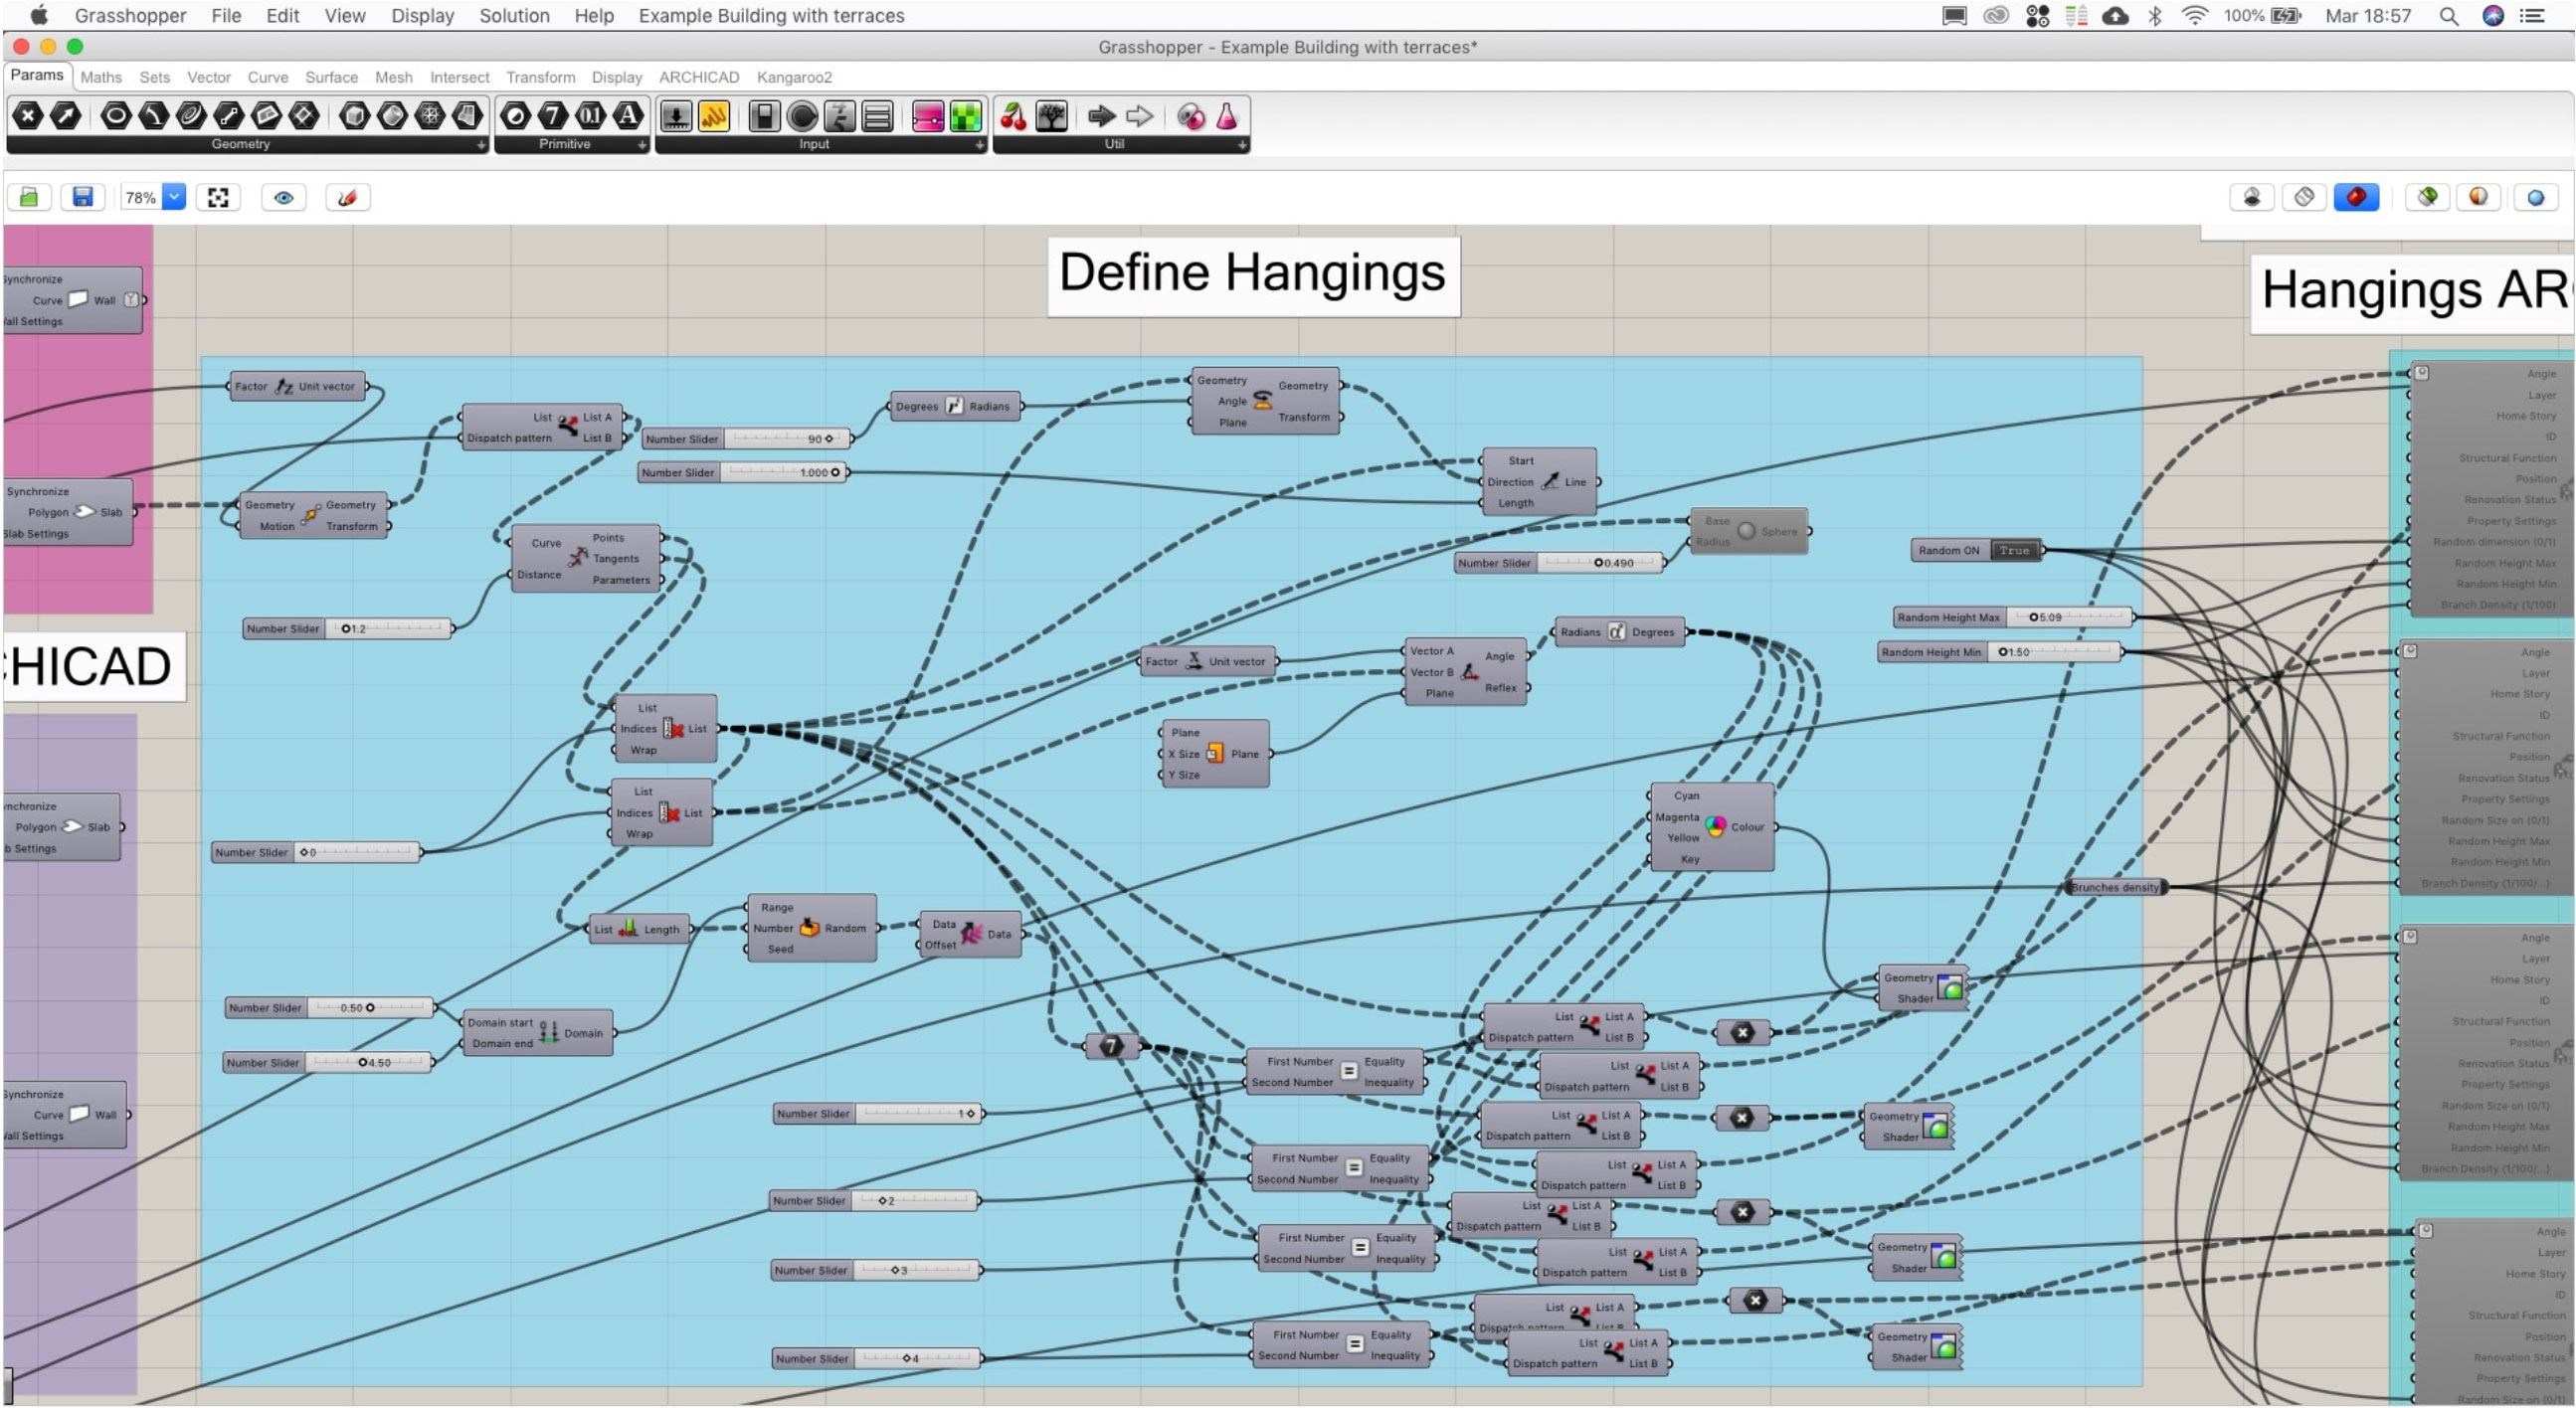
 

10 Foresta verticale archicad grasshopper


• Define Hangings and Bushes in ARCHICAD
The hangings and bushes are ARCHICAD Object made by ArchiRADAR. The hangings and bushes are placed with random choice from different ARCHICAD species object; four hangins and three bushes. To define the objects, you must use the Object ARCHICAD Component in GH. In the Object Setting Component you must click on “Use existing Library part”; then click on “Select ARCHICAD Library Part” and choose the object you prefer from the library. Remember to select the parameter to be edit in GH: Random Dimension (0/1), Random Heigh Max, Random Height Min, Branch Density (1/100/...); these parameters are used in the GH definition. You can add your favorite parameter. When you have finished to personalize your parameters, you can Enable all components in the Hanging ArchiRADAR Objects group using right click (4). Enable all components in the Bush ArchiRADAR Objects group using right click (5).
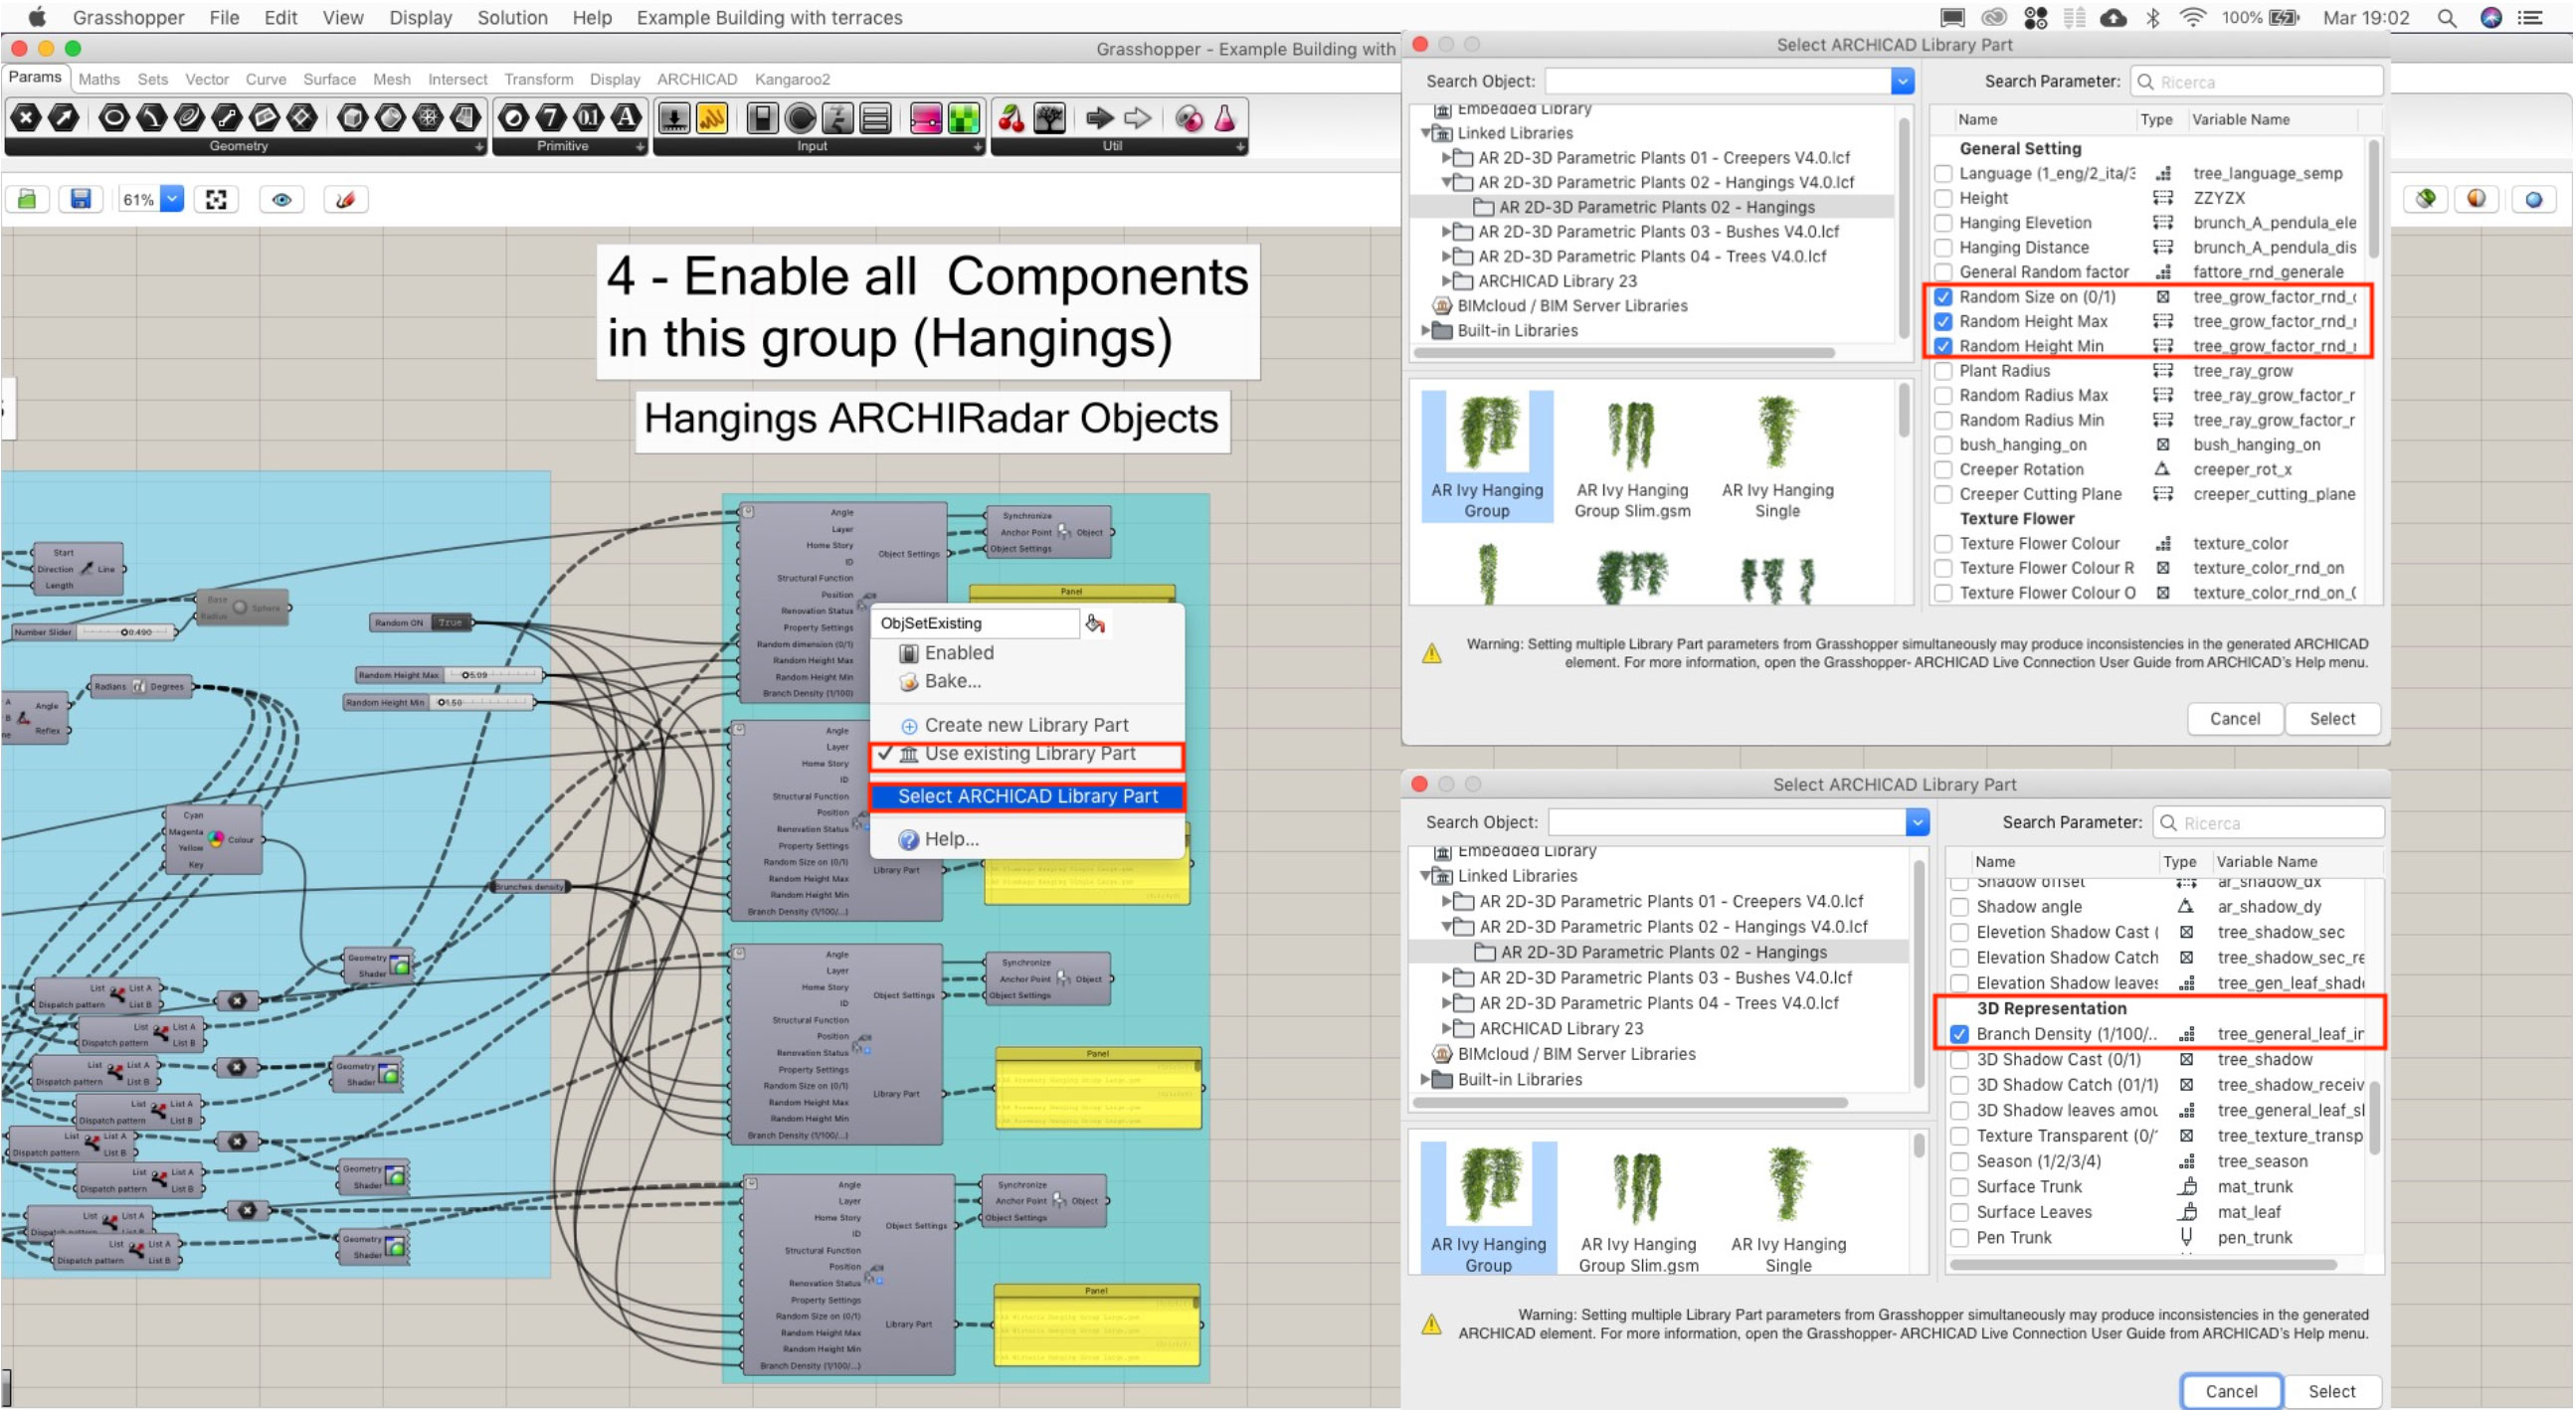
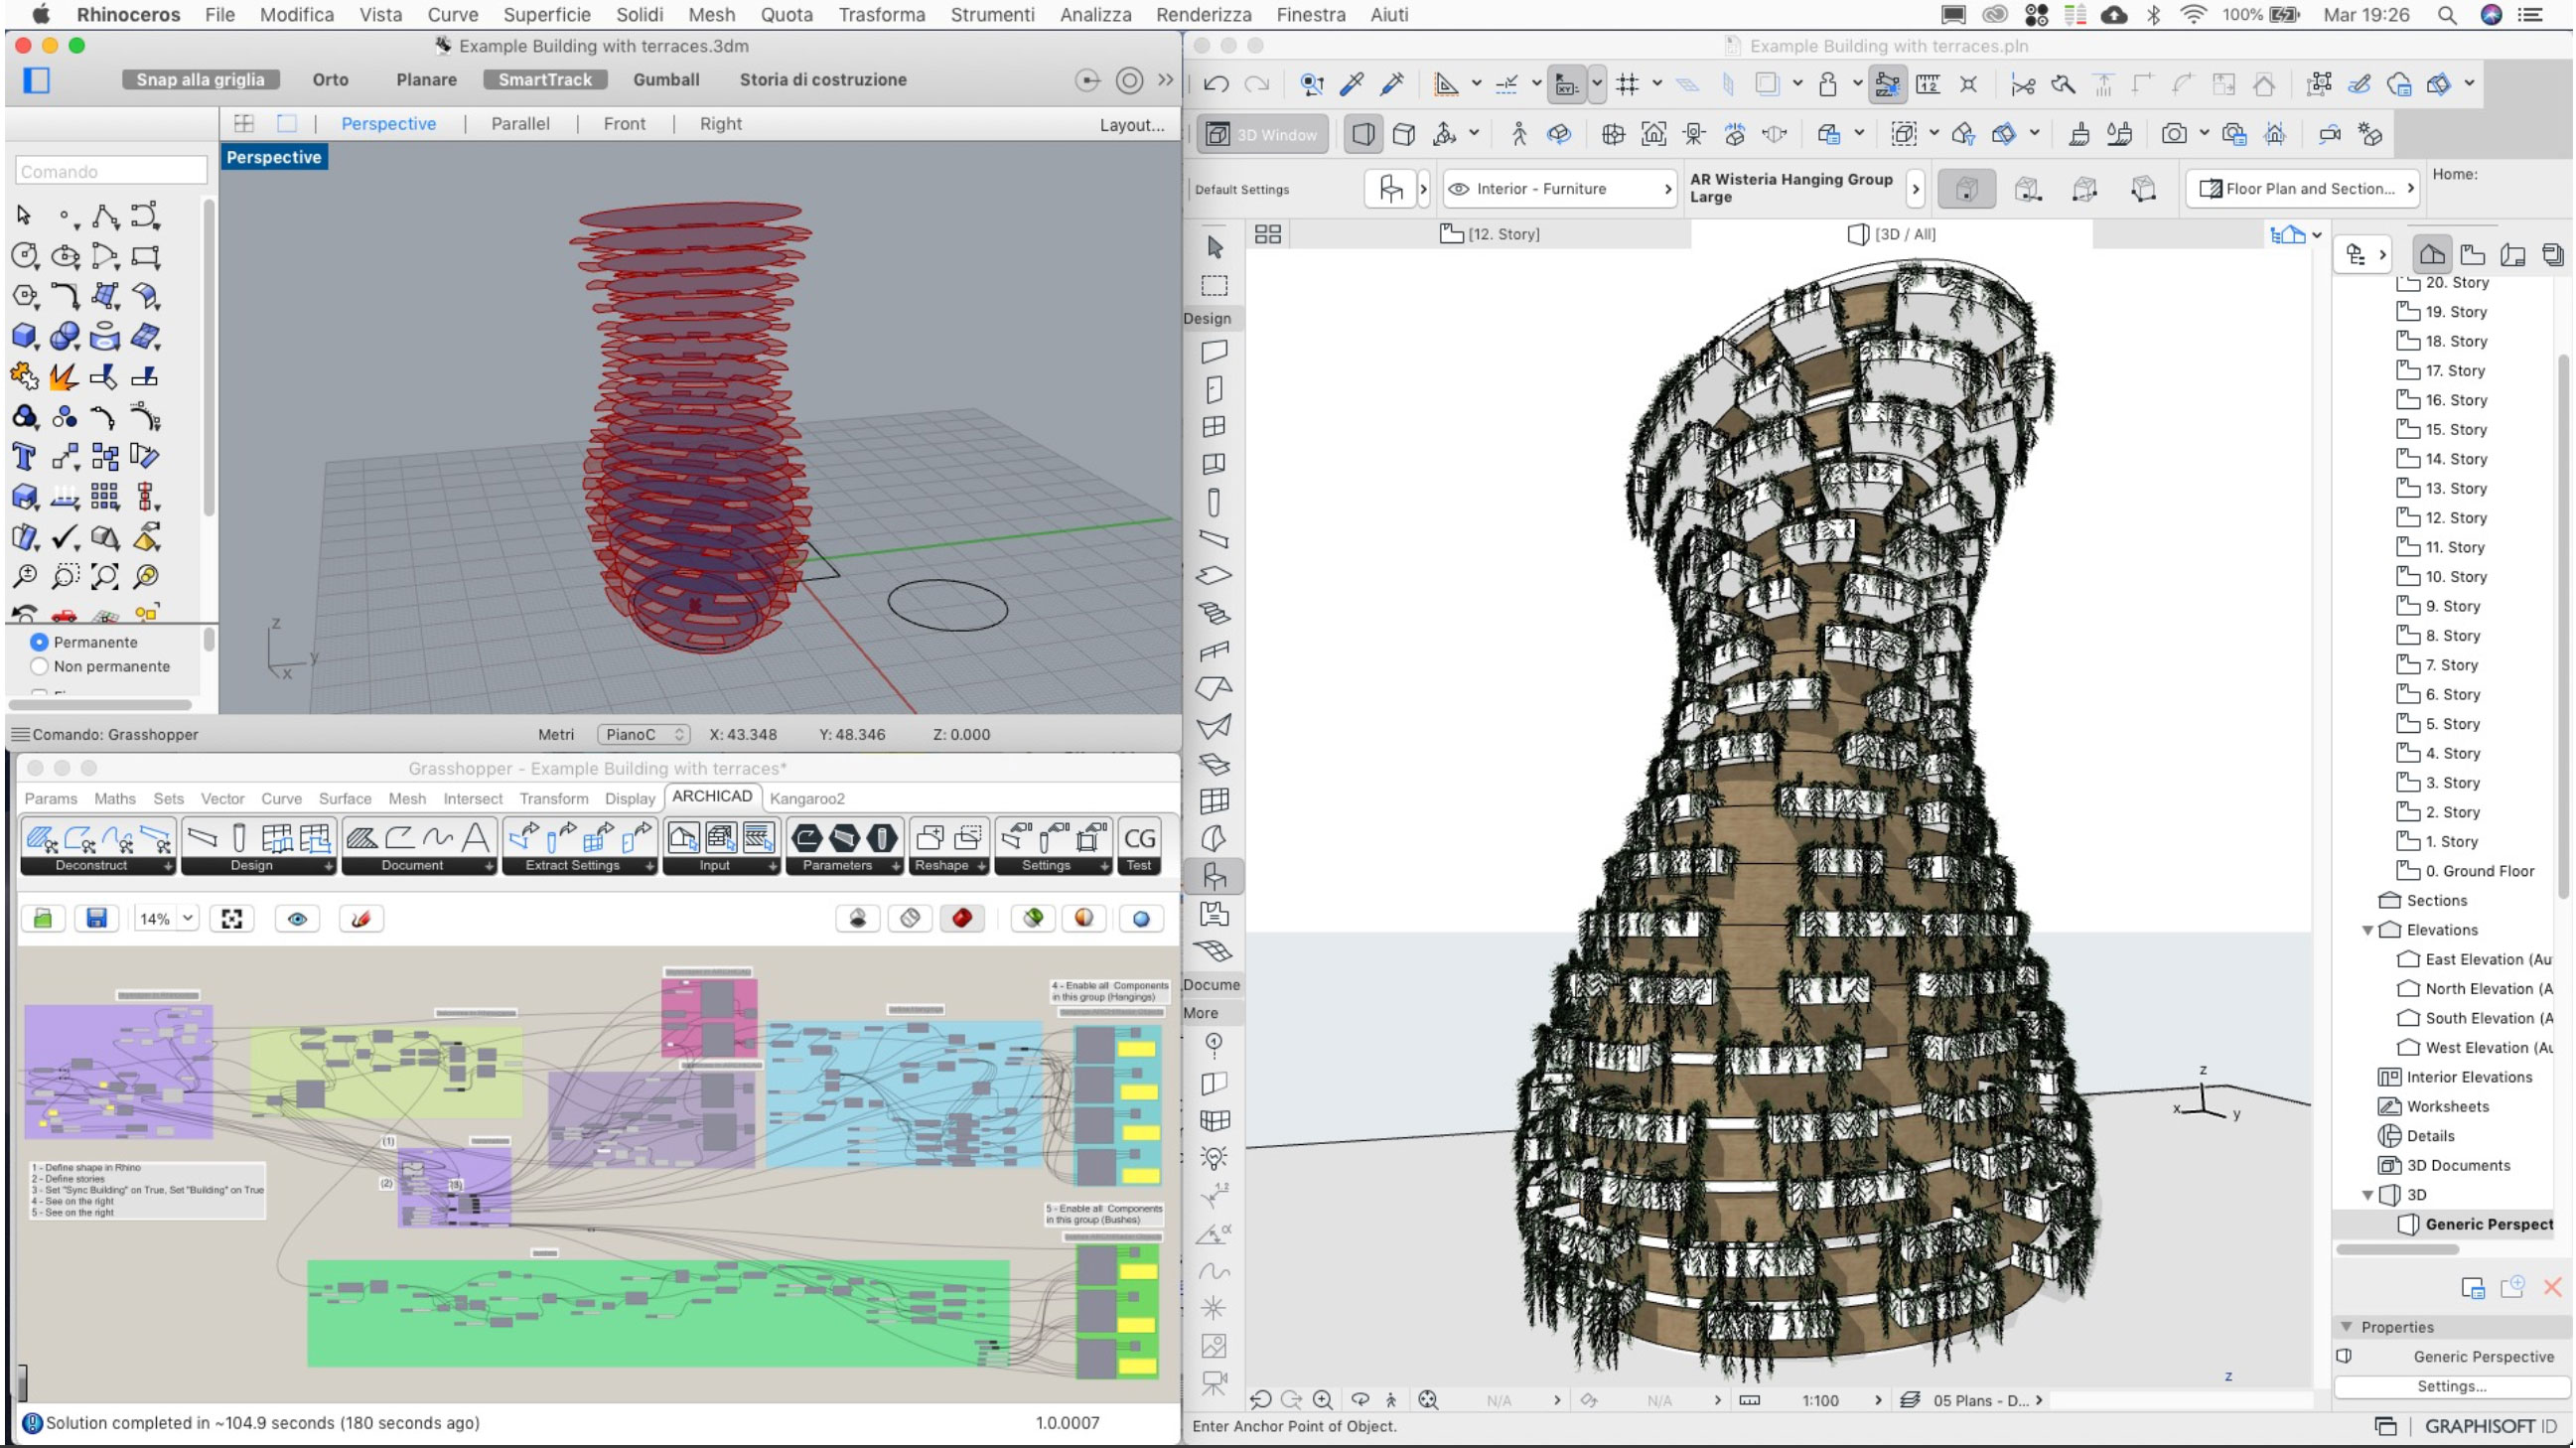
 

11 Foresta verticale archicad grasshopper


12 Foresta verticale archicad grasshopper


• Further use in ARCHICAD
To enable the correct random dimension of the plants in ARCHICAD you need to select all the plant objects, open the setting dialog of the objects, close it; the objects will be updated to the correct dimension. The plants objects have simplified models for elevation you can choose in the setting dialog; you can quickly realize elevation and section with the real plants position; you can also decide to turn off casting and receiving shadows regardless for elevation or 3d to simplify the elaboration.
 

13 Foresta verticale archicad grasshopper


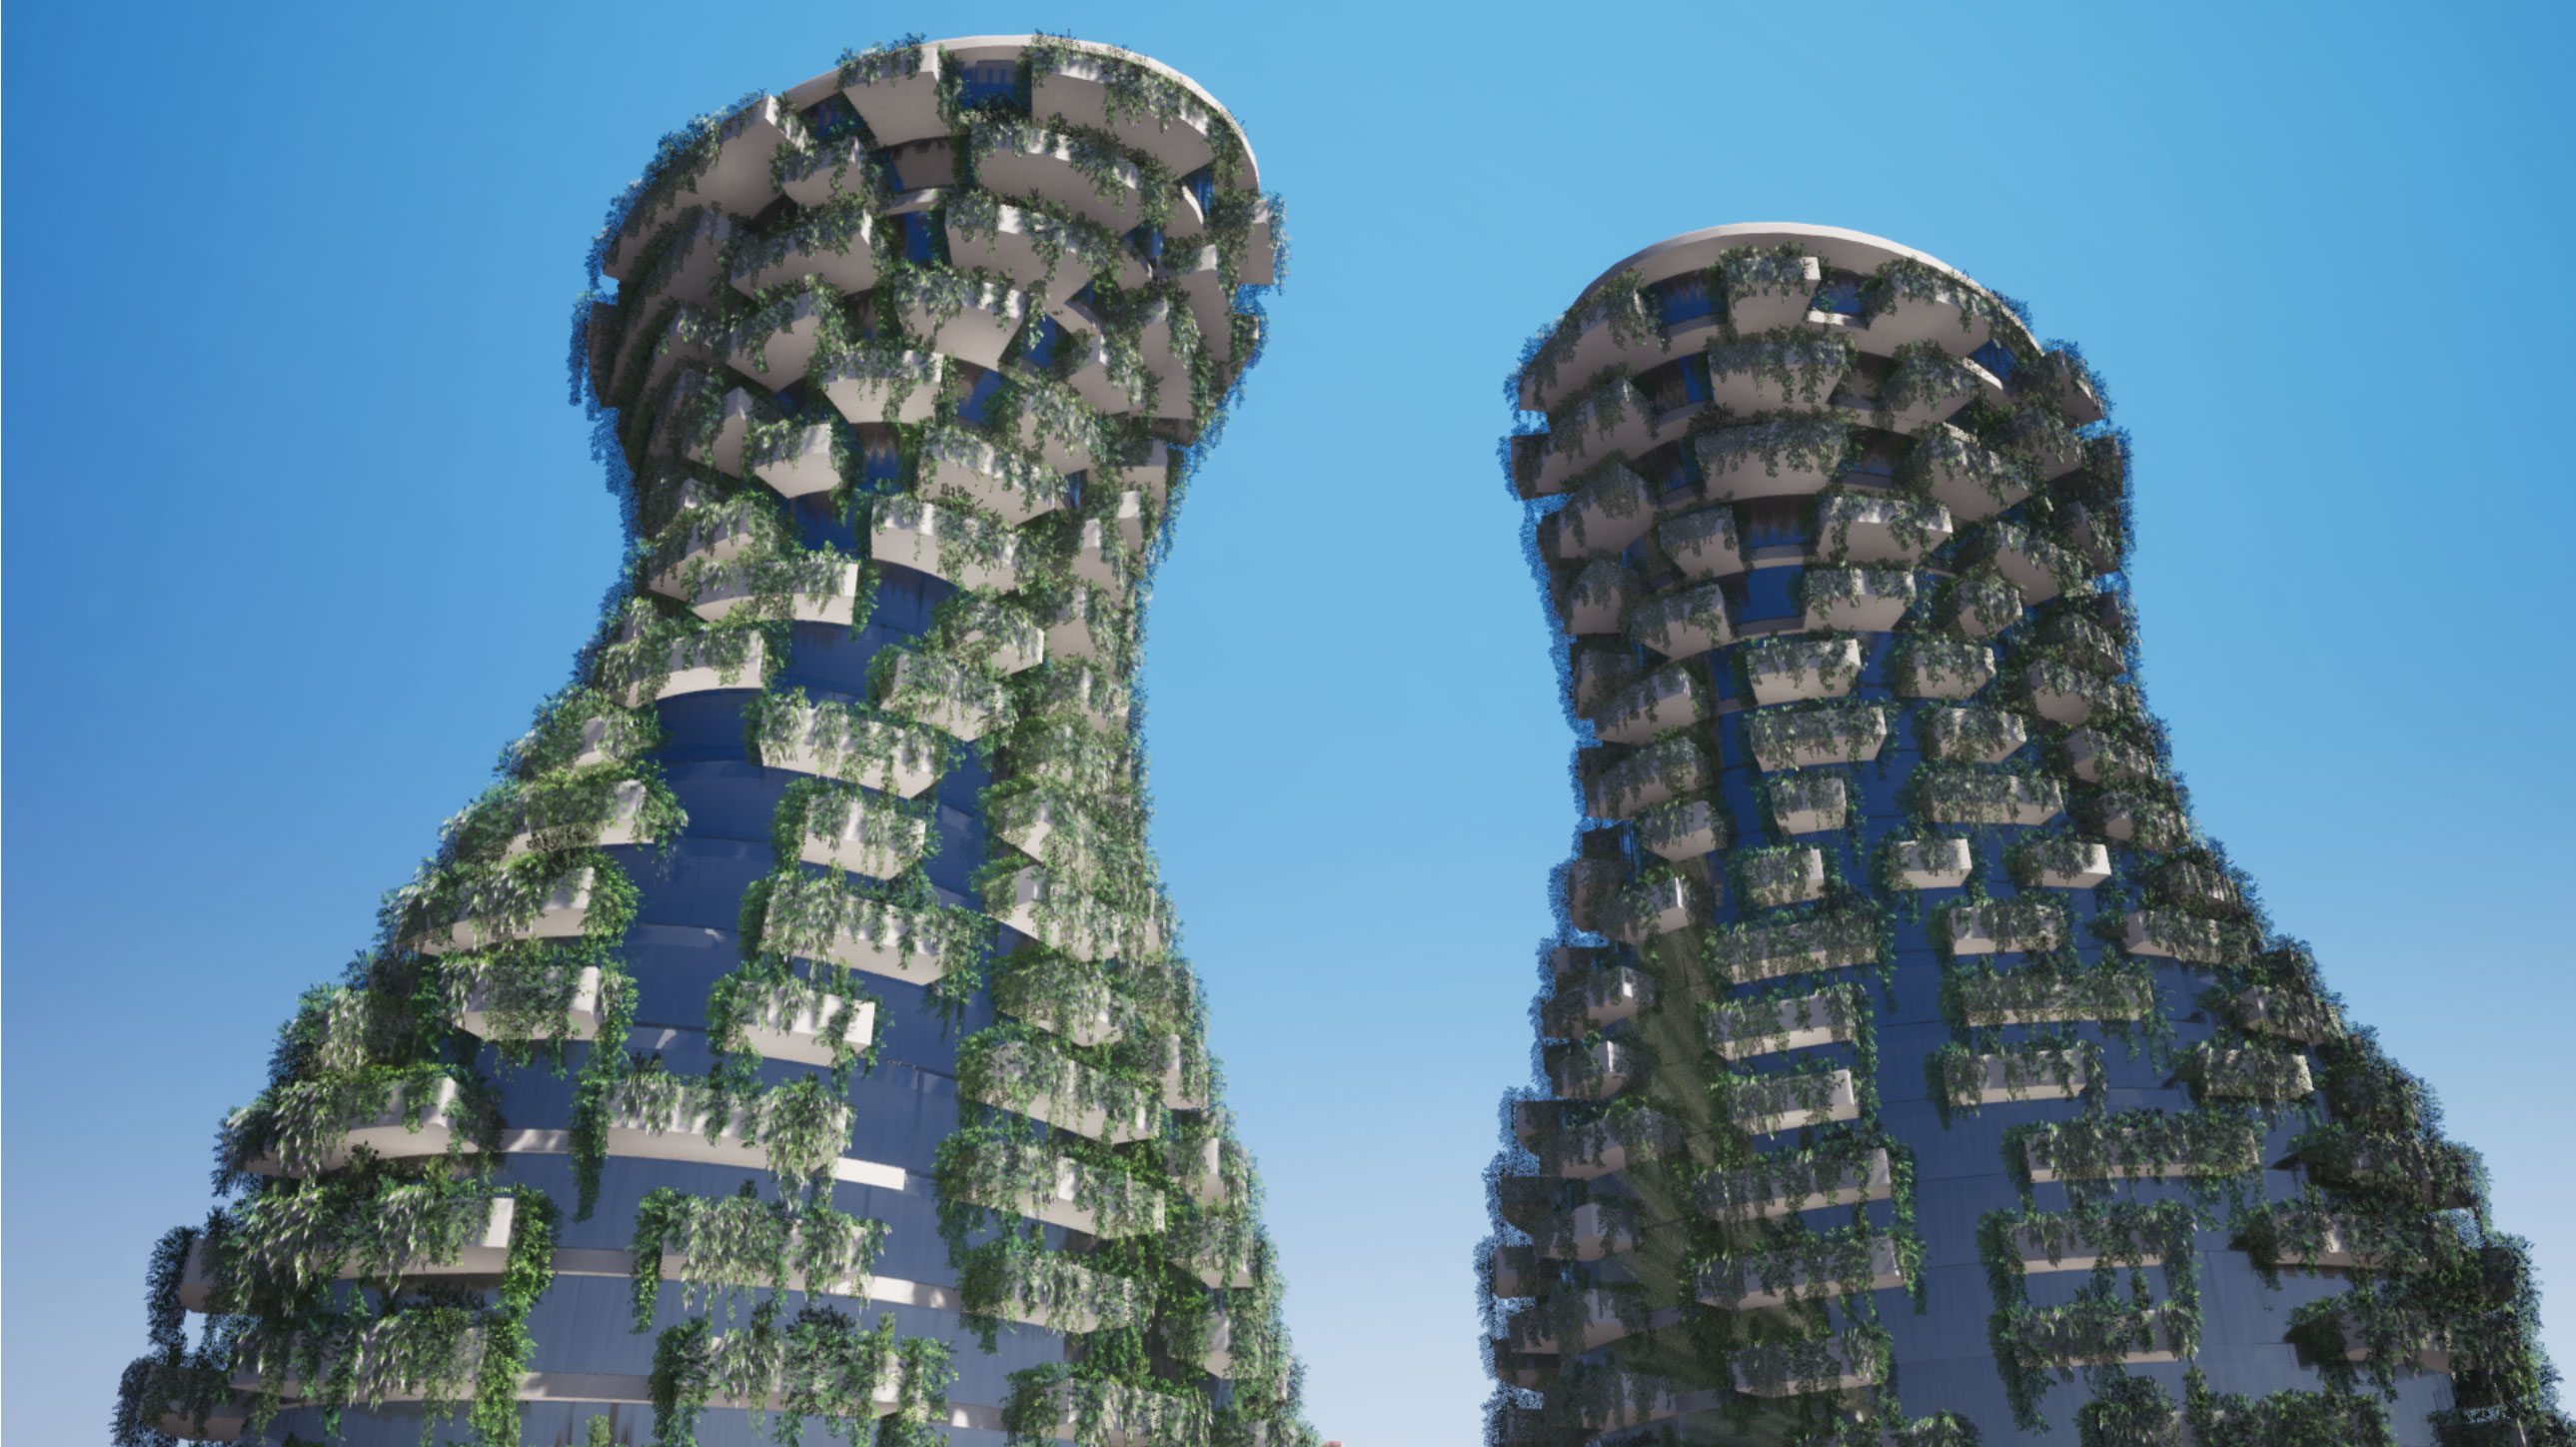
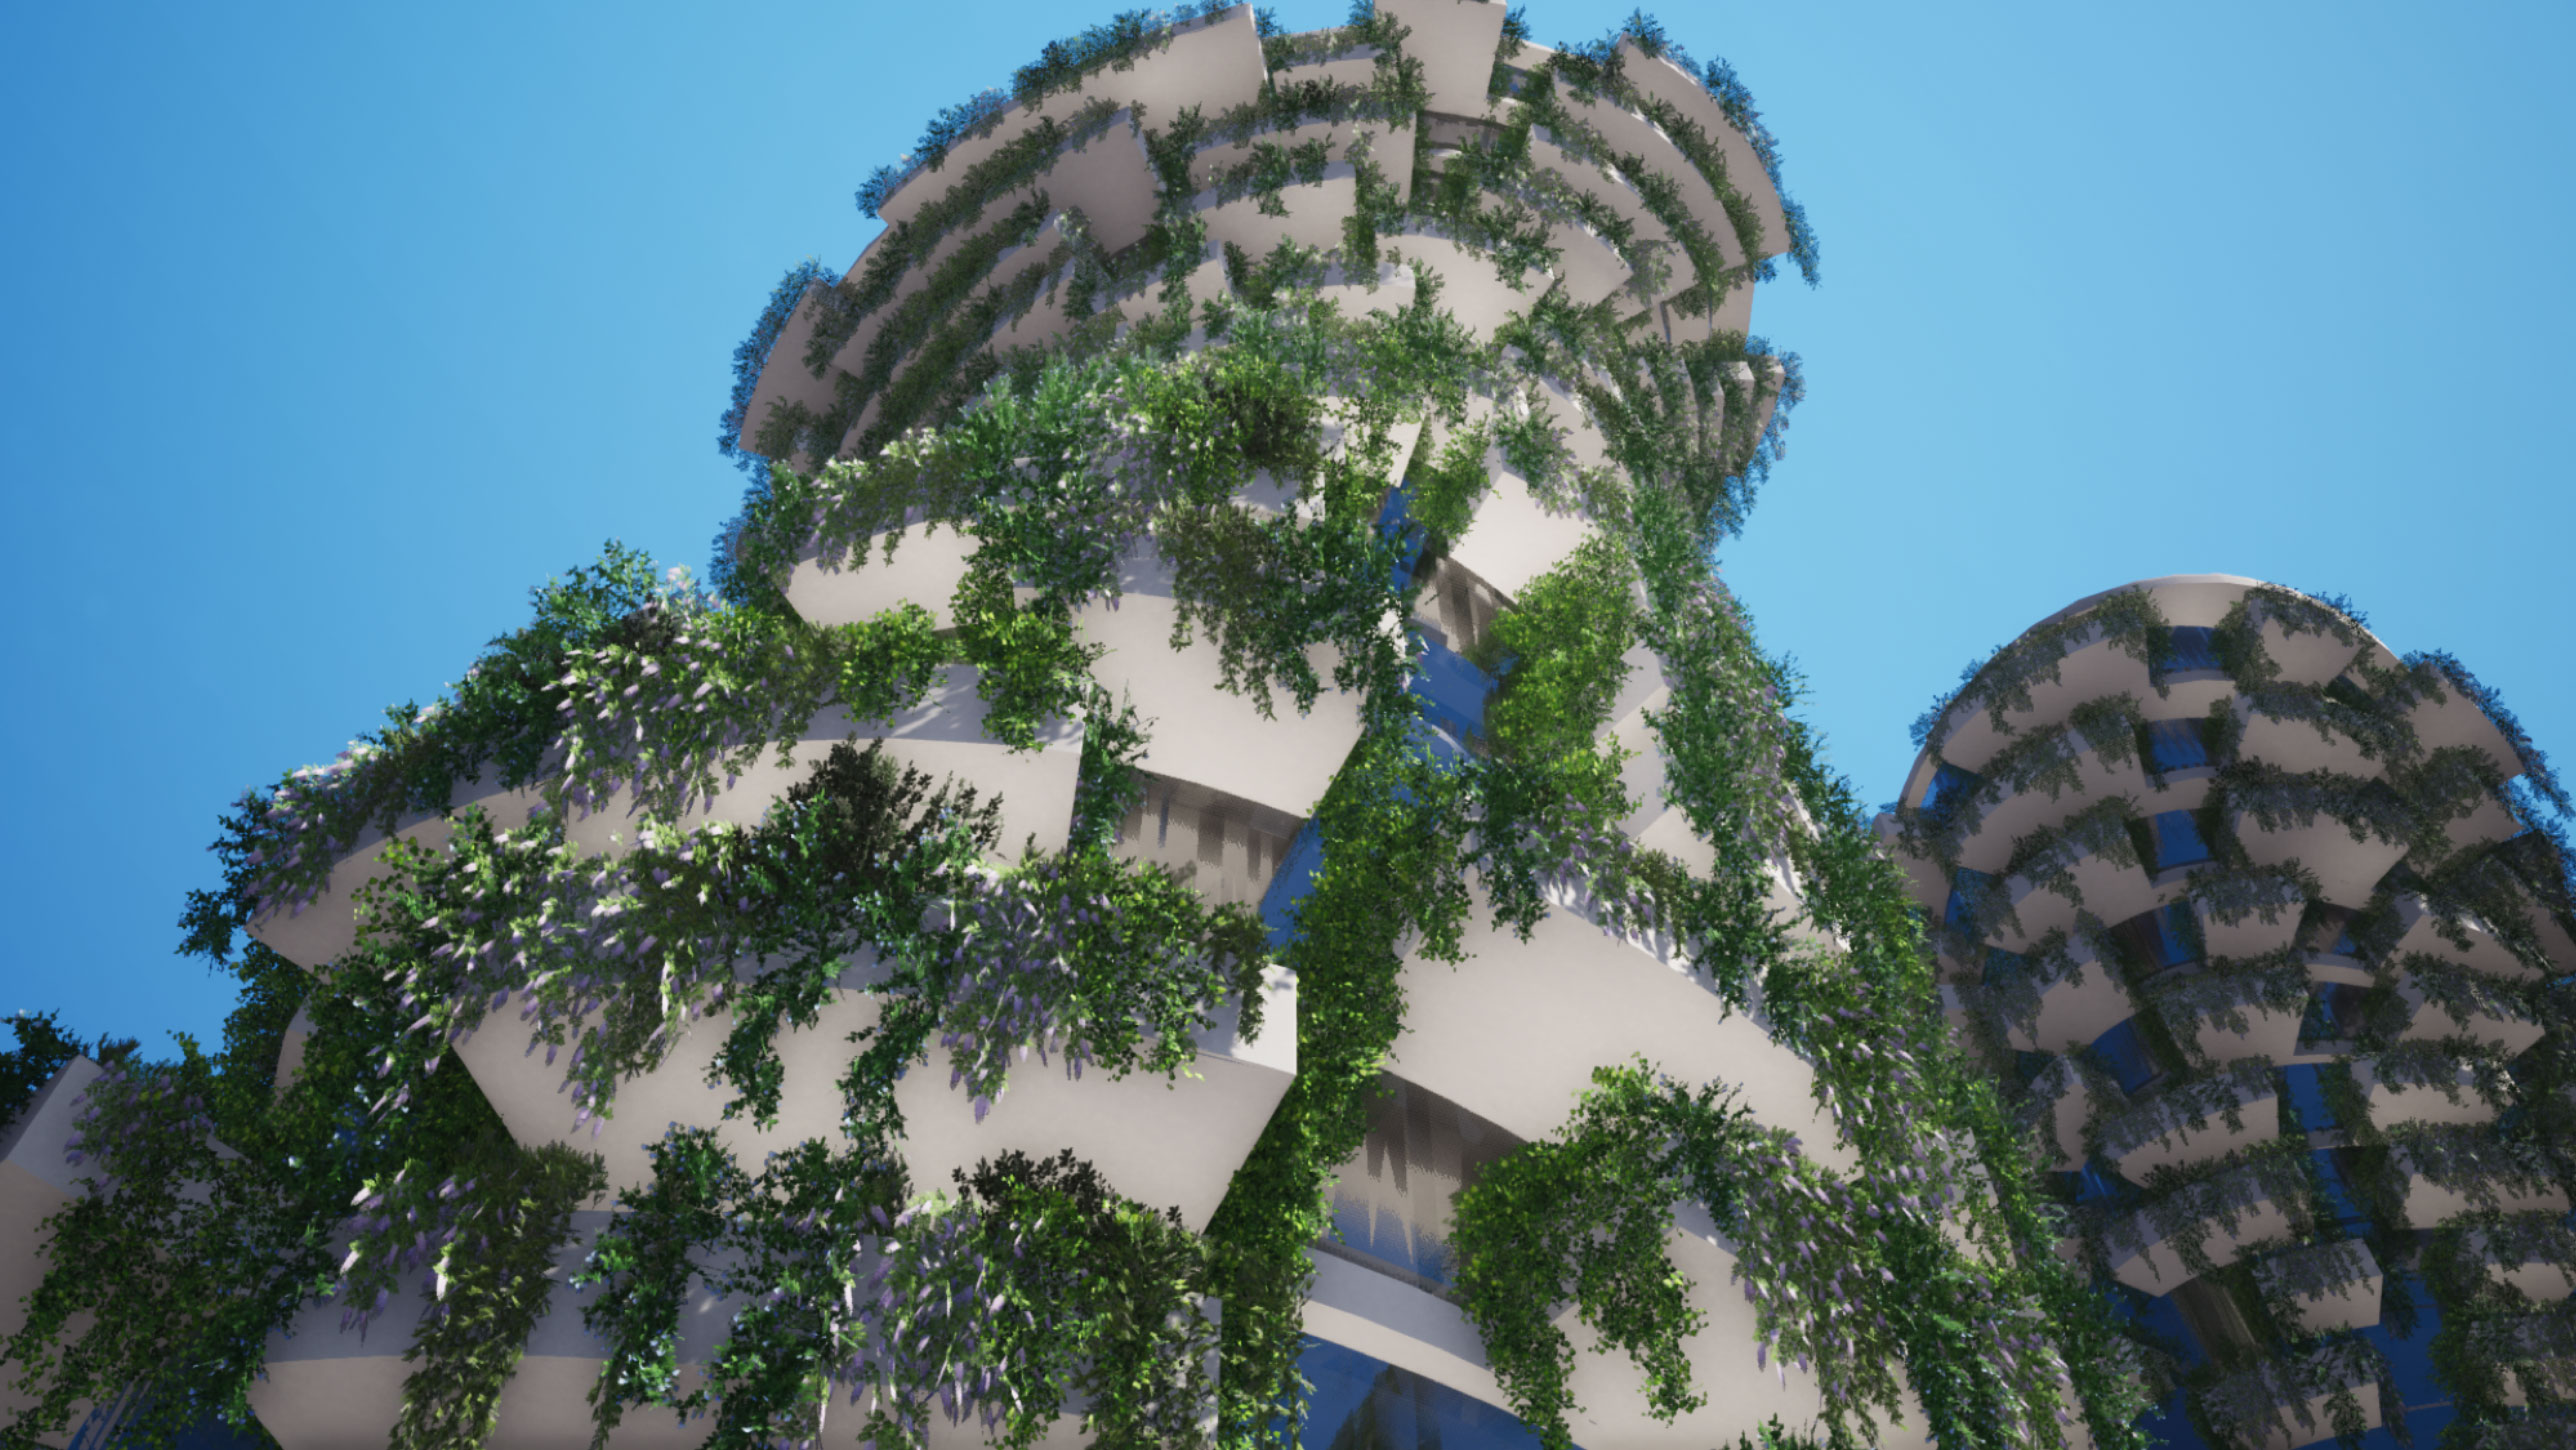
Using the connection with Twinmotion, freely available with ARCHICAD 23 you can quickly realize stunning render views. Remember to set double side surface in the material Twinmotion dialog.
 

14 Foresta verticale archicad grasshopper


15 Foresta verticale archicad grasshopper


• Further shapes
If you decide to have different shape of the skyscraper is better break the Connection in ARCHICAD and Disable all the ARCHICAD Objects Component (4)(5). On complex shape is better delete all the model in ARCHICAD before updating it with a new shape. If the update is slow, you can close and reopen Rhinoceros. All depend on the capability of your computer.


• Notes
The tutorial uses ArchiRADAR libraries: Plants 2D-3D - Volume 02 – Hangings, Plants 2D- 3D - Volume 03 Bushes, available on ArchiRADAR website at these links:
https://www.archiradar.it/it/oggetti/oggetti-in-vendita-archicad-artlantis/product/view/44/878.html
https://www.archiradar.it/it/oggetti/oggetti-in-vendita-archicad-artlantis/product/view/44/879.html

This tutorial is made using a definition made in Grasshopper you can find on the shop of ArchiRADAR:
https://www.archiradar.it/it/oggetti/oggetti-in-vendita-archicad-artlantis/product/view/48/882.html

This tutorial needs knowledge in ARCHICAD, Rhinoceros and Grassshopper. You can find below a link to a specific topic in the ArchiRADAR Forum


• Other link
ArchiRADAR website. https://www.archiradar.it/en

Hangings: https://www.archiradar.it/en/3d-objects/objects-on-sale/product/view/44/878.html

Bushes: https://www.archiradar.it/en/3d-objects/objects-on-sale/product/view/44/879.html

File ARCHICAD, Rhino e Grasshopper of this tutorial:  https://www.archiradar.it/en/3d-objects/objects-on-sale/product/view/48/882.html

Topic on the ArchiRADAR Forum: https://www.archiradar.it/smf/index.php?topic=27066.0

VIDEO:  https://www.youtube.com/watch?v=e5ttvgzLj84&feature=youtu.be


Grasshopper-ArchiCAD Connection

 01 Grasshopper Archicad connection


This model is a test to evaluate the Rhino – Grasshopper – Archicad connection; the model is developed by Michele Calvano expert in Rhino­Grasshopper and Mario Sacco expert in Archicad­GDL.

Our first aim was to generate, not general mesh, but native Archicad building elements from the Rhino model, to manage in a second step all the BIM features.
Rhino is able to design the complex geometry but the only informations that you can share with this shape are geometrical and mathematical informations, good to sketch an architecture, but they are not enough to build it. In Archicad using geometry and other informations migrated from Rhino­GH you can develop further complex parametric geometry; with parametric geometry you can have high detail in a model of few MB, enhancing the Cloud sharing and BIM interoperability.
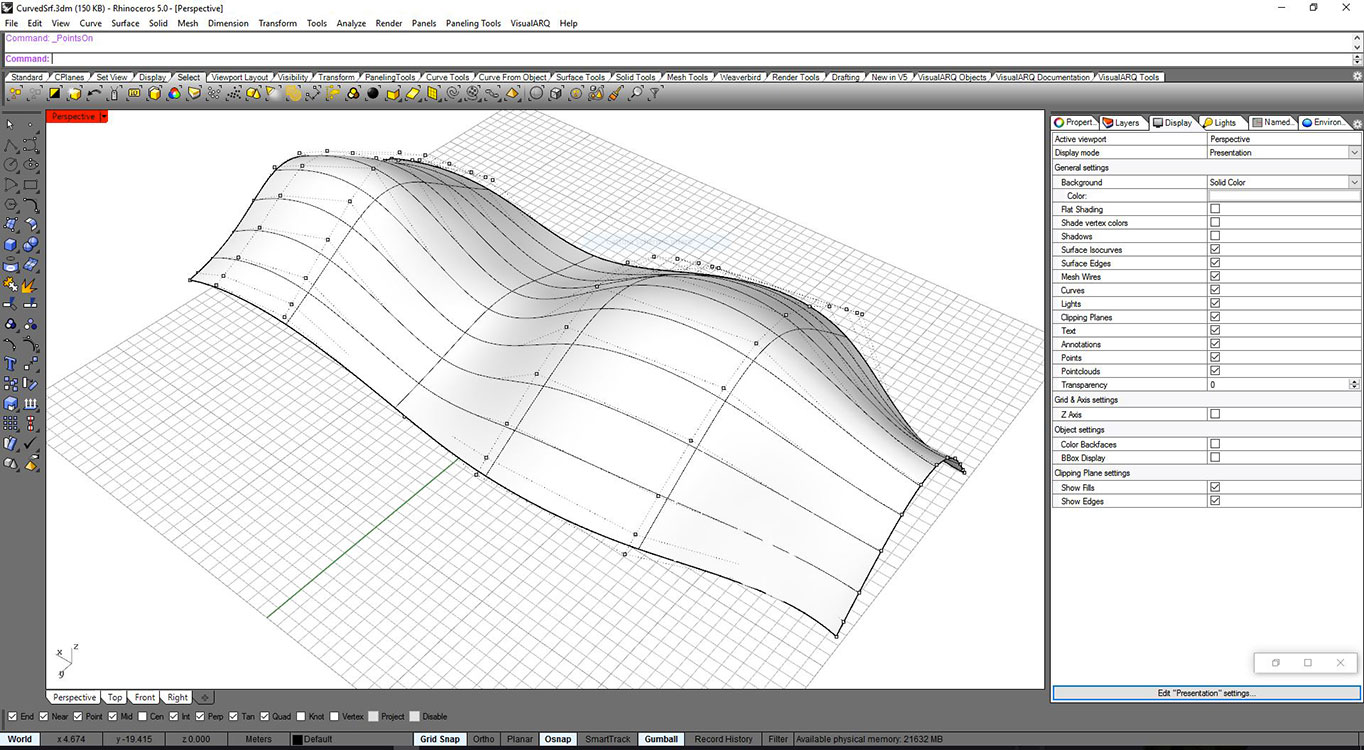
We generated a free form in Rhino that could be a roof. In Rhino a double curved surface is easy to generate by moving the control points; thanks to this simplicity you can create your model.


02 Grasshopper plugin


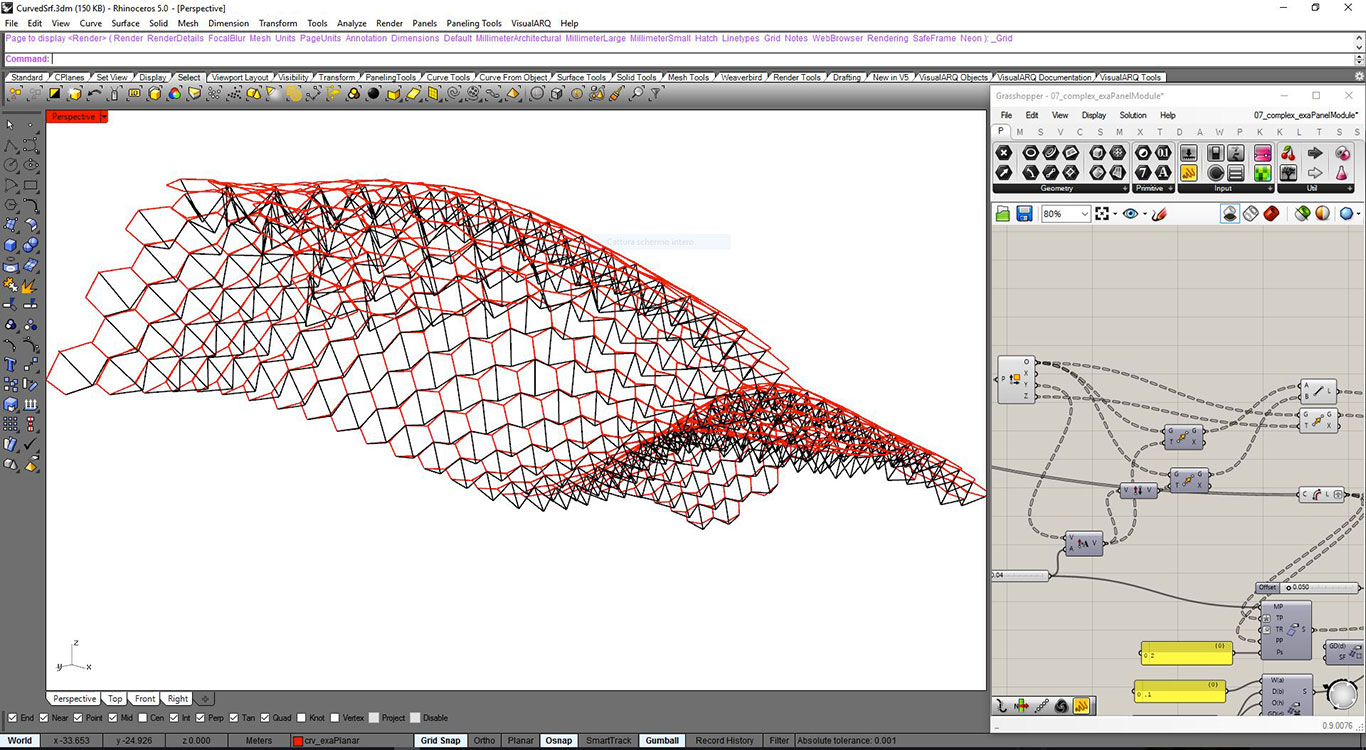
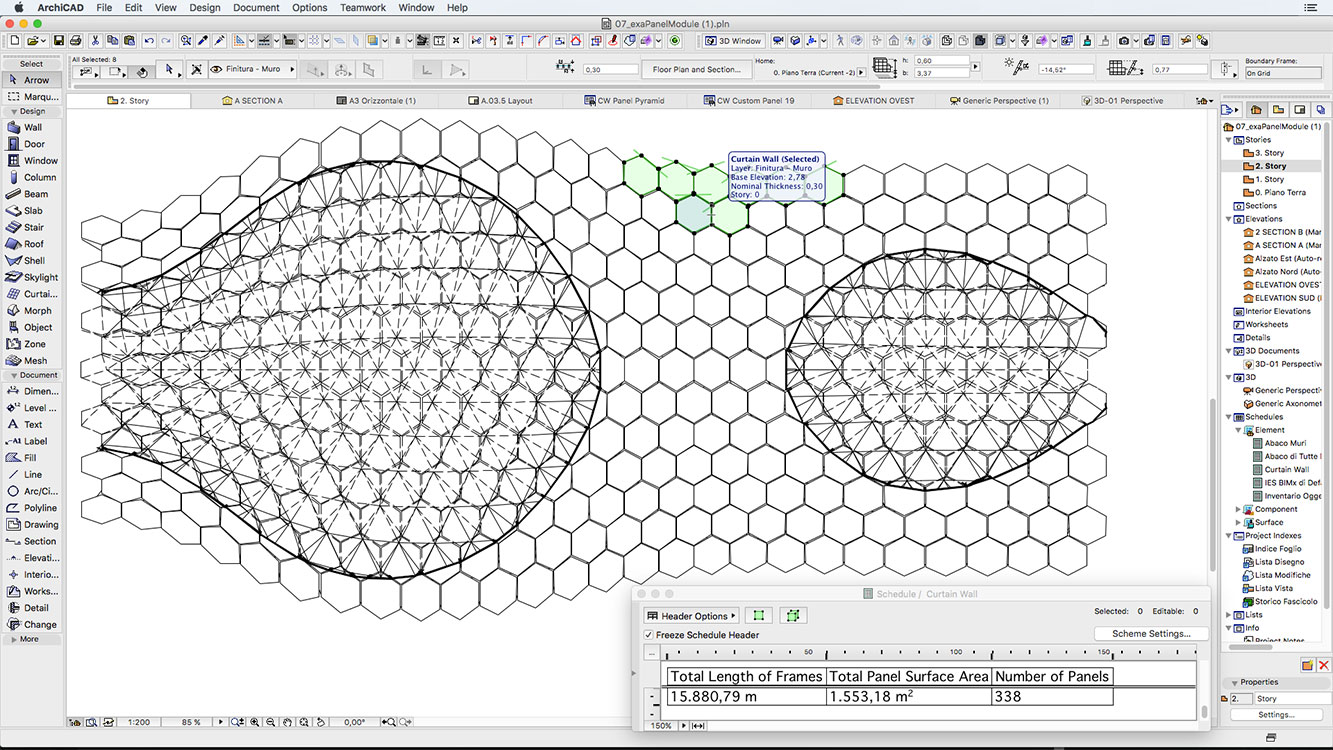
In Grasshopper you can manage a mass of data; using this tool you can solve the problem of tessellation. We reduced the complexity of surface in a series of planar hexagons, thanks
to the explicit history of the created algorithm, we can decide the number and the size of the planar polygons.


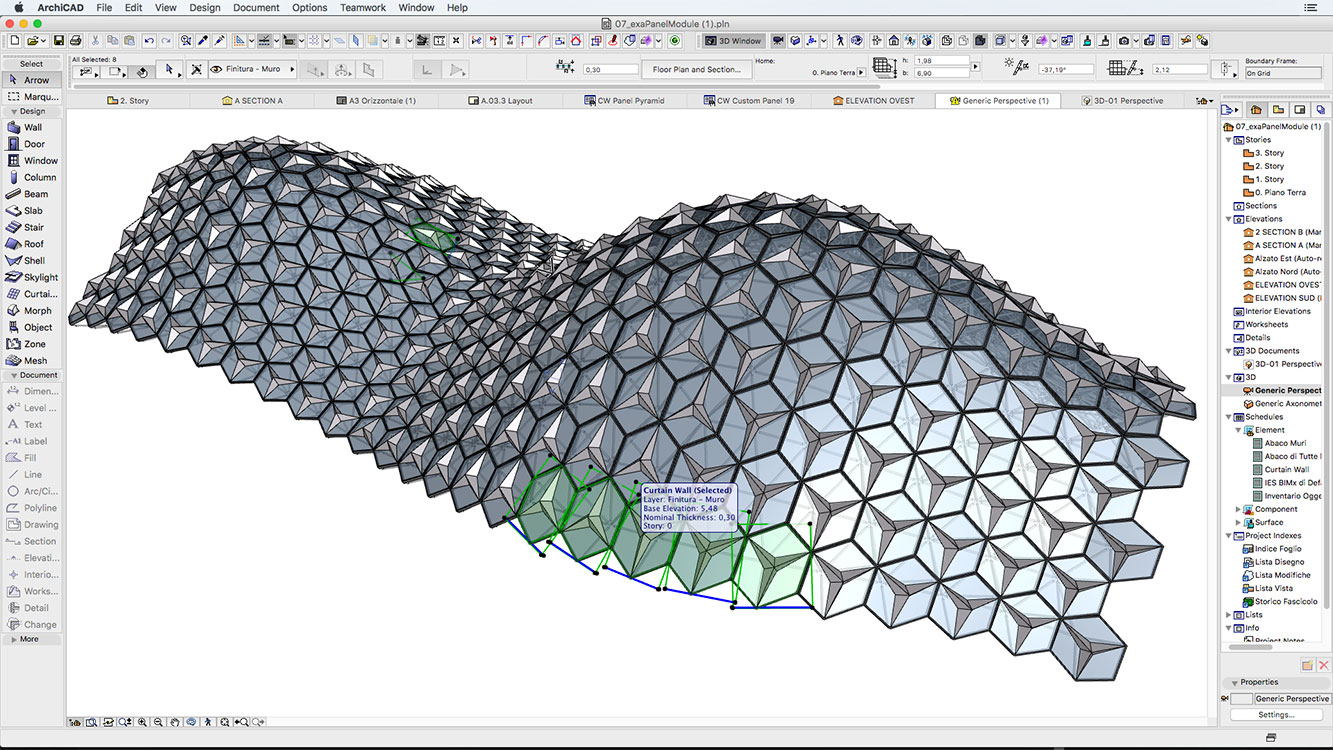
03 Grasshopper Archicad curtainwall


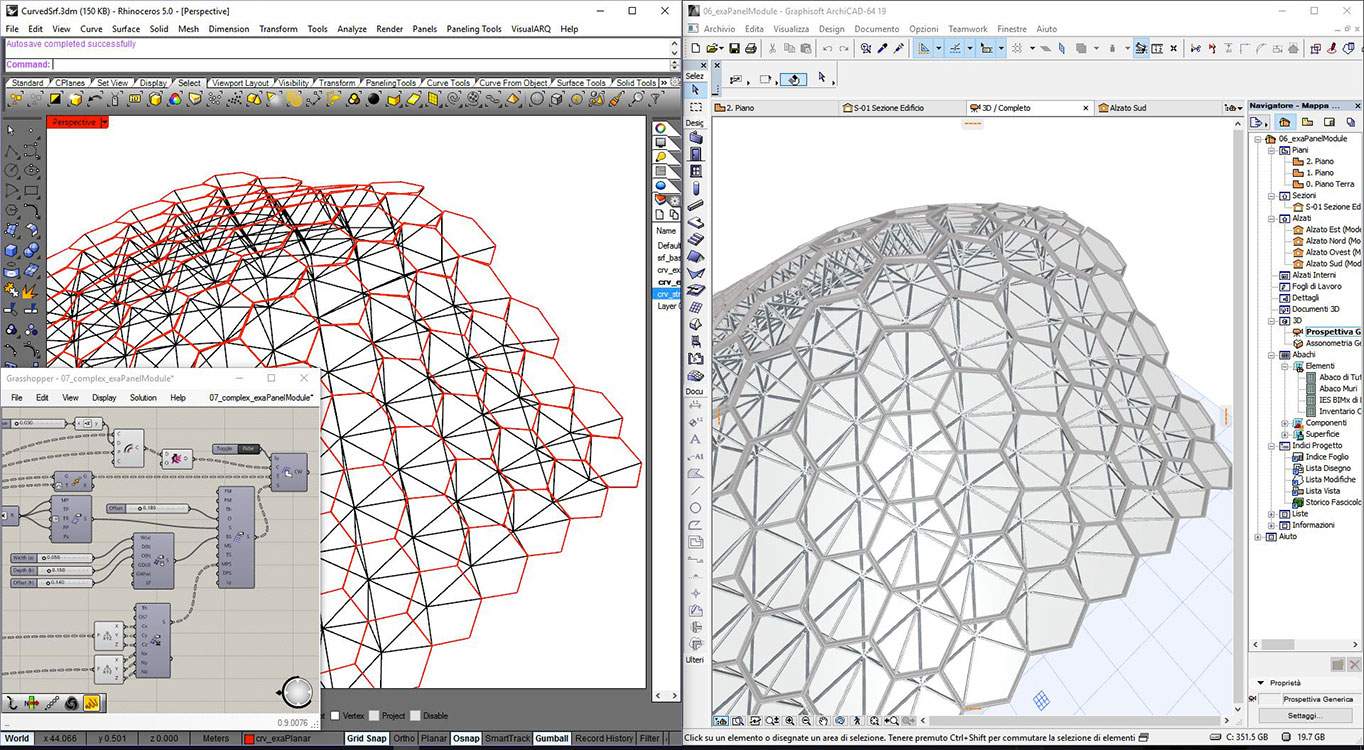
Under the principal surface, we have drawn a reticular structure using lines and no solid shapes to make a light definition and easily changeable. In this case we can share the data via web. The Gh file is 67 kb.


04 Grasshopper Archicad connessione


Lines, polylines and points, thanks to the ACgh_Connection can become Archicad object; In this experience the most used element was the Curtain Wall and special objects created with GDL programming (the origami shades above the hexagonal modules).


05 Grasshopper Archicad reticolare


This connection is always available during your work. Inside Archicad you can control the data of the project (kind and number of beam, windows and its elements, columns) and of course, the costs. Changing the shape in Rhino, or changing the parameters in Grasshopper, in few seconds you obtain the AC model with all the properties updated.
Using Archicad native components you will benefit of all their own components options. For Curtain wall you can develop in GDL custom objects where you can control detail for different scale, manage different 2d­3d representation and add further details without starting again from the complex geometry in Rhino. Curtain Wall elements can benefit of many options in the plan visualization having a simple design without many details. Using native Archicad elements we can also benefit of schedule features to evaluate for example quantities, frame lengths or panel surfaces.


06 Grasshopper Archicad example


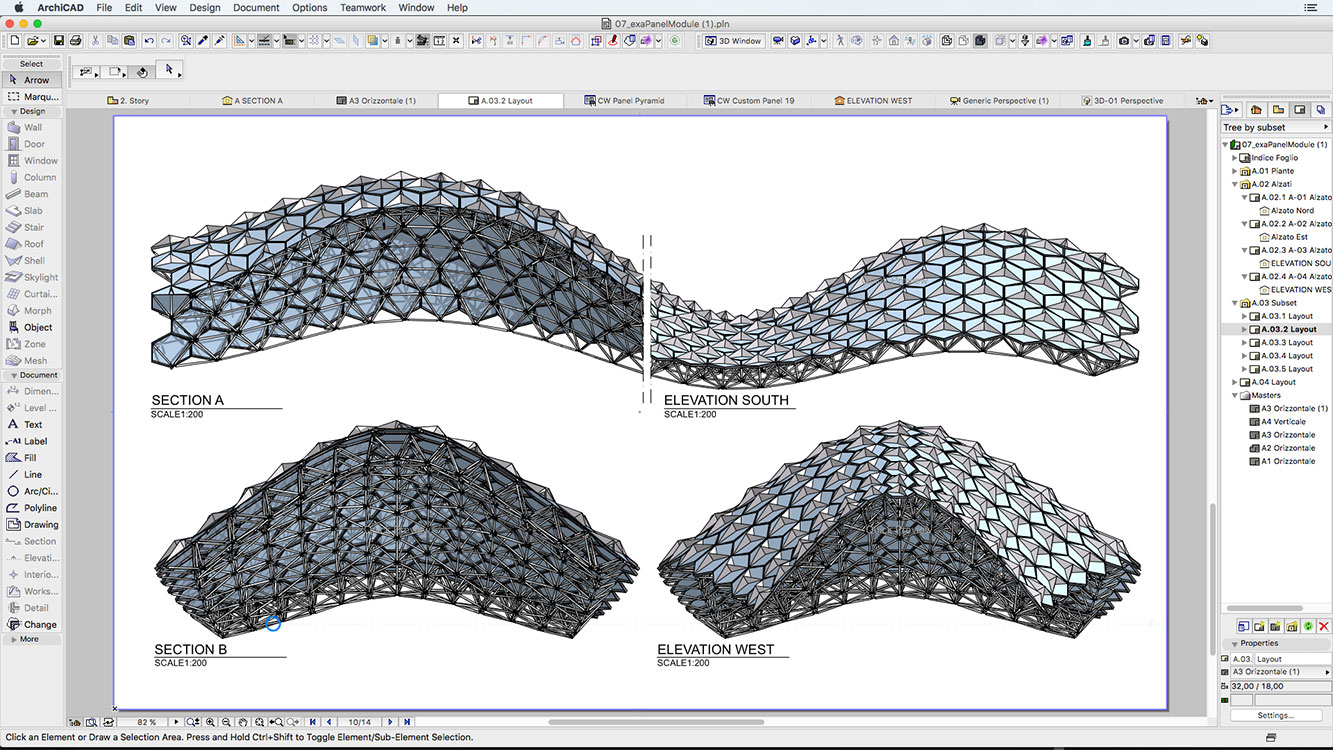
In elevation and section views we can decide to automatic improve detail if necessary. The generation of complex geometry is fast, also adding options of shading surfaces and shadows, thanks to the new Archicad background computation.


07 Grasshopper Archicad shape


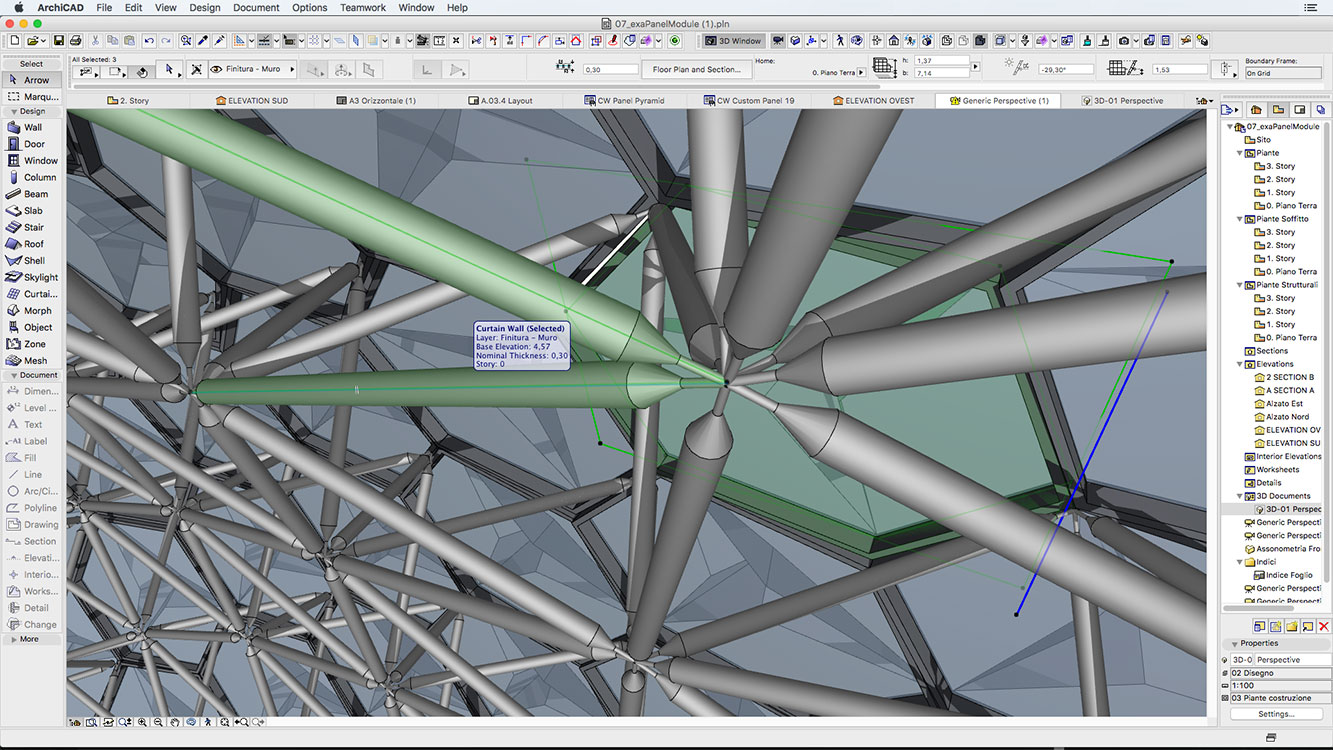
Curtain wall tools uses parametric sub elements, such us Panels and Frames. We can use the model also to generate details. We could add nodes, spiders, special profiles and manage all them in schedules.


08 Grasshopper Archicad structural


Using native Archicad element we can also use a simplified geometry using beam elements compatible with IFC to export the model in structural software.
This method allows the designer to manage complex geometry with many details also in the preliminary phases of the building process having always the benefit of the interoperability with MEP and engineerings.


BIMX MODEL

FROM SHAPE TO BIM BIMX ARCHICAD GRASSHOPPER


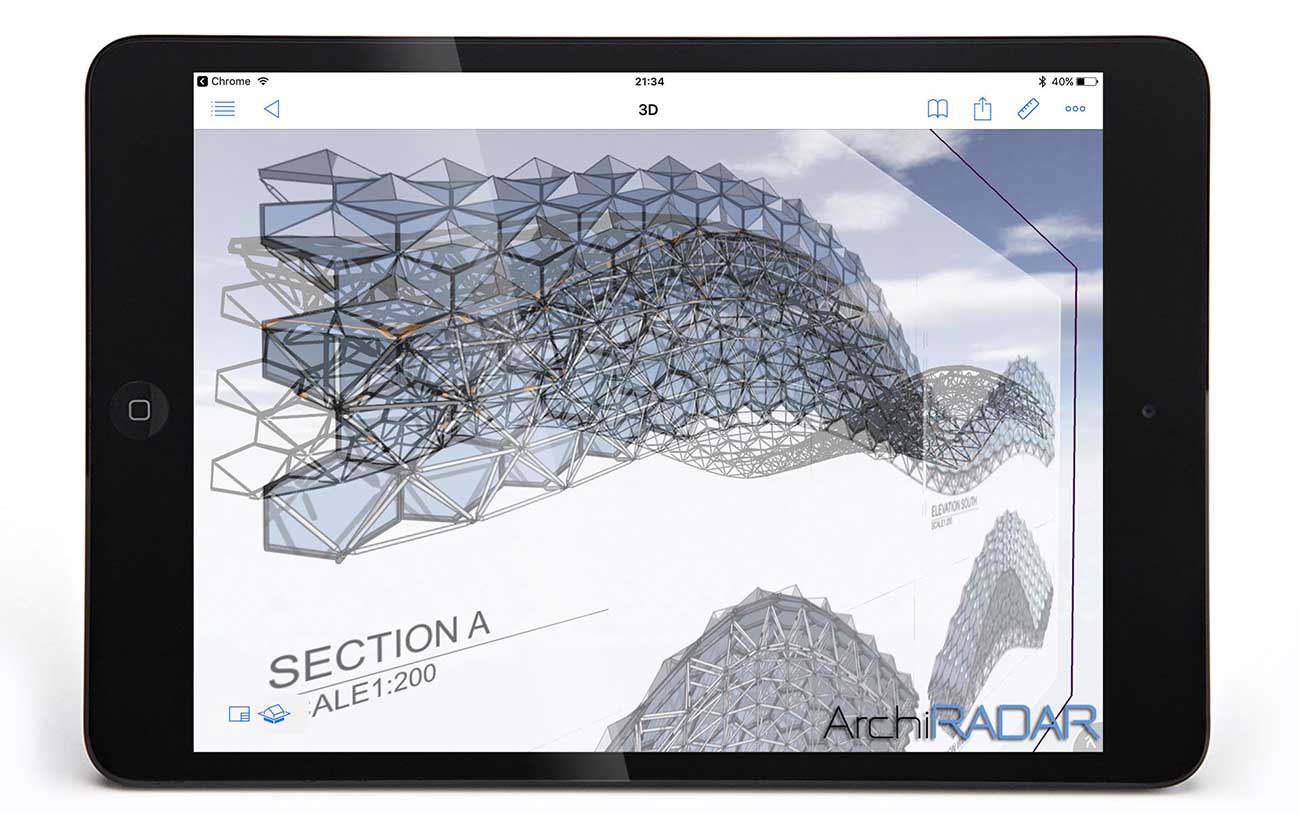
If you want view the BIMX model please insert this link into your BIMX app:

http://www.archiradar.it/images/BIMX/GH-AC-From_The_shape_to_BIM.bimx


From the shape to BIM - Archicad Grasshopper by ArchiRADAR on Sketchfab


Click here, to follow the post in the our forum.